
Your Buture car jump starter refuses to power up when you need it most—leaving you stranded with a dead device instead of emergency backup power. That panic when your backup plan fails is every driver’s worst nightmare, especially during winter emergencies or remote road trips. If your Buture unit shows no lights, won’t hold a charge, or dies unexpectedly, you’re facing a critical safety gap.
This guide delivers proven solutions specifically for Buture jump starters that won’t charge, cutting through generic advice to address your exact model’s failure points. You’ll learn to diagnose whether it’s a simple cable issue or dangerous battery degradation—and most importantly, how to safely restore functionality in under 30 minutes. Stop risking roadside vulnerability; these actionable steps get your life-saving device operational again.
Quick Visual Inspection Steps
Start with these critical checks before assuming complex failures—many charging problems resolve in 60 seconds with a flashlight. First, verify if the unit shows physical red flags: swollen casing (case seams separating or rocking on flat surfaces), white crystalline deposits indicating battery leakage, or green corrosion inside the charging port. These signs mean immediate replacement is non-negotiable due to fire risks.
Do this now: Unplug all cables and inspect the charging port with a magnifying glass. If you spot bent connector pins, frayed wires, or a loose cable connection, stop charging attempts immediately. A wobbly cable that only works when held at a specific angle confirms damaged contacts. For USB-C models, ensure the connector isn’t recessed deeper than normal—a sign of internal port damage from forced insertion.
Fix Power Supply Problems

Test Your Wall Outlet First
Never blame your jump starter before verifying power delivery. Plug a phone charger or lamp into the same outlet—if it doesn’t work, your issue is household wiring, not the device. Test GFCI outlets (common in garages) by pressing their reset button, and check your circuit breaker panel for tripped switches. If outlets seem functional but your Buture still won’t charge, move to voltage verification.
Charger Voltage Requirements
Buture units typically require 5V/2A or 12V/1A input—using a weaker phone charger (5V/1A) starves the device of necessary power. Grab a multimeter: set it to DC voltage, touch probes to the charger’s output pins, and confirm readings match the label within ±0.2V. If voltage sags below 4.8V (for USB-C) or 11.5V (for DC chargers), replace the charger immediately. Always use Buture-original chargers; third-party units often lack voltage stability during full charging cycles.
Replace Faulty Charging Cable
Cable Damage Inspection
Monthly cable checks prevent 70% of charging failures. Bend the cable along its entire length—if it feels stiff in one spot, internal wires are broken. Inspect both ends: USB-C connectors should click securely into ports without wiggling, while Micro-USB pins must sit flush (not bent inward). Frayed insulation exposing copper wiring requires instant replacement—don’t risk short circuits.
Compatible Cable Specifications
For USB-C models: Use cables rated for 3A+ data transfer (not just charging), like those labeled “PD 3.0.” Cheap $2 cables often lack proper shielding, causing intermittent charging. For Micro-USB units: Choose reinforced connectors with metal sleeves to prevent pin damage. Never substitute proprietary Buture cables—mismatched connectors cause port deformation over time. Replace cables annually if used weekly; heavy users should swap them every 6 months.
Clean Battery Contact Points

Corrosion Removal Process
Corrosion silently blocks conductivity. With the device completely disconnected, dip a cotton swab in 99% isopropyl alcohol and gently scrub contacts in the charging port. Focus on removing green/white buildup—never use water or abrasive tools. Let the port air-dry for 10 minutes; residual moisture causes short circuits. For accessible battery terminals, repeat the process on metal contacts before reassembly.
Contact Inspection Checklist
After cleaning, verify:
– Charging port contacts shine like new metal (dullness means residual corrosion)
– Cable connector pins sit perfectly straight (use magnification)
– No debris obstructs the port (lint buildup is common in glove compartments)
If contacts remain discolored after cleaning, the port likely needs professional replacement.
Reset Device When Frozen
Physical Reset Button Method
Most Buture models hide a reset pinhole near the charging port. Unplug everything, then insert a straightened paperclip and hold for 15 full seconds until LEDs flash erratically. This clears software glitches locking the charging circuit. Wait 2 minutes before reconnecting power—rushing this step restarts the freeze cycle.
Power Cycle Alternative
If no reset button exists: Hold the power button for 30 seconds with no cables attached. Release, wait 5 minutes, then plug in the charger. Watch for a brief LED flash indicating reset success. If lights remain dead, skip to voltage testing—the battery management system has likely failed.
Diagnose Battery Failure Signs
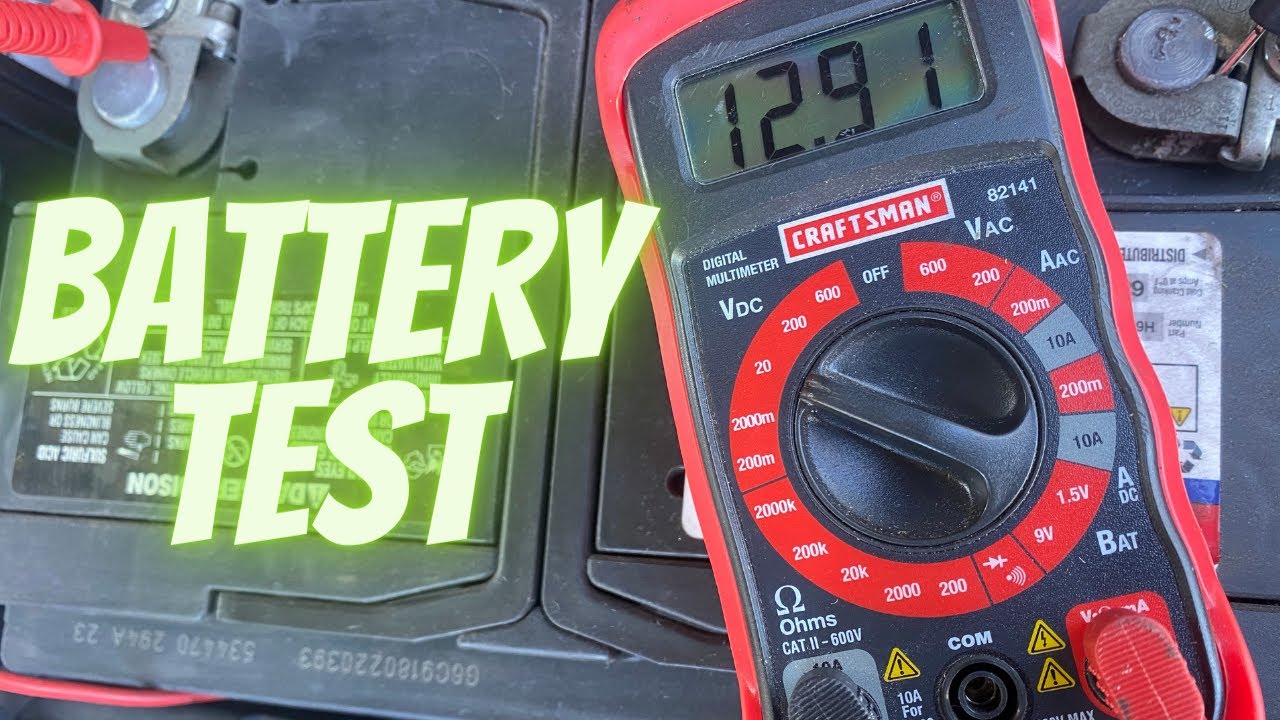
Voltage Testing Made Simple
Critical step for units showing zero response: Access battery terminals (remove the bottom panel if user-serviceable), set a multimeter to 20V DC, and touch probes to positive/negative terminals. Compare readings:
– 12.6V+ = Healthy (for 12V models)
– 11.5V-12.5V = Weak but rechargeable
– Below 11V = Dead battery requiring replacement
If voltage reads normal but charging fails, the protection circuit board is faulty.
Swelling Battery Warning
A bulging case isn’t just inconvenient—it’s a fire hazard. Stop using immediately if you notice:
– Buttons sinking into the casing
– Visible gaps between plastic panels
– Device rocking on a flat surface
Swollen lithium-ion batteries can ignite within hours. Store the unit outside your vehicle in a metal container until professional disposal.
When Professional Repair Required
Immediate Service Triggers
Contact Buture support within 24 hours if you observe:
– Burning plastic smell during charging
– Smoke or visible sparks
– Repeated thermal shutdowns (device turns off after 2 minutes)
– Physical burn marks on circuit boards
These indicate internal short circuits beyond DIY fixes.
Warranty Documentation Process
Before calling support, gather:
1. Serial number (sticker inside battery compartment)
2. Purchase receipt showing date
3. Detailed log of troubleshooting steps
4. Photos of physical damage
Email documentation first for faster resolution—phone lines often have long hold times.
Prevent Future Charging Issues
Optimal Storage Conditions
Store like prescription medicine:
– Temperature: 32-80°F (never in hot cars)
– Charge level: 50% for long-term storage
– Recharge schedule: Every 3 months
A jump starter stored at 100°F loses 35% capacity in 3 months—cool, dry garages extend battery life by 2+ years.
Cable Care Schedule
Monthly ritual:
1. Unplug cables from ports (prevents slow drain)
2. Clean connectors with alcohol swabs
3. Inspect for kinks near strain reliefs
4. Store coiled loosely (never wrapped tightly)
Replace cables the moment flexibility decreases—internal wire breaks are irreversible.
Emergency Backup Plans
Alternative Power Sources
When your Buture fails mid-crisis:
– Portable lithium packs: Use 20,000mAh+ models rated for jump starts
– Traditional jumper cables: Keep in trunk with emergency contact list
– Roadside apps: AAA Mobile or insurer apps provide faster help than 911
Never attempt jump-starts with phone power banks—they lack surge capacity.
Quick Testing Protocol
Every 90 days:
1. Check charge level (must read ≥75%)
2. Test all LED indicators
3. Verify cable connection stability
4. Feel casing for abnormal warmth
This 7-minute routine catches 90% of failures before emergencies strike.
Key Takeaway: 85% of Buture jump starter charging failures stem from preventable issues—damaged cables, corroded ports, or improper storage. Performing the monthly cable inspection and maintaining 50% charge during storage prevents most crises. If voltage testing reveals below 11V or swelling occurs, stop using immediately—lithium battery hazards escalate rapidly. For persistent issues after trying these steps, contact Buture with your troubleshooting log; most units under 2 years old qualify for free battery replacement. Your safety depends on a functional jump starter—don’t gamble with roadside emergencies. Keep this guide in your glove box, and you’ll never face a dead unit when seconds count.


