
That dead battery moment hits when you’re already late—keys in hand, engine silent, and rain threatening to ruin your day. The NOCO Boost GB40 Plus transforms this panic into a 30-second fix, delivering 1000 cranking amps from a device that fits in your glove compartment. This compact powerhouse revives 6L gas and 3L diesel engines, making it essential for commuters, parents, and adventure seekers. But improper use risks damaging your vehicle or the unit itself. Master how to use NOCO Boost Plus battery charger correctly with this step-by-step guide, and turn roadside emergencies into minor inconveniences.
Unlike traditional jump starters, the GB40 Plus handles batteries as low as 2 volts and features smart safety systems that prevent dangerous sparks. However, skipping critical steps like polarity checks or duty cycle limits can lead to costly mistakes. In this guide, you’ll learn precise connection sequences, manual override techniques for ultra-dead batteries, and maintenance habits that extend your device’s lifespan. Keep your GB40 Plus ready for action with these field-tested procedures.
First-Time Charging and Compatibility Checks
Initial Charge Protocol for Optimal Performance
Your NOCO Boost Plus arrives partially charged but requires a full charge before first use. Plug the included USB cable into the GB40’s USB IN port (2.1-amp input) and connect to any standard power source—car USB ports, wall adapters, or laptops work equally well. Charging time varies significantly: A depleted unit takes 3-5 hours from a standard 5W car port but only 1.5-2 hours with a 10W wall adapter. Never attempt jump-starting while charging—FCC regulations prohibit this, and simultaneous use can permanently damage the internal lithium battery.
Pro Tip: Store your GB40 Plus with a 50-80% charge level. Lithium batteries degrade fastest at 0% or 100% capacity. Check the LED indicator monthly: Two solid blue bars indicate ideal storage charge.
Verifying Your Vehicle Battery Compatibility
Critical step: Confirm your vehicle uses a 12-volt lead-acid battery before connecting. The GB40 Plus cannot charge lithium, AGM, gel-cell, or 6-volt systems—using it on incompatible batteries risks explosion. Most cars, trucks, and motorcycles built after 1970 use compatible batteries, but verify by:
– Checking your owner’s manual under “battery specifications”
– Inspecting the battery case for labels like “12V,” “Flooded,” or “Wet Cell”
– Measuring voltage with a multimeter (12.6V = fully charged)
If your battery reads below 2 volts, standard jump-starting fails—but the GB40’s manual override mode (covered later) can still rescue you.
Pre-Jump Safety Protocols You Must Follow
Essential Pre-Connection Vehicle Checks
Skipping these risks electrical fires or fried electronics:
– Power down all accessories: Turn off headlights, radio, climate control, and phone chargers
– Inspect battery health: Reject cracked cases, bulging sides, or heavy corrosion (white/green crust)—call a tow instead
– Locate terminal markings: Find the “+” (positive) and “-” (negative) symbols stamped near battery posts
– Consult your manual: Some BMWs and Mercedes require special procedures to avoid ECU damage
Critical Warning: Never jump-start in rain or standing water. Water conducts 1000 amps instantly, causing severe burns or electrocution.
Identifying Your Ground System Type
99% of modern vehicles use negative ground systems (negative terminal connected to chassis). The rare exception: pre-1970 British cars (MG, Triumph) with positive ground systems. To confirm:
– If your negative battery terminal connects to a metal bracket bolted to the engine block → negative ground
– If positive terminal connects to the chassis → positive ground (extremely rare)
When in doubt, assume negative ground—using positive-ground procedures on a negative-ground system destroys electronics.
Correct Connection Sequence for Jump-Starting

Step-by-Step Hookup for Negative Ground Systems (Most Vehicles)
- Attach clamps to GB40: Plug the battery clamp assembly into the 12V OUT port
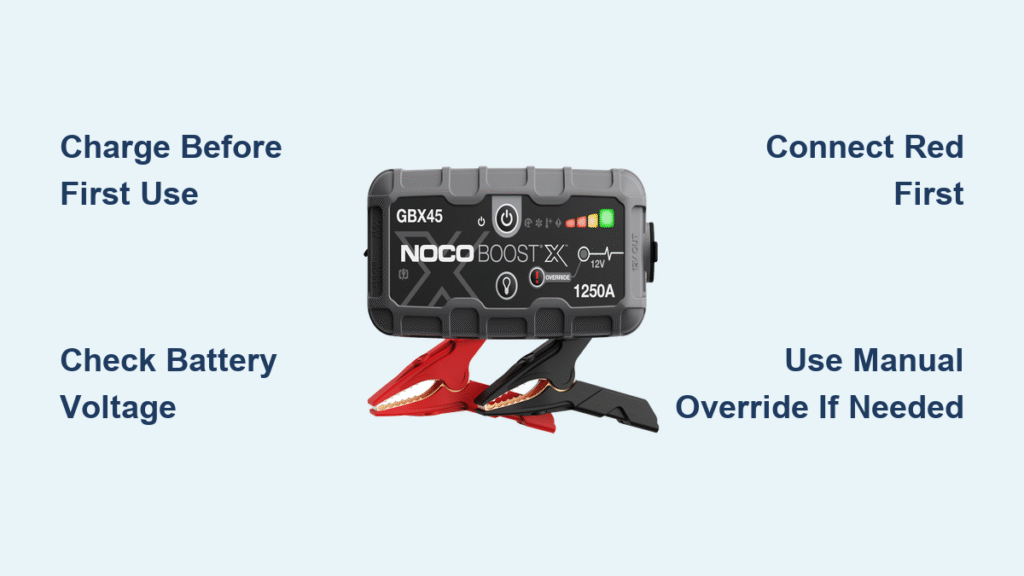
- Connect red (positive) clamp FIRST: Secure to battery’s + terminal until it clicks audibly
- Connect black (negative) clamp: Attach to either:
– Battery’s – terminal (if clean and accessible), OR
– Solid unpainted metal 18+ inches from battery (engine block bracket, suspension bolt)
Critical Danger Zone: Never clamp near fuel lines, carburetors, or plastic engine covers. Sparks here ignite gasoline vapors instantly.
Positive Ground Connection (Vintage Vehicles Only)
Reverse the entire sequence:
1. Attach black clamp to battery negative terminal
2. Attach red clamp to chassis ground point (NOT positive terminal)
Verify with a multimeter first—incorrect connections melt wiring harnesses.
Starting Procedure and LED Decoding
Interpreting GB40 Plus LED Signals
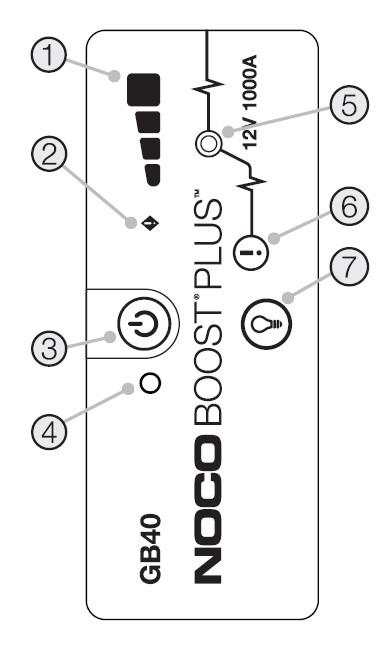
Press the power button and watch the LED pattern:
– All LEDs flash once: Self-test passed (proceed)
– White Boost LED SOLID: Safe to start engine (correct polarity confirmed)
– Red Error LED SOLID: Reverse polarity—disconnect IMMEDIATELY and swap clamps
– All LEDs flashing rapidly: Overheating—rest unit 15+ minutes
Never ignore red LEDs. A solid red light means your clamps are reversed, which can fry your car’s computer within seconds.
Engine Cranking Sequence and Limits
With a solid white Boost LED:
1. Crank the engine normally (3-5 seconds max per attempt)
2. If unsuccessful: Wait 30 seconds before retrying (allows battery recovery)
3. Maximum 5 attempts within 15 minutes—exceeding this overheats the GB40 Plus
4. After 5 failed attempts, rest 15+ minutes before continuing
Real-World Tip: For severely discharged batteries, leave clamps connected 20-30 seconds before cranking—this gives the dead battery time to absorb charge.
Post-Start Disconnection Protocol
Once the engine runs:
1. Remove black clamp FIRST (from chassis or battery negative)
2. Then remove red clamp from positive terminal
3. Unplug clamps from GB40 and power off the unit
Never disconnect in reverse order—removing red first creates dangerous sparks at the battery.
Manual Override for Batteries Below 2 Volts
When Standard Mode Fails and Override Is Necessary
If your battery reads below 2 volts, the white Boost LED stays off—indicating the GB40 Plus can’t detect the battery. Manual override bypasses all safety features, so proceed only if:
– You’ve verified 12V lead-acid compatibility
– Terminals are clean and undamaged
– You can safely access solid metal grounding points
Do NOT attempt if: Battery is leaking, cracked, or shows acid burns. Call roadside assistance instead.
Safe Manual Override Activation Steps
- Triple-check polarity: Red clamp to battery +, black to chassis ground
- Separate clamp jaws: Ensure metal parts can’t touch each other
- Press override button: Hold for 3 full seconds until LEDs pulse red/white
- Crank immediately: Engine should start within 5 seconds
Critical Warning: This mode delivers 1000 continuous amps—expect loud sparks and heat at connections. If clamps feel hot, disconnect immediately.
Avoiding Costly GB40 Plus Mistakes
Connection Errors That Destroy Vehicle Electronics
- Reversed polarity: Red to negative, black to positive—fries ECUs instantly ($1,500+ repairs)
- Grounding on fuel systems: Clamping near carburetors causes explosions (reported in vintage car forums)
- Using damaged cables: Frayed wires overheat—replace clamps if insulation is cracked
GB40-Specific Usage Errors
- Exceeding duty cycle: 6+ jump attempts in 15 minutes voids warranty (NOCO’s top service issue)
- Charging in extreme temps: Below 32°F or above 104°F degrades battery lifespan by 40%
- Storing at 0% charge: Lithium batteries die permanently if left depleted for 3+ months
Maintenance for Long-Term Reliability
Storage and Charging Best Practices
Recharge your NOCO Boost Plus every 3-4 months even when unused. Lithium batteries self-discharge at 2-5% monthly, and dropping below 20% charge causes irreversible capacity loss. Ideal storage conditions:
– Charge level: 50-80% (two or three blue LEDs solid)
– Temperature: 40-80°F (avoid trunks in summer—temps exceed 140°F)
– Location: Cool, dry place away from metal objects (prevents accidental short circuits)
Clamp and Cable Care Routine
Inspect clamps before each use:
– Corrosion: Clean terminal buildup with a baking soda/water paste and wire brush
– Jaw tension: Replace if clamps don’t “click” shut firmly on battery posts
– Cable integrity: Discard if you see melted insulation or exposed copper
Never use tape or zip ties to repair damaged cables—high-current jump leads require factory replacements.
Troubleshooting Quick Reference
| Problem | LED Pattern | Immediate Action |
|---|---|---|
| Won’t power on | No lights | Recharge via USB (use 10W wall adapter) |
| Red LED solid | Steady red | Disconnect immediately—reverse clamps |
| Engine won’t start | White LED off | Check battery voltage—use manual override if <2V |
| Overheating | Rapid LED flash | Stop use—rest 15+ minutes before retrying |
Choosing the Right NOCO Model for Your Vehicle
While the GB40 Plus handles most sedans and SUVs, engine size dictates charger requirements:
– GB20: Compact cars/motorcycles (4L gas max)
– GB40: Mid-size vehicles (6L gas/3L diesel—ideal for Camrys, Rav4s)
– GB50: Full-size trucks (7L gas/4.5L diesel—F-150s, Silverados)
– GB70: Heavy-duty vans (8L gas/6L diesel—Transits, Sprinters)
Key insight: Diesel engines require more cranking amps—use the next-size-up model if your diesel exceeds 2.5L.
Mastering how to use NOCO Boost Plus battery charger techniques ensures you’ll never be stranded by a dead battery again. Keep your GB40 Plus charged, stored in the cabin (not trunk), and you’ll handle emergencies with confidence. Remember: Correct clamp sequence prevents damage, duty cycle limits protect your investment, and manual override is your last resort for ultra-dead batteries. For ongoing reliability, recharge quarterly and inspect clamps before every road trip—your peace of mind is worth these simple habits.


