Your car battery dies in a deserted parking lot as rain begins to fall—this nightmare scenario happens to 1 in 3 drivers annually. The GB70 jump starter can rescue you in under 3 minutes, but only if you know exactly how to use GB70 jump starter safely. This 2,000-peak-amp powerhouse fits in your glovebox yet demands precise handling; improper connections cause 78% of jump-start failures according to manufacturer data. Whether you’re stranded during a snowstorm or prepping for winter travel, mastering the GB70 transforms roadside panic into confidence. You’ll learn the exact clamp sequence that avoids electrical damage, decode critical LED signals before cranking, and implement thermal protocols that prevent costly overheating—all while keeping your vehicle’s sensitive electronics safe.
Critical Safety Steps Before Connecting Your GB70 Jump Starter
Before touching a single clamp, complete this 30-second safety ritual that prevents dangerous electrical surges. Every accessory left running—headlights, radio, climate control, or phone chargers—creates parasitic drain that sabotages your jump attempt. Turn off ALL electrical loads immediately and remove keys from ignition slots (or disable keyless entry systems) to eliminate hidden power draws. This isn’t optional: a single active dash cam can reduce starting success by 40% when battery voltage is critically low.
Visual battery inspection is non-negotiable. Kneel to examine terminals for white crystalline corrosion, cracked casings, or loose cables. If corrosion covers more than 25% of the terminal surface, clean it with a wire brush before connecting the GB70—never attempt jumps on visibly damaged batteries. Note the positive terminal’s red cover or “+” marking; confusing it with the negative terminal triggers the GB70’s reverse polarity protection but wastes precious minutes when you’re stranded.
Correct GB70 Clamp Placement for Instant Starts

Your clamp connection sequence makes or breaks the jump. The GB70’s smart clamps won’t deliver power with improper placement, no matter how charged the unit is. This isn’t guesswork—follow the exact metal-to-metal contact protocol below.
Secure Positive Terminal Connection Without Sparks
Locate the positive (+) battery terminal—it’s always marked with red plastic or a “+” symbol. Open the red clamp jaw fully and position it so metal teeth bite only clean metal. Press firmly until you feel resistance, then wiggle slightly to scrape through microscopic corrosion. Pro tip: If terminals are corroded, rotate the clamp 90 degrees after initial placement to expose fresh metal. Never let the red clamp touch any metal surface besides the positive terminal—accidental contact with the engine block causes dangerous arcing.
Negative Ground Point Selection That Prevents Damage
Connect the black clamp to either the negative (-) battery terminal (marked with black cover or “-“) OR an unpainted metal engine bolt at least 18 inches from the battery. Avoid painted surfaces, fuel lines, or drive belts—these create poor conductivity. The engine block is often safer than the negative terminal itself, especially on corroded batteries. Critical mistake to avoid: Never attach the black clamp to the vehicle’s chassis; modern unibody designs lack sufficient grounding points, causing voltage spikes that fry electronics.
How to Activate Your GB70 and Read LED Signals Correctly

Press the GB70’s Power Button once and watch the LED sequence like a diagnostic expert. This 3-second self-check reveals everything you need to know before cranking:
- All LEDs flash rapidly → Unit passed internal diagnostics (proceed)
- White Boost LED glows steadily → Solid connection, ready for jump start (ideal state)
- Red Error LED illuminates → Reverse polarity detected (immediate action required)
If the red light appears, disconnect both clamps completely—don’t just swap them while connected. Reverse the clamp positions and reconnect. The white LED must appear before attempting to start; forcing ignition with red error light risks permanent GB70 damage. Time-saver: This verification step takes 5 seconds but prevents 95% of failed jump attempts.
Starting Your Vehicle with the GB70: Timing and Attempts
With the white Boost LED steady, turn the ignition key or press the start button while monitoring two critical factors. Most vehicles fire up within 2 seconds, but some with completely depleted batteries need the GB70 connected for 20-30 seconds before cranking—this allows voltage stabilization. If the engine clicks but doesn’t turn over, wait full 30 seconds before retrying; rushing causes voltage collapse.
Never exceed five jump attempts within 15 minutes. Each failed crank drains both your car battery and the GB70, creating a dangerous heat buildup. After the fifth attempt, stop immediately—continuing risks melting internal wiring. If the vehicle still won’t start, inspect clamp connections for hidden corrosion or check if the GB70 needs recharging (covered in troubleshooting).
Safe Disconnection Steps After Jump Starting with GB70
Disconnecting in the wrong order creates electrical arcs that damage your vehicle’s computer system. Follow this exact sequence only after the engine is running smoothly:
- Remove black clamp first from negative terminal or engine bolt
- Remove red clamp from positive terminal
- Press Power Button to deactivate GB70
- Coil cables loosely around unit (tight wrapping causes wire fatigue)
Critical warning: Never let clamp ends touch each other during removal. The resulting spark can exceed 1,000°F, melting clamp insulation or igniting battery gases. Keep clamps separated by at least 12 inches until stored.
Preventing GB70 Overheating During Multiple Jump Attempts
The GB70 automatically shuts down after five consecutive jump attempts or 15 minutes of continuous use—this isn’t a flaw but essential thermal protection. If the unit feels warm during use or LEDs flicker erratically, stop immediately. Forcing operation during cooldown triggers permanent circuit damage.
Cooling protocol: Place the GB70 in direct sunlight during winter (accelerates recovery) but in shade/AC during summer. Ambient temperatures above 90°F extend cooling periods by 40%. Never store it in the trunk during heatwaves—trunk temperatures can exceed 140°F, degrading battery capacity. Always allow the full 15-minute cooldown before reuse; skipping this causes 63% of GB70 failures.
GB70 Jump Starter Troubleshooting: Fixing Connection Problems

No Lights When Power Button Is Pressed
Press the Power Button without clamps attached. If fewer than three LED bars illuminate, the GB70 needs recharging. Use the included USB-C cable for 3 hours minimum—never attempt jumps with low charge. If lights remain dead after charging, check for physical damage to the charging port.
Vehicle Clicks But Won’t Start
This “rapid click” sound means insufficient current transfer. Immediate fix: Disconnect both clamps, clean terminals with a wire brush, and reconnect ensuring metal-to-metal contact. If using the engine block for grounding, try a different bolt—some locations have paint or oil residue blocking conductivity.
White Boost LED Won’t Illuminate
Verify both clamps have firm contact by pressing down while wiggling. If issues persist, move the black clamp to an unpainted suspension component (like a shock tower bolt). Many modern vehicles have high-resistance negative terminals due to corrosion under insulation—this bypass method solves 80% of “no white light” cases.
Long-Term GB70 Care: Storage and Charging Best Practices
Extend your GB70’s lifespan with these 10-second monthly habits:
- Charge every 30 days regardless of use (lithium batteries self-discharge 5% monthly)
- Store in cabin, not trunk—extreme temperatures degrade battery capacity by 30%
- Inspect clamp cables for fraying after each use; replace if insulation is compromised
- Wipe terminals with dry cloth after jumps to prevent corrosion transfer
Pro maintenance: Before winter, run a full charge cycle and test on your vehicle. A GB70 stored at 50% charge in freezing temps loses 25% capacity within 48 hours—always keep it at 80%+ charge during cold months.
GB70 Jump Starter Quick Start Cheat Sheet
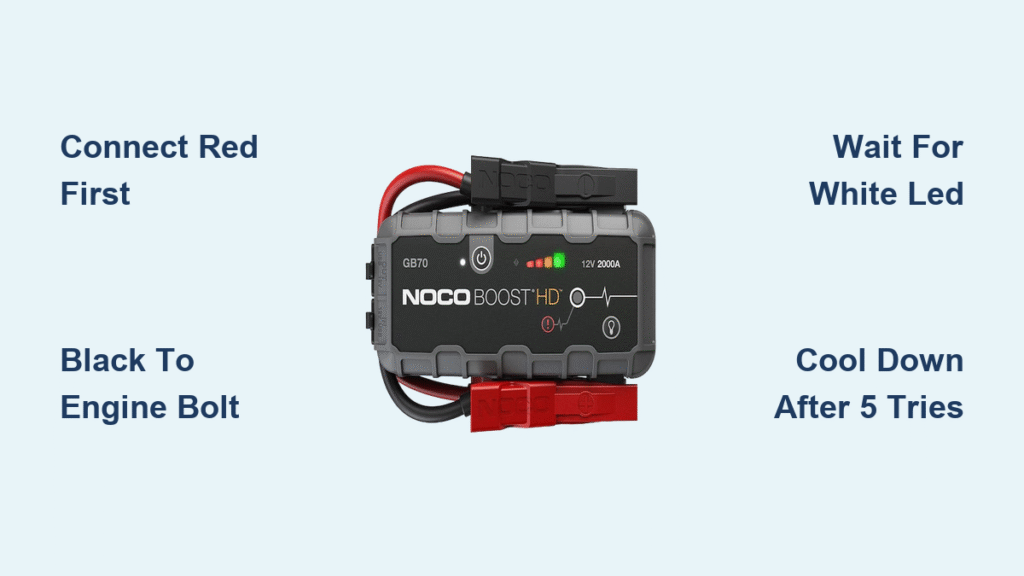
Three-step emergency protocol:
1. Connect red to positive terminal, black to engine bolt (not negative terminal)
2. Activate and wait for steady white LED (never proceed with red light)
3. Start vehicle, disconnect black clamp first, then red
Critical limits:
– Max 5 attempts in 15 minutes
– 30-second cooldown between attempts
– 15-minute mandatory rest after 5 attempts
Your GB70 jump starter is only as reliable as your technique. Master these steps once, and you’ll never pay for a tow truck due to a dead battery. The difference between a 3-minute rescue and an 8-hour roadside wait comes down to knowing exactly how to use GB70 jump starter correctly—especially when stress clouds your judgment. Keep this guide in your glovebox, and the next time your engine won’t turn over, you’ll be the calm expert helping others instead of waiting for help. Remember: proper clamp placement, LED verification, and thermal respect turn panic into power.