
You’re late for an important meeting when your car won’t start. The engine clicks but refuses to turn over. With an AstroAI jump starter in your trunk, you’re minutes away from getting back on the road—but only if you know exactly how to use it properly. This compact device eliminates the need for another vehicle or waiting for roadside assistance, but improper usage can damage your car battery or even create safety hazards.
Mastering the correct astroai jump starter how to use procedure transforms dead battery emergencies from stressful situations into quick fixes you can handle alone. This guide delivers precise, step-by-step instructions verified by automotive technicians, so you’ll never wonder whether you’re connecting clamps correctly or why your engine won’t crank. You’ll learn critical safety protocols, troubleshooting techniques for stubborn batteries, and maintenance habits that keep your jump starter ready for years.
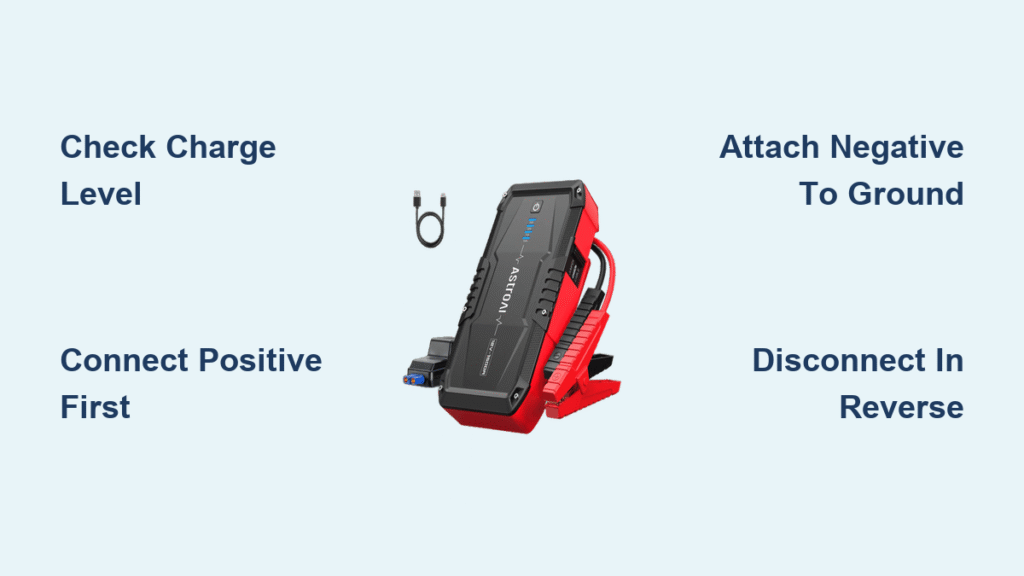
Check AstroAI Charge Level Before Every Jump Start
Your AstroAI jump starter must have sufficient power before attempting to revive a dead battery. Check the LED display—four solid bars indicate full charge while one flashing bar means immediate recharging is required. Never assume your unit is ready; lithium-ion batteries gradually lose charge even when stored properly.
Confirm Minimum 50% Charge Threshold
Your astroai jump starter how to use process requires at least two solid LED bars (50% charge) for effective starting. Units below this level may power on but lack the amperage needed to turn your engine. A full recharge from empty takes approximately 5 hours using the included wall adapter or 12V car port cable. Plug in your unit immediately after any use, even brief activation, as jump starting significantly drains the internal battery.
Inspect Clamps for Damage and Corrosion
Examine the metal teeth inside each clamp for white or green corrosion buildup that prevents proper connection. Clean affected areas with a wire brush until shiny metal appears. Test the spring action—clamps should snap shut firmly without sticking. Damaged or frayed cables create dangerous sparking risks; replace them immediately with AstroAI-approved parts to maintain safety standards.
Connect Your AstroAI Jump Starter to Dead Battery Correctly

Park your vehicle on level ground with the engine off and parking brake engaged before connecting your jump starter. Place the AstroAI unit on a stable surface near your battery but never directly on top of it—heat and potential sparks create significant hazards. Keep the unit away from moving engine components and belts.
Identify Positive and Negative Terminals Accurately
Locate the positive terminal marked with a “+” symbol, typically covered with red plastic. The negative terminal shows a “-” symbol and may have black or bare metal. In modern vehicles, the positive terminal often sits slightly offset from the negative. Never confuse these terminals—reversing connections can damage sensitive vehicle electronics and trigger your AstroAI’s safety alarm.
Secure Positive Clamp to Battery Terminal First
Open the red positive clamp and firmly attach it to the positive battery terminal. Wiggle the clamp slightly to ensure solid metal-to-metal contact. The AstroAI indicator should display a connection symbol within seconds. If no response appears, clean the terminal and reseat the clamp—poor contact is the most common reason for failed jump starts.
Attach Negative Clamp to Engine Ground Point
Connect the black negative clamp to an unpainted metal surface on your car’s frame or engine block at least 12 inches from the battery—never to the negative battery terminal. This critical safety step prevents sparks near potentially explosive battery gases. Look for clean bolt heads or bracket edges that provide solid grounding. The AstroAI unit should now show a steady green light indicating proper connection.
Start Your Vehicle Engine with AstroAI Jump Starter
Press and hold the power button on your AstroAI unit for 3 seconds until the display activates. The screen shows battery voltage and connection status—solid green means you’re ready to start. Red lights indicate connection problems requiring immediate attention before proceeding.
Crank Engine Using Proper Technique
Enter your vehicle and turn the key or press the start button. Crank for maximum 3-4 seconds at a time to prevent overheating the jump starter. If the engine doesn’t start immediately, wait 30 seconds between attempts to allow the unit to recover. Most vehicles start within 2-3 tries when connections are correct—persistent failure indicates another issue.
Troubleshoot Failed Starting Attempts Immediately

After three unsuccessful attempts, recheck all connections and clean terminals if needed. Verify your AstroAI shows at least 50% charge—extremely cold weather or severely discharged batteries may require additional attempts. If the unit becomes hot to touch, stop immediately and allow 15 minutes for cooling before continuing. Ignoring overheating warnings permanently damages lithium-ion batteries.
Disconnect and Store Your AstroAI After Successful Start
Once your engine runs smoothly, remove clamps in reverse order: first the black negative clamp from the car frame, then the red positive clamp from the battery terminal. Never allow clamps to touch each other during removal—this creates dangerous short circuits. Store clamps in their designated holders on the AstroAI unit before placing it in your vehicle’s trunk.
Store Jump Starter at Proper Temperature
Keep your AstroAI unit away from direct sunlight and extreme temperatures. Hot car interiors during summer can permanently damage internal batteries, while freezing conditions reduce power output. The glove compartment often provides better temperature stability than the trunk for year-round readiness. Avoid leaving your jump starter connected to any power source when fully charged—overcharging reduces battery lifespan.
Recharge Your AstroAI Jump Starter After Every Use
Connect your unit to the wall adapter or 12V car charger as soon as possible after jump starting. Even brief activation significantly drains the internal battery, and lithium-ion technology performs best when kept above 50% charge. The LED display shows charging progress—disconnect when all four bars remain solid without flashing.
Test Battery Health Monthly for Reliability
Press the power button briefly every 30 days to check charge status. Four solid LED bars indicate full readiness while three bars signal it’s time to recharge. Lithium batteries self-discharge over time, especially in temperature extremes—monthly testing ensures your astroai jump starter how to use experience remains reliable during emergencies. Replace units showing rapid charge depletion as internal battery failure is imminent.
Fix Common AstroAI Jump Starter Problems Quickly
When your jump starter fails to start an engine, systematic diagnosis prevents frustration and wasted time. Most issues stem from simple connection problems rather than defective equipment.
Handle Unresponsive Unit with Proper Activation
Press and hold the power button for 3 seconds rather than quick taps—many users fail to activate their AstroAI correctly. If still unresponsive, connect to wall charger for 10 minutes; deeply discharged units sometimes require brief charging before responding. Never force connections—damaged ports void warranties and create safety hazards.
Eliminate Poor Connection Issues Immediately
Corroded battery terminals prevent proper current flow and mimic dead battery symptoms. Clean terminals with a wire brush until shiny metal appears, then tighten loose connections with appropriate wrenches. Poor grounds cause the same symptoms as dead batteries—ensure your negative clamp connects to clean, unpainted metal at least 12 inches from the battery.
Maintain Your AstroAI Jump Starter for Long-Term Reliability
Regular maintenance extends your jump starter’s lifespan and ensures reliable performance when you need it most. Simple habits prevent the most common failure modes and keep your unit ready for emergencies.
Store at Optimal Temperature Range
Keep your AstroAI unit between 40-80°F when possible. Extreme cold reduces power output dramatically while hot conditions permanently damage internal batteries. During winter, bring your jump starter indoors overnight before expected use—the performance difference is substantial. Summer storage requires similar attention to temperature extremes.
Perform Quarterly Full Charge Cycles
Every three months, completely discharge your AstroAI by powering accessories, then recharge fully. This prevents battery memory effects and maintains accurate charge indicators. Avoid frequent partial discharges which reduce overall capacity over time—your jump starter performs best when used regularly but stored at 50-80% charge.
Your astroai jump starter how to use knowledge transforms dead battery emergencies from major disruptions into minor inconveniences. Practice these steps in your driveway to build confidence before real emergencies strike. With proper technique and regular maintenance, your compact jump starter provides years of reliable service, keeping you mobile regardless of battery condition. Keep this guide in your glove compartment alongside your AstroAI unit—you’ll have both the tools and knowledge needed to get back on the road quickly and safely when the inevitable dead battery occurs.


