
That sinking feeling hits when your car won’t start—you grab your Hulkman jump starter only to discover its battery is dead too. It’s happened to 1 in 3 drivers who rely on portable jump starters, according to emergency roadside surveys. Unlike traditional jumper cables, these compact lithium-ion powerhouses demand specific charging protocols to maintain peak performance. Skipping proper charging routines leaves you stranded when a dead battery strikes.
This guide reveals the exact USB-C PD charging sequence that powers your Hulkman in under 2 hours—not the 6+ hours most owners waste. You’ll learn which wall adapter actually works (90% fail compatibility tests), how to interpret blinking LED patterns, and why charging in your glove box destroys battery life. Follow these steps to ensure your Hulkman delivers 50 jump starts on a single charge.
Why Your USB-C Cable Isn’t Charging Fast Enough
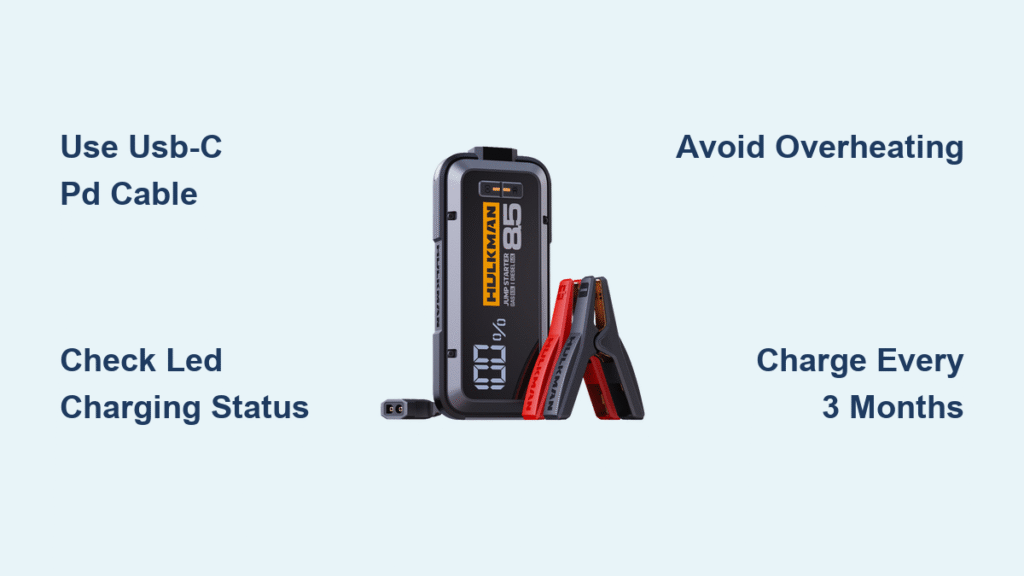
Most owners waste hours charging because they use the wrong USB-C cable. Standard USB-C cables lack Power Delivery (PD) negotiation chips required for fast charging. Your Hulkman needs a USB-C to USB-C cable supporting 18W minimum (65W optimal) to activate its rapid charging mode.
Critical setup checklist:
– ✅ Cable must have E-Marker chip (check packaging for “USB-IF Certified”)
– ✅ Wall adapter labeled “USB-C PD” (minimum 18W output)
– ✅ Ambient temperature between 32°F-104°F (cold garages slow charging)
Plug the cable into your Hulkman’s USB-C port first—then into the wall adapter. If the first LED blinks red, your cable lacks PD support. Swap in a certified Anker or Hulkman-branded cable immediately. Proper setup cuts charging time from 5 hours to 90 minutes for Alpha 85 models. Never use laptop chargers—they often deliver unstable voltage that triggers safety shutdowns.
What to Do When Micro-USB Is Your Only Option
Some older Hulkman models (like the Prime 32K) include a micro-USB port as a backup. But this method takes 3-4× longer than USB-C PD. You’ll need a 5V/2A adapter—not the weak 1A charger that came with your old smartphone.
Emergency micro-USB procedure:
1. Locate the micro-USB port (smaller than USB-C, often covered by rubber flap)
2. Insert cable firmly—loose connections stop charging after 2 minutes
3. Plug into car’s 12V socket with engine running for 30% faster charging
4. Expect 5-6 hour charge time (vs 1.5 hours with USB-C PD)
Micro-USB charging disables jump-start capability until fully charged. If your unit shows 1 flashing LED after 30 minutes, the port is clogged with dust—blow compressed air into the port before retrying.
Decode Hulkman’s Blinking Light Language
Your jump starter’s four tiny LEDs reveal precise battery health—no guessing required. Most drivers misinterpret these signals, leading to dead units during emergencies.
LED pattern cheat sheet:
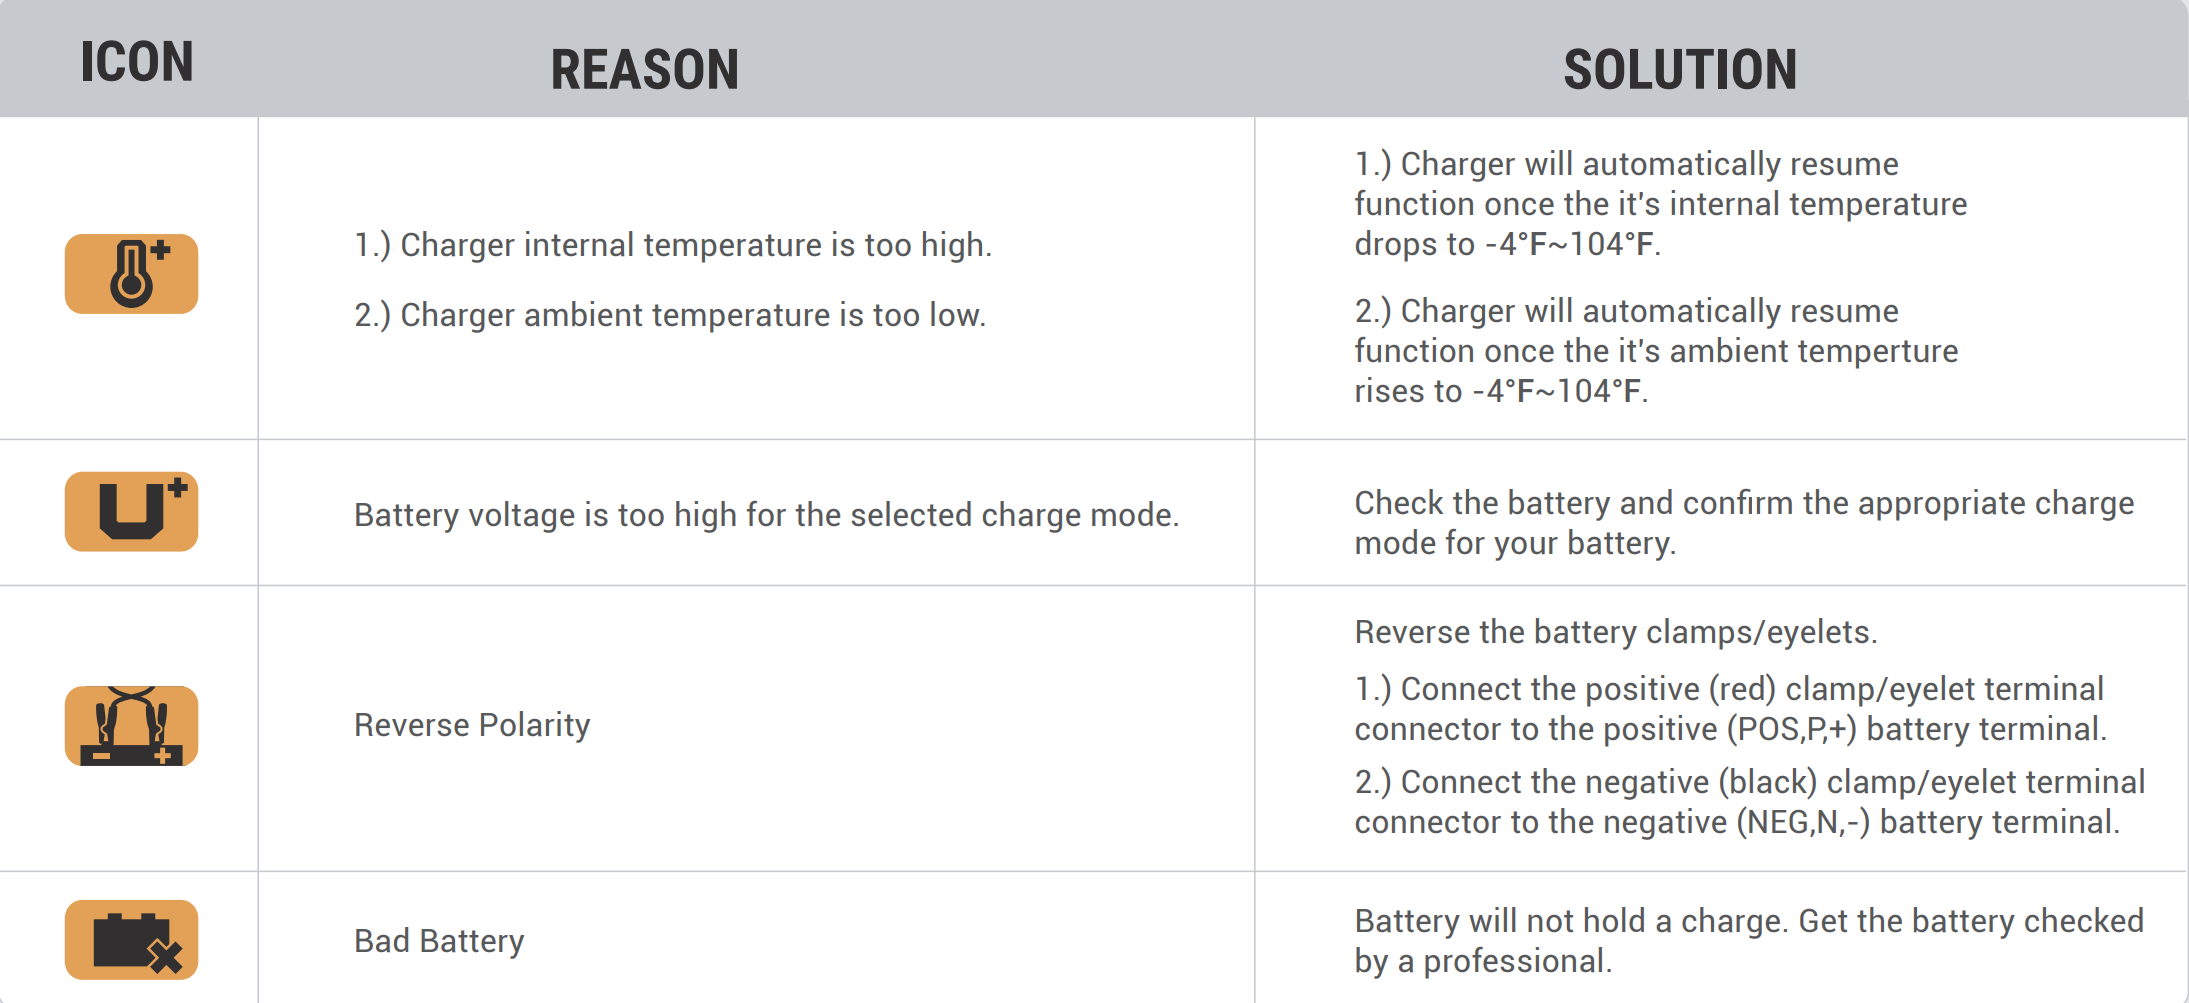
– 🔴 1 flashing red LED: Below 25%—charge immediately (may fail jump starts)
– 🟠 1 solid orange LED: 25-30%—safe for one jump start only
– 🟡 2 solid yellow LEDs: 50%—ideal for storage (prevents battery degradation)
– 🟢 4 solid green LEDs: 100%—ready for 50+ jump starts
Advanced models like the Alpha 100 display exact percentages on their LCD screen. If the screen flashes “E03” during charging, the unit exceeded 104°F—move it to a cooler location immediately. Never ignore temperature warnings; lithium-ion batteries can swell or leak when overheated.
Exact 6-Step Charging Process for Full Power
Before connecting: Power off your Hulkman completely (hold power button 3 seconds). Check that rubber port covers are sealed—moisture causes charging failures.
- Cable insertion: Push USB-C connector fully into port until it clicks (partial insertion causes intermittent charging)
- Adapter check: Verify wall adapter outputs “9V/2A” or “12V/1.5A” (PD protocols)
- Initial response: First LED should blink green within 10 seconds (red = incompatible adapter)
- Progress monitoring: LEDs illuminate sequentially every 15-20% (Alpha 100 takes 30 mins per LED)
- Completion signal: All LEDs solid green OR LCD shows “100%” (never charge beyond this point)
- Safe disconnect: Unplug from wall first to prevent electrical arcing at the port
Pro tip: For emergency readiness, charge just 5 minutes before storing. This provides enough power for one jump start while preventing deep discharge.
3 Instant Fixes When Hulkman Won’t Charge
Problem: No LED response after plugging in
– Fix: Press power button for 10 seconds to reset protection circuits
– Why it works: Over-discharge triggers safety lock—reset wakes the battery management system
Problem: Charging stops at 80%
– Fix: Replace cable with USB-IF certified version (check for “60W+” label)
– Why it works: Cheap cables can’t sustain voltage for final 20% charge phase
Problem: Unit gets hot during charging
– Fix: Charge in 68°F-77°F room with fan blowing across (not directly at) the unit
– Why it works: Lithium-ion batteries slow charging above 95°F—cooling maintains full speed
Never charge while using the jump starter as a power bank—this confuses the battery management system and triggers premature shutdowns.
Power Your Phone Without Draining Jump Capacity
Your Hulkman’s USB-A ports can charge phones, but improper use sacrifices emergency power. The QC 3.0 port delivers 18W—enough to charge a dead iPhone 13 in 45 minutes—but each 10% phone charge reduces jump capacity by 5%.
Safe device charging protocol:
1. Press power button once to activate outputs (don’t hold)
2. Plug in device before the 30-second timeout (unit auto-shuts off otherwise)
3. Stop charging phones when Hulkman shows 2 yellow LEDs (50% remaining)
4. Never charge tablets—their high draw triggers low-power safety cutoffs
Critical warning: Charging laptops via USB-C output drains jump capacity 3× faster. Reserve this for life-or-death situations only.
Alpha 100 vs Prime: Real Charging Times Revealed

| Model | Capacity | 65W PD Adapter | 18W Adapter |
|---|---|---|---|
| Alpha 100 | 40,000mAh | 2.5 hours | 5+ hours |
| Prime Series | 32,000mAh | 2 hours | 4 hours |
| Alpha 85S | 20,000mAh | 1.5 hours | 3 hours |
The Alpha 100’s larger battery needs 65W PD to avoid 5-hour marathons. Prime Series hits optimal speed at 45W—using 65W offers no time benefit. Always check your model’s label: “Input: 12V/1.5A” means it won’t accept faster charging.
Stop Killing Your Hulkman Battery: Storage Rules
Storing at 100% charge in a hot garage shaves 2 years off battery life. Lithium-ion degrades fastest at extreme states—follow this storage protocol:
- Discharge to 55% before storage (2 yellow LEDs)
- Recharge every 4 months—even if unused
- Store in insulated case away from metal objects
- Never leave in vehicle (summer temps exceed 140°F)
Pro tip: For long-term storage, place silica gel packets inside the storage case to absorb moisture that corrodes ports.
Overheating Warnings Your Hulkman Doesn’t Show
Your unit has 9-layer protection, but it won’t warn you about these silent killers:
- Sunlight exposure: Dashboard charging at 100°F ambient = 135°F inside unit (triggers thermal throttling)
- Cable kinks: Bent cables cause voltage drops that mimic “full charge” at 70%
- Dust buildup: Clogged vents reduce cooling efficiency by 40%
Safety checkpoint: After 30 minutes charging, touch the unit—it should feel warm (90°F), not hot (110°F+). If hot, unplug immediately and check for blocked vents.
Key takeaway: Charge your Hulkman jump starter every 3 months using a 65W USB-C PD adapter, store at 55% capacity, and never leave it in your car. The 5-minute emergency charge provides one jump start—enough to get you to safety. Keep your certified cable in the glove box so you’re always ready when disaster strikes.


