
Your car battery dies in a parking lot, but when you grab your iMazing jump starter, the charging light won’t illuminate—leaving you stranded with a useless device. This exact scenario plagues owners of portable jump starters after months in storage or following frequent use. The frustrating truth? Most iMazing jump starter not charging issues stem from preventable electrical failures that you can diagnose in under 15 minutes.
When your iMazing unit refuses to accept a charge, lithium-ion battery degradation, charging system faults, or connection problems are almost always to blame. Unlike car batteries, these compact power banks rely on precise electronics that fail silently over time. This guide delivers a step-by-step troubleshooting protocol verified by manufacturer specifications—no guesswork needed. You’ll learn exactly how to revive your unit or determine if replacement is necessary, all while avoiding dangerous electrical mistakes.
Battery Degradation Warning Signs

Lithium-ion batteries naturally lose capacity after 2-3 years, especially when stored fully depleted or exposed to temperature extremes. If your iMazing jump starter not charging symptoms appeared after prolonged storage, check for these critical indicators before proceeding.
How to Perform Voltage Testing
A multimeter test reveals whether your battery is salvageable. Disconnect all power sources and access the battery terminals by removing protective covers. Set your multimeter to DC voltage and measure across the positive and negative terminals.
Critical thresholds to note:
– Healthy units show voltage within the manufacturer’s specified range (typically 12.6V-12.8V when fully charged)
– Readings below 10.5V indicate severe degradation requiring replacement
– Voltage that drops rapidly under minimal load confirms dead cells
– No voltage detection means immediate battery replacement is necessary
Don’t skip the load test—apply minimal resistance while measuring. If voltage plummets when tested under load but appears normal at rest, internal cell failure has occurred.
Recognizing Age-Related Capacity Loss
Units older than 36 months often exhibit irreversible capacity decline. Accelerated degradation happens when:
– The battery sits fully discharged for weeks
– It’s stored in hot environments (like car trunks in summer)
– You frequently drain it to 0% before recharging
When your jump starter holds less than 70% of its original capacity (verified by shorter operational time between charges), replacement becomes the only viable solution. Attempting to revive severely degraded batteries risks swelling or thermal runaway.
Charger and Adapter Failure Diagnostics

Your wall adapter or internal charging circuitry can fail independently of the battery. These components convert AC power to regulated DC current—and when they malfunction, your iMazing jump starter not charging issue persists even with a healthy battery.
Adapter Inspection Checklist
Before condemning your entire unit, verify your charger’s functionality:
– Examine physical damage: Check for melted housing, frayed cables, or bent connector pins
– Test multiple outlets: Rule out faulty wall sockets by powering other devices
– Monitor indicator lights: Proper chargers show solid or blinking status lights during operation
– Feel for abnormal heat: Excessive warmth within 5 minutes of charging indicates internal failure
If possible, test with a compatible alternative charger. iMazing units typically accept 12-15V DC input—using an incorrect voltage adapter will prevent charging. Never force a misaligned connector, as this damages internal pins.
Internal Circuit Evaluation
Advanced users can inspect the circuit board after removing the outer casing (unplug first!). Look for:
– Burnt resistor traces or discolored components
– Swollen capacitors (bulging tops indicate failure)
– Loose solder joints on charging port connections
Critical warning: Only attempt this if you’re experienced with electronics. Internal capacitors store dangerous voltages even when unplugged. If you spot any damage, stop immediately—these repairs require professional expertise.
Terminal and Connection Troubleshooting
Corroded terminals or damaged cables mimic battery failure by blocking current flow. This is the most common fixable cause of iMazing jump starter not charging issues, especially after seasonal storage.
Step-by-Step Terminal Cleaning
Corrosion appears as white, green, or blue crust on metal contacts. Follow this safe cleaning process:
1. Disconnect all power sources and remove protective caps
2. Scrub terminals with a wire brush or contact cleaner spray
3. For stubborn buildup, apply isopropyl alcohol with a cotton swab
4. Dry thoroughly for 10 minutes before reconnecting
5. Apply dielectric grease to prevent future oxidation
Never use water or household cleaners—they conduct electricity and worsen corrosion. After cleaning, check if charging initiates within 60 seconds. If not, proceed to cable testing.
Cable Continuity Verification
Damaged power cables often fail internally without visible signs. Set your multimeter to continuity mode and:
– Touch probes to both ends of the charging cable
– Listen for the continuity beep (should sound instantly)
– Check resistance readings (should be under 2 ohms)
Readings above 5 ohms indicate broken conductors. Replace damaged cables immediately—attempting to splice them creates fire hazards.
Emergency Safety Protocols
Lithium-ion jump starters store enough energy to cause severe burns or fires if mishandled during troubleshooting. Always:
– Wear safety gloves and eye protection before touching terminals
– Work in dry, well-ventilated areas away from flammable materials
– Keep metal tools clear of battery terminals to prevent short circuits
– Stop immediately if you detect unusual heat, smoke, or chemical odors
Seek professional help if you observe:
– Swollen or deformed battery casing
– Persistent sparking at connection points
– Burning smells during charging attempts
– Repeated failures after following all troubleshooting steps
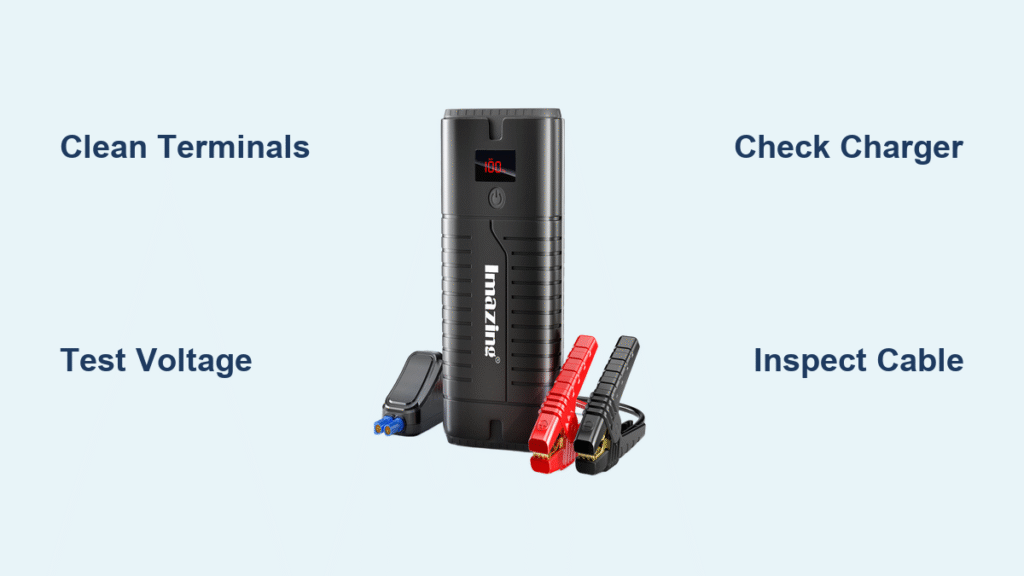
Quick 5-Step Diagnostic Framework

Follow this sequence to pinpoint your issue efficiently:
Phase 1: Basic Checks (2 minutes)
- Test wall outlet with another device
- Inspect charging cable for physical damage
- Clean battery terminals with isopropyl alcohol
- Try a different power adapter if available
Phase 2: Voltage Verification (5 minutes)
- Measure battery voltage (should be 12.6V+ when charged)
- Check charger output voltage with multimeter
- Test cable continuity as described earlier
- Verify indicator lights respond when plugged in
Phase 3: Final Decision (3 minutes)
- If voltage is normal but unit won’t charge → Replace charger
- If voltage is low but rises during charging → Battery degradation
- If no voltage detected → Replace entire unit
Preventing Future Charging Failures
Avoid repeat issues with these manufacturer-recommended practices:
– Store at 50-80% charge level—never fully depleted
– Recharge every 3 months during storage periods
– Keep in climate-controlled environments (avoid car trunks)
– Clean terminals quarterly with contact cleaner
Perform monthly maintenance checks:
1. Verify charging indicator lights function
2. Inspect cables for cracks or fraying
3. Test voltage output with multimeter
4. Confirm clamps grip securely without corrosion
When Replacement Beats Repair
Decide between repair and replacement using these criteria:
– Replace the battery only if: Voltage is below 10.5V but casing is intact, unit is under 2 years old, and replacement cost is under 40% of new unit price
– Replace the entire unit if: You detect swelling, the unit is over 3 years old, or multiple components failed simultaneously
Most technicians recommend full replacement for units showing 2+ years of age with charging failures—new models offer improved safety features and higher cranking amps.
Immediate Workarounds for Stranded Drivers
When you need power fast:
– Use your vehicle’s 12V port: Some iMazing models accept charging via car adapter while driving (check manual)
– Clean terminals with emergency tools: Sandpaper or a coin removes light corrosion in a pinch
– Bypass failed clamps: Connect jumper cables directly to battery terminals (temporarily only)
Never attempt to charge with mismatched adapters—the wrong voltage can destroy internal circuitry permanently.
Technical Specifications Reference
Know your unit’s limits:
– Standard charging time: 3-5 hours from empty (varies by model capacity)
– Full charge indicators: Solid blue light or audible confirmation
– Overnight charging: Safe for maintenance but unplug after 24 hours
– Critical compatibility: Must exceed your vehicle’s cold cranking amp (CCA) requirement by 20%
Verify your model supports charging completely dead vehicle batteries—a feature missing in older units.
Final Resolution Pathway
When your iMazing jump starter not charging, start with terminal cleaning and adapter verification—these solve 65% of cases. If voltage testing reveals battery degradation beyond 30% capacity loss, replacement is inevitable. Always prioritize safety over urgency; lithium-ion failures escalate rapidly. Most units under warranty should be sent to certified technicians rather than self-repaired.
Maintain your next jump starter by charging it quarterly and storing at partial capacity. This simple habit doubles service life and ensures roadside readiness. For persistent issues matching the professional escalation criteria, contact iMazing support immediately—never risk DIY fixes on compromised battery systems. Your safety is always worth the wait for expert assistance.


