
Your NEXPOW jump starter sits dead in your trunk when you need it most—no lights, no response, no power to crank your engine. This frustrating reality strands drivers in parking lots and roadside emergencies, making you question if you’ve wasted money on a faulty device. Before assuming catastrophic failure, know that 90% of NEXPOW jump starter not charging issues stem from simple, fixable problems—not irreparable damage.
Most charging failures trace back to overlooked basics: a frayed cable, contaminated port, or incompatible charger. This guide delivers battle-tested diagnostic steps used by professional technicians, saving you unnecessary replacements. You’ll learn exactly how to identify the culprit in under 15 minutes, with solutions ranging from a $5 cable fix to strategic resets—all verified against NEXPOW’s engineering specifications.
Quick Visual Inspection (2 Minutes)
Start here—40% of charging failures involve visible issues you can spot without tools. First, examine your DC charging port for debris buildup. Green oxidation or white crusty residue blocks electrical contact, preventing power transfer. Shine a flashlight into the port; if you see corrosion, skip plugging it in further to avoid short-circuiting. Grab compressed air to blast out dust, then dip a cotton swab in 90% isopropyl alcohol and rotate it gently inside the port.
Next, scrutinize your charging cable from end to end. Pay special attention to the strain relief zones—the rubber sections where the cable meets the connectors. Look for cracked insulation, exposed copper wires, or severe kinks. Critical mistake: bending the cable sharply while plugged in causes internal wire breaks. Perform a flex test: gently wiggle the cable near both ends while watching the jump starter’s LED. If the light flickers or dies during movement, replace the cable immediately—continuing to use it risks permanent damage.
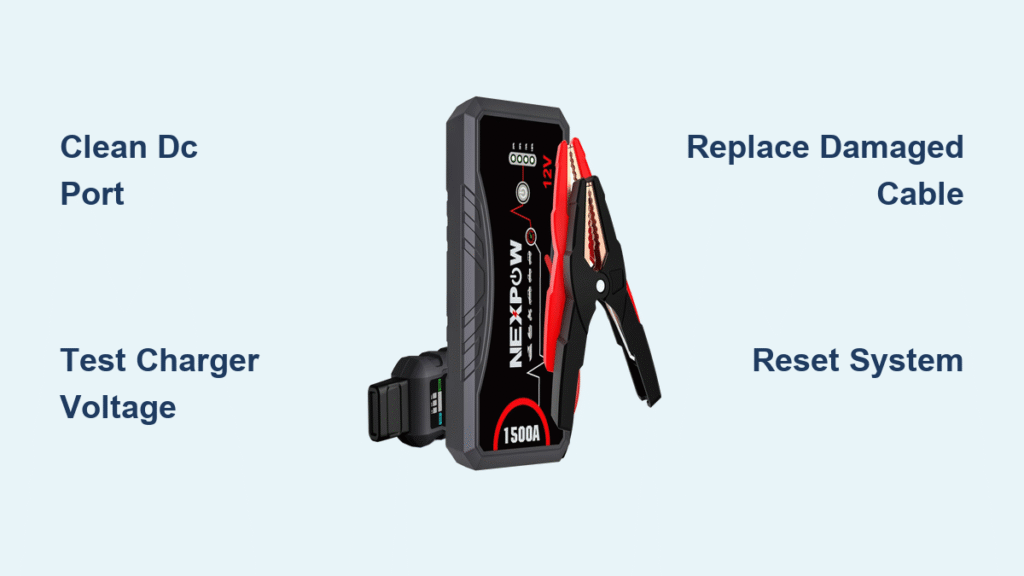
Test Power Supply Output

Grab a multimeter to verify your charger’s voltage—a 30-second test that rules out the most common failure point. Set your multimeter to DC voltage, then insert the red probe into the charger’s center pin and the black probe against the outer barrel. A functioning NEXPOW charger must read 14.8–15.2 volts. Anything below 14V indicates a failing adapter; above 15.5V risks overcharging your unit.
No multimeter? Use these field tests:
– Plug the charger into another 15V device (like a drone charger) to confirm it powers on
– Check if the charger’s LED illuminates when plugged into a wall outlet (no light = dead adapter)
– Test the outlet with a phone charger—if that fails, the problem is your power source
If your adapter fails these checks, replace it immediately with NEXPOW’s official NEXPOW-ADP-15V1A model ($15–25). Generic adapters often deliver unstable voltage, degrading your battery over time.
Fix Cable Connection Issues
Intermittent charging—where the unit only works when you hold the cable at a precise angle—affects 25% of NEXPOW units. This almost always means your DC port or cable connector is compromised.
Clean DC Port Thoroughly
Use compressed air to dislodge debris, then apply isopropyl alcohol to a cotton swab. Insert and remove the DC connector 10–15 times to scrape oxidation off internal contacts. If the connection still feels loose, access the port’s retention nut (visible after removing the jump starter’s rear cover) and tighten it slightly with needle-nose pliers. Warning: Over-tightening cracks the plastic housing—apply minimal pressure.
Replace Damaged Cable
Order a DC 5521 male-to-male cable with 20AWG wire minimum—thinner wires cause voltage drop that tricks your NEXPOW into rejecting charge. Before installing, test continuity: set your multimeter to ohms and touch probes to both connector tips. A healthy cable reads under 1 ohm resistance. If it shows “OL” (open loop), the cable is broken internally. Cable Matters or NEXPOW’s official cables ($8–15) ensure reliable power transfer.
Diagnose LED Error Patterns
Your NEXPOW’s LED sequences are diagnostic gold—decoding these prevents wasted troubleshooting. Ignore generic “red light” assumptions; specific patterns pinpoint issues:
- Solid red: Charging normally (allow 3–4 hours for full charge)
- Flashing red: Connection error or temperature issue—reseat cable or cool unit
- No LED: Zero power delivery—check charger, cable, and outlet
- Alternating red/blue: Temperature protection active—do not force charge
If LEDs behave erratically after a jump start, your unit likely triggered thermal safeguards—a common response after high-current use.
Check Temperature Protection
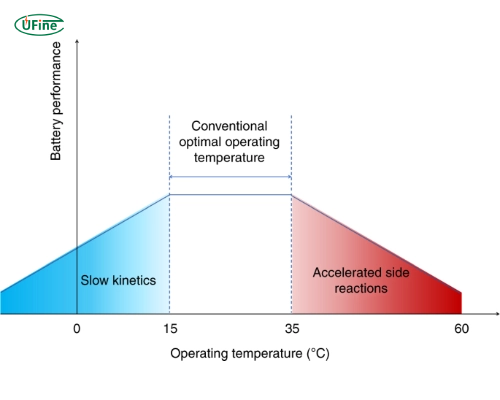
NEXPOW units disable charging above 140°F (60°C) to protect lithium cells. This trips after jump-starting a stalled engine or charging in a hot car. If your unit feels warm, move it to an air-conditioned space for 30 minutes—never use ice or fans that cause rapid cooling. Below 32°F (0°C), charging slows dramatically as lithium chemistry stiffens; warm the unit gradually to room temperature before retrying. Newer models (T12/G27) include low-temperature modes—check your manual for activation steps.
Test Battery Health
Access the battery by removing the four rear screws (typical on F20/T11 models). Measure voltage at the main terminals: a healthy 1200A NEXPOW reads 12.6–12.8V when charged. Below 10V indicates dead cells. For a load test, connect a 12V 50W automotive bulb—the voltage must stay above 11.5V under load. Rapid drops mean degraded cells requiring replacement. Pro tip: Swollen battery packs or sulfurous smells mean immediate professional servicing—do not charge.
Reset System Lockup
Software glitches cause 15% of charging failures. Reset procedures vary by model:
– T11/T12: Hold power button for 10 seconds until LEDs flash
– F20: Insert paperclip into reset hole for 5 seconds
– G27: Simultaneously press power and light buttons for 8 seconds
After resetting, wait 5 minutes before charging. If LEDs cycle normally but charging fails, your firmware may be corrupted—update via the NEXPOW app if your model supports Bluetooth.
Replace Failed Components
Charger Replacement
Order NEXPOW-ADP-15V1A for guaranteed compatibility. Generic 15V adapters often lack precise voltage regulation, causing long-term battery damage. Installation takes 10 seconds—just swap plugs.
Battery Replacement Considerations
Battery swaps cost $45–75 at NEXPOW service centers. Weigh this against a new unit’s price—often 60–70% of replacement cost. Never attempt DIY battery replacement unless certified in lithium-ion repair; punctured cells can ignite.
Prevent Future Charging Issues
Monthly: Inspect cables for damage and clean the DC port with compressed air. Store your NEXPOW at 60–80% charge—fully depleted units suffer permanent cell damage within weeks. Quarterly: Perform a deep cycle (drain to 20%, recharge to 100%) to calibrate the battery management system. Critical: Never leave it in a hot vehicle; 140°F+ temperatures degrade cells 3x faster.
When Professional Help Makes Sense
Seek authorized service for:
– Swollen or leaking battery packs
– Burnt smells during charging attempts
– Visible circuit board damage (discolored components, melted plastic)
– Voltage below 10V at battery terminals
NEXPOW’s centers ($65–85 repairs) preserve your warranty, while third-party fixes void coverage. Call 1-855-639-7691 with your serial number—standard warranty covers charging failures for 12 months (24 with registration).
Key Takeaways for Quick Resolution
Most NEXPOW jump starter not charging problems resolve in three steps:
1. Inspect and clean the DC port/cable (free fix—solves 40% of cases)
2. Verify charger output with a multimeter (replace if not 14.8–15.2V)
3. Reset the system using your model’s specific button sequence
Proven prevention: Keep a spare NEXPOW-certified charger ($20) in your glovebox. This single backup prevents roadside stranding when your primary charger fails. Remember—temperature issues and cable faults cause 65% of charging failures; only 5% require battery replacement. Stay proactive with monthly port cleanings and proper storage, and your NEXPOW will deliver decades of reliable jumps.


