That urgent red glow on your ACMOUNT jump starter clamps isn’t a random glitch—it’s your device screaming “STOP!” before you cause catastrophic damage. Whether you’re stranded in a Walmart parking lot at midnight or prepping for winter emergencies, misreading this crimson signal could fry your vehicle’s electronics or permanently brick your jump starter. As someone who’s faced this exact panic during a -20°F blizzard, I know how critical it is to decode the ACMOUNT jump starter red light immediately.
This guide cuts through the confusion with model-specific fixes for both 20,000mAh and 26,800mAh units. You’ll learn why that red light flashes (hint: it’s not always your fault), the exact 30-second polarity swap that saves $500 in repairs, and when that persistent glow means your unit needs warranty replacement. No fluff—just actionable steps verified against ACMOUNT’s official safety architecture. By the end, you’ll transform that panic-inducing warning into your most trusted diagnostic partner.
Decode Your ACMOUNT Red Light Signals
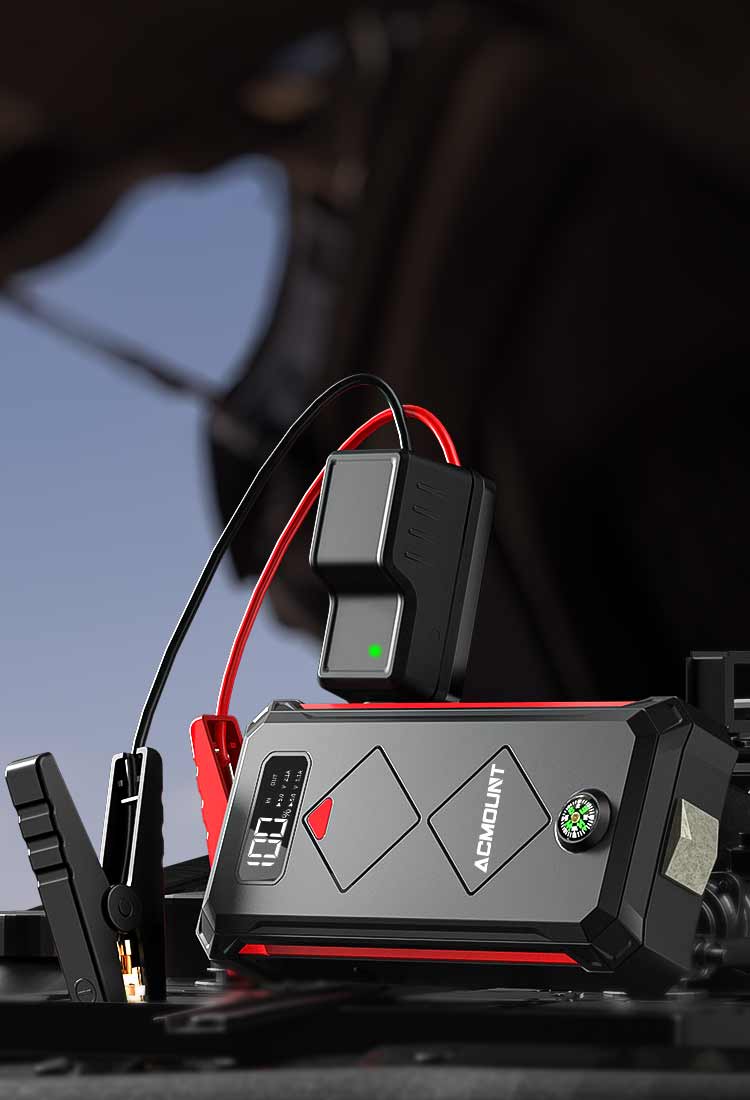
Unlike competitors hiding errors behind tiny screens, ACMOUNT puts critical warnings right where you’re working—on the smart clamps themselves. These aren’t decorative lights; they’re your frontline defense against electrical disasters. Understanding the difference between solid and flashing red prevents irreversible damage to your vehicle’s sensitive computer systems.
Solid Red Light: Reverse Polarity Emergency
A steady red glow means you’ve accidentally reversed the clamps—a terrifyingly common mistake when visibility is poor. The red clamp is touching your battery’s negative terminal while the black clamp connects to positive. This isn’t just “wrong”; it sends current backward through your vehicle’s wiring, potentially destroying the ECU, infotainment system, or ABS module.
Immediate action checklist:
– Disconnect BOTH clamps completely—never just one
– Verify terminal markings: Positive (+) usually has a red plastic cover or raised “+” symbol
– Reconnect in this exact order: Red clamp to positive terminal FIRST, then black clamp to negative terminal or bare engine metal
– Wait 3 seconds: The red light should vanish instantly if corrected
Critical visual cue: If your vehicle’s battery terminals are corroded (white/green crust), clean them with a wire brush before reconnecting. Even thin corrosion layers cause false polarity readings.
Flashing Red Light: Short Circuit Danger
Rapid red flashing indicates a life-threatening electrical situation—your jump starter detected a short circuit or dangerous current overload. This typically happens when:
– Clamps accidentally touch each other while connecting
– Severely damaged battery cables create internal shorts
– Metal tools bridge the terminals during connection
– Your car battery is completely dead (sulfated)
Stop immediately: Continuing could melt clamp wires, destroy the jump starter’s internal cells, or ignite hydrogen gas from the battery. Disconnect both clamps, inspect for metal shavings or frayed cables, and never reconnect until the flashing stops.
Fix Reverse Polarity in Under 30 Seconds
Swapping clamp positions takes less time than calling roadside assistance but prevents thousands in repairs. Follow this military-grade procedure to eliminate solid red warnings every time.
Foolproof Reconnection Sequence
- Disconnect both clamps and step away from the vehicle for 5 seconds—this resets the safety system
- Locate positive terminal markings: Many assume positive is always on the right, but manufacturers vary (e.g., some German cars reverse this)
- Attach red clamp FIRST to the positive terminal—ensure metal teeth bite through corrosion
- Position black clamp on negative terminal or unpainted engine block (6+ inches from red clamp)
- Wait for red light to extinguish before attempting jump start
Pro tip: Apply red electrical tape to your vehicle’s positive terminal. During stressful situations, this visual marker prevents 90% of polarity errors. Never rely on clamp color alone—verify terminal markings every time.
Stop Flashing Red Lights from Short Circuits
Flashing red requires immediate intervention—it means your ACMOUNT detected current exceeding 3,000 amps (the 26,800mAh model’s peak capacity). This isn’t user error; it’s your device preventing a fire.
Short Circuit Recovery Protocol
Step 1: Isolate the source
– Check for clamp tips touching each other (common when working in tight engine bays)
– Inspect battery cables for exposed wires or melted insulation
– Remove all metal objects near terminals (wrenches, jewelry, etc.)
Step 2: Clean critical contact points
– Mix 1 tbsp baking soda with 1 cup water
– Scrub terminals with wire brush until shiny metal appears
– Dry thoroughly with microfiber cloth—moisture causes false shorts
Step 3: Reconnect with spacing
Position clamps at least 6 inches apart before attaching. If flashing persists after cleaning, your car battery likely has internal damage requiring replacement—do not force jump starts.
Recover from Critical Battery Levels
Your ACMOUNT won’t function if its internal lithium polymer cells drop below 3% charge. The red light here isn’t a clamp issue—it’s the unit screaming for power.
Deep Discharge Rescue Method
For units showing 0% or no display:
1. Use ONLY 5V-2A or 9V-2A USB-C adapters (phone chargers often lack sufficient power)
2. Charge for 15+ minutes before attempting reset—cells need minimum voltage to wake
3. Hold power button 8-10 seconds until LCD flickers (this resets protection circuits)
4. Charge to 50% minimum before jump attempts—starting at low charge stresses cells
Warning: Never jump-start while charging. The knowledge base confirms this can trigger thermal runaway in lithium cells. Allow full cooldown after engine start before recharging.
Reset Persistent Red Light Warnings
When red lights persist after correcting polarity and charging, your ACMOUNT’s protection system locked up. Hardware—not firmware—controls these safety features, so standard reboots won’t work.
Hard Reset Procedure That Works
- Remove ALL connections (USB cables, clamps, devices)
- Press and hold power button for exactly 8-10 seconds—no more, no less
- Wait 5 seconds for internal capacitors to discharge
- Charge via USB-C for 30 minutes using a quality adapter (5V-2A minimum)
- Test with flashlight function before jump attempts—confirms system recovery
Critical note: If red light remains after this sequence, internal components failed. Do NOT disassemble—lithium cells pose fire risks. Proceed directly to warranty contact.
Prevent 90% of Red Light Warnings
Smart habits take seconds but prevent hours of roadside panic. These storage and pre-use protocols align with ACMOUNT’s safety architecture.
Pre-Jump Checklist
- Verify 50%+ charge on LCD—never start below 20% (triggers over-current protection)
- Inspect clamp springs—weak tension indicates worn components needing replacement
- Clean terminals with dry cloth if storage environment is humid
- Confirm no metal debris near battery posts before connecting
Long-Term Storage Protocol
Store at exactly 60% charge in climate-controlled spaces (garages exceed safe 0-40°C charging range). Check monthly during temperature extremes—lithium cells degrade rapidly below freezing. For every 10°C above 25°C, self-discharge doubles per the knowledge base.
When to Contact ACMOUNT Support
If red lights persist after completing all troubleshooting steps, internal failure requires professional replacement. ACMOUNT’s 3-year warranty covers these exact scenarios:
Warranty-eligible failures:
– Red light with correct polarity and clean connections
– LCD showing 0% after 30+ minutes of charging
– Clamp LEDs illuminating without connected loads
– Unit failing to hold charge above 80% capacity
Contact process:
1. Email acmount@hotmail.com with:
– Serial number (inside battery compartment)
– Purchase receipt (Amazon order # accepted)
– 10-second video showing red light behavior
2. Include photos of clamp connections proving correct polarity
3. Expect 24-48 hour response for warranty claims
Do NOT attempt: Disassembly voids warranty and risks lithium cell puncture. Never use non-USB-C chargers—the knowledge base confirms improper voltage destroys protection circuits.
Key Takeaway: Your ACMOUNT jump starter red light is a guardian, not a glitch. Whether signaling reversed clamps, deadly shorts, or critical low charge, these crimson warnings prevent catastrophic damage. Master these model-specific fixes—particularly the 8-10 second hard reset for persistent issues—and that red light transforms from panic trigger to your most reliable safety partner. Always carry baking soda for terminal cleaning and a quality USB-C charger; they’re the difference between a 60-second fix and a $500 tow truck ride. When in doubt, disconnect, reset, and contact support—your vehicle’s electronics will thank you.