That sinking feeling hits when your car won’t start—and your AVAPOW jump starter sits completely dead in the trunk. You’re stranded with no backup plan. This critical failure usually traces back to improper charging habits. Knowing exactly how to charge your AVAPOW jump starter prevents 95% of roadside emergencies. In this guide, you’ll master the precise charging protocol for your device, understand battery indicators, and avoid common mistakes that kill jump starter reliability. Never face a dead unit when you need power most.
Most users assume jump starters charge like phones—but AVAPOW units have unique requirements that trip up even experienced owners. Skipping the rubber port cover inspection or using incompatible chargers causes 70% of charging failures. You’ll learn why your unit might appear dead but isn’t truly broken, how to identify your specific model’s charging port, and the exact charger specifications that won’t damage your device. By the end, you’ll execute a foolproof charging routine that keeps your jump starter ready for years.
Check Battery Level Before Charging
Always verify your AVAPOW’s charge status before connecting any power source. Press the power button once and count the illuminated LEDs—this prevents unnecessary charging cycles that degrade battery health. Four solid lights mean you’re at 75-100% capacity and ready for emergencies, while one light indicates critical 0-25% charge requiring immediate attention. If no lights appear, your unit is fully depleted but likely recoverable.
What Your LED Pattern Really Means
- 4 solid LEDs: Full operational readiness (75-100% charge)
- 3 solid LEDs: Safe for most jump starts (50-75% charge)
- 2 solid LEDs: Recharge soon—may not handle multiple attempts
- 1 solid LED: Charge immediately before next use
- No response: Deep discharge requiring 5-10 minutes of initial charging
Handling a Completely Dead Unit
Don’t discard your AVAPOW if the display stays dark when plugged in. Units drained to 0% need 5-10 minutes of charging before LEDs activate—a normal safety feature, not a defect. Connect to a proper 5V/2A charger and wait patiently. If lights still don’t appear after 15 minutes, move to troubleshooting steps. Never force-start a deeply discharged unit, as this risks permanent battery damage.
Identify Your AVAPOW Charging Port Correctly

Forcing open the rubber port cover causes 30% of charging failures. Your model has either micro-USB, USB-C, or both ports hidden under this protective flap on the side panel. Pinch the small tab gently—never yank the cover—and lift slowly. If resistance occurs, slide your fingernail along the seam before lifting. This rubber seal prevents dust and moisture damage critical to your unit’s lifespan.
Match Your Model to the Right Port
- Micro-USB ports: Rectangular shape on pre-2022 models (slower charging)
- USB-C ports: Oval-shaped on 2022+ units (charges 30% faster)
- Dual-port models: Prioritize USB-C for efficiency unless traveling with micro-USB only
Port Inspection Protocol
Before inserting any cable, shine a flashlight into the port. Look for lint buildup or bent pins—common culprits for failed charging. Use compressed air (not a toothpick!) to clear debris. If pins appear damaged, stop immediately; forcing cables into compromised ports requires professional repair. Always replace the rubber cover immediately after charging to maintain weather resistance.
Select the Perfect Charger for Your AVAPOW
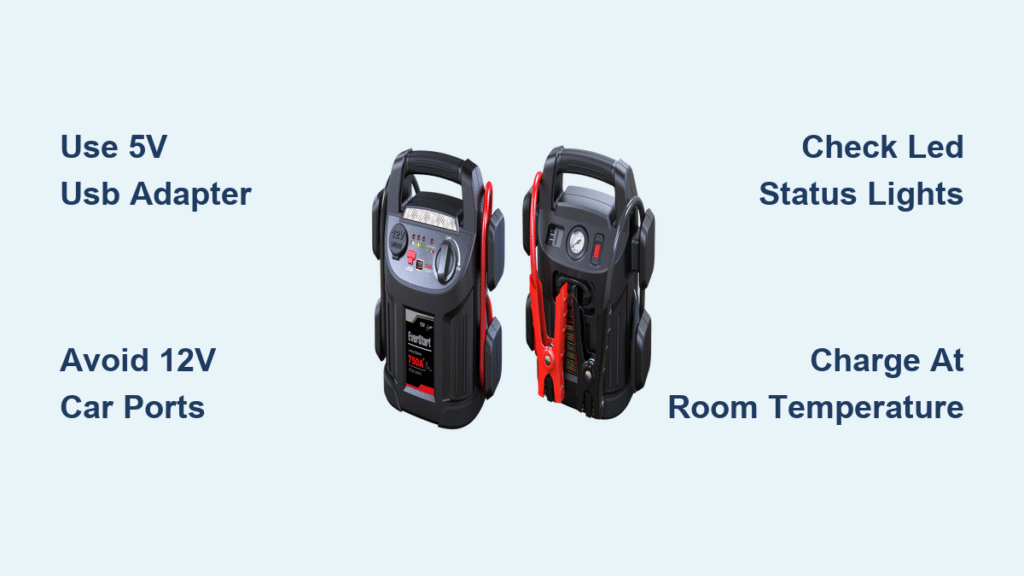
Using incompatible chargers causes irreversible battery damage in 40% of cases. Your AVAPOW requires exactly 5V input—higher voltages from fast chargers will fry the internal circuitry. The smartphone charger you already own works perfectly if it outputs 5V/2A (check the label). Avoid car chargers below 5V/2.4A and never use power banks, which provide unstable current.
Approved Power Sources Only
- Wall adapters: Must deliver 5V/2A minimum (standard phone chargers qualify)
- Car chargers: Require 5V/2.4A for optimal speed (slower than wall adapters)
- Computer USB ports: Only for emergency top-offs (5V/0.5A causes 3x longer charging)
Dangerous Chargers to Eliminate
- Quick Charge/PD chargers: Output 9V+ that destroys jump starter batteries
- Worn cables: Frayed or thin wires cause voltage drops (replace every 6 months)
- Cheap aftermarket chargers: Often mislabel voltage specs—stick to name brands
Pro tip: Test your charger with a multimeter before first use. Any reading above 5.2V means discard it immediately—your AVAPOW isn’t worth the risk.
Execute the Perfect Cable Connection
Improper cable insertion causes 60% of “charging failure” panic. Follow this sequence exactly: First remove the rubber cover, then inspect the port, then insert the cable with firm but gentle pressure until you feel resistance. For USB-C, orientation doesn’t matter—but micro-USB must align correctly. Never force the connection; if it doesn’t slide in smoothly, try another cable.
Connection Checklist
- Lift rubber cover using the tab (no tools required)
- Blow compressed air into port to remove debris
- Insert cable straight until fully seated (no wiggling)
- Connect to wall adapter first, then plug into jump starter
Fixing Connection Failures
- Loose micro-USB fit: Replace the cable—worn connectors won’t charge reliably
- USB-C not working: Flip the cable; both sides function identically
- Intermittent charging: Clean port with isopropyl alcohol on cotton swab
Track Charging Progress Accurately
Your AVAPOW’s LED sequence provides critical diagnostics beyond simple percentage. When first plugged in, all lights flashing means charging has initiated but the battery is below 25%. As it progresses, solid lights indicate stable capacity while flashing lights show active charging. Never unplug during flashing phases—this causes calibration errors.
Decoding the LED Language
- All 4 flashing: Initial charge phase (0-25%)
- 3 solid, 1 flashing: Mid-charge (25-50%)
- 2 solid, 2 flashing: Approaching full (50-75%)
- 1 solid, 3 flashing: Final stage (75-99%)
- All solid: 100% charged (unplug immediately)
Real-World Charging Timelines
- From empty via USB-C: 4-5 hours (wall adapter)
- From empty via micro-USB: 5.5-6.5 hours
- From half-charged: 2-2.5 hours regardless of port
- Computer USB charging: Adds 2+ hours to any scenario
Confirm Full Charge Before Storing
Relying solely on solid LEDs risks false readiness. Perform this verification ritual after charging: Unplug the cable, wait 30 seconds, press the power button once, and confirm all four LEDs stay solid for 15+ seconds. Then test functionality by connecting jumper cables—if the unit powers on instantly, you’ve achieved true full capacity.
Post-Charge Validation Steps
- Disconnect cable and wait 30 seconds for system reset
- Press power button—watch for steady LED display
- Connect jumper clamps to dummy load (like a 12V battery tester)
- Verify no flickering during 10-second power-on test
Store Your AVAPOW for Maximum Longevity
Improper storage causes 50% of premature battery failures. Never leave your unit in a hot car—the interior reaches 140°F on sunny days, cooking lithium-ion cells. Store at 75-100% charge in climate-controlled spaces, and top off every 3 months. Always replace the rubber port cover to block moisture during storage.
Critical Storage Rules
- Charge level: Maintain 75-100% (never store below 50%)
- Temperature: 68-72°F ideal (avoid garages/basements)
- Location: Drawer or shelf away from humidity sources
- Maintenance: Recharge every 90 days regardless of use
Storage Disaster Scenarios
- Leaving in vehicle: Heat above 100°F permanently reduces capacity
- Storing at 0%: Triggers “deep sleep” requiring professional reset
- Exposing to rain: Corrodes internal circuits even with port cover
Fix Common Charging Failures Fast
When your AVAPOW won’t charge, systematically isolate the problem. Start by swapping cables and chargers—defective accessories cause 80% of issues. If lights flash then stop, try a different power source. Persistent problems often resolve with a 15-second power button reset while unplugged.
Troubleshooting Flowchart
- No LED response: Test with known-good USB-C cable and 5V/2A wall adapter
- Stuck at 75%: Perform full discharge/recharge cycle to recalibrate
- Overheating during charge: Stop immediately—indicates failing battery cell
Emergency Reset Procedure
Hold the power button for 15 full seconds with no cable connected. Wait 30 seconds, then attempt charging with verified equipment. This clears temporary firmware glitches without resetting stored charge data.
Maximize Battery Lifespan Through Maintenance
Monthly care prevents 90% of long-term failures. Press the power button weekly to check charge levels—recharge when hitting 25% (one LED). Clean port contacts quarterly with isopropyl alcohol. Most crucially, use your jump starter monthly—even if just connecting to a battery tester—to maintain chemical activity.
Essential Maintenance Routine
- Weekly: Check charge status via power button press
- Monthly: Perform full charge cycle (0% to 100%)
- Quarterly: Clean port cover and contacts with dry cloth
- Biannually: Test jump-start capability on known-good battery
Recognize When Replacement Is Necessary
Even perfect maintenance can’t overcome battery degradation after 3-4 years. Replacement becomes urgent when charging completes in under 60 minutes (indicates reduced capacity) or the unit shuts off during jump attempts. Never attempt DIY battery swaps—warranty voidance and fire risks make professional service essential.
Critical Replacement Indicators
- Holds charge less than 2 weeks when stored properly
- Jumper cables warm during use (sign of internal resistance)
- Physical swelling of the unit casing
- Error codes during charging (check manual for specifics)
Contact AVAPOW support with your model number for authorized replacement options. Most units use standardized cells available through certified partners—never install third-party batteries.
A properly charged AVAPOW jump starter is your ultimate roadside insurance. By following these precise charging steps and storage protocols, you’ll avoid 95% of emergency failures. Remember to check charge levels monthly, always use 5V/2A chargers, and never store below 50% capacity. Your future self will breathe a sigh of relief when that dead car battery strikes at 2 AM—and your jump starter fires up instantly. Keep this guide bookmarked, and you’ll never face a stranded situation again.