
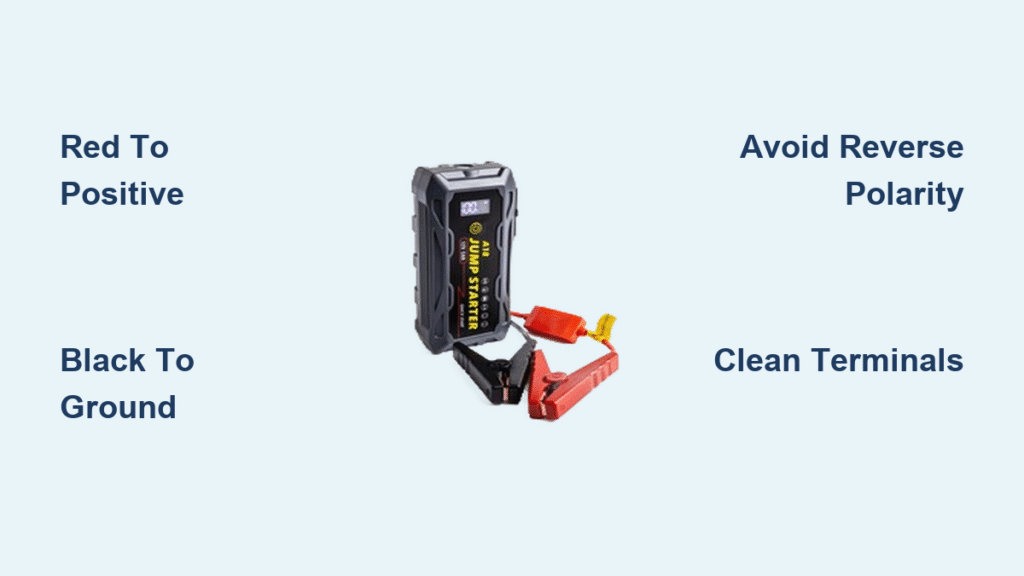
Your car won’t start, the headlights are dim, and you’re stuck in a parking lot with a dead battery. Before you panic, knowing how to correctly connect a jump starter’s positive and negative terminals could save your day—and your vehicle’s expensive electronics. One wrong move with these connections can turn a simple jump start into a thousand-dollar repair bill. This guide walks you through every critical detail of car jump starter positive and negative connections, from identifying terminals to avoiding dangerous mistakes that could damage your vehicle or injure you.
Identify Battery Terminals in Seconds
Visual Terminal Markers You Can’t Miss
Your vehicle’s battery has two distinct terminals with specific visual cues. The positive terminal features a “+” symbol stamped nearby and typically has a red plastic cover or red cable attached. The negative terminal displays a “-” symbol and connects to black cables or has black coloring. These markings aren’t just suggestions—they’re critical safety indicators.
Terminal size reveals polarity: The positive post measures 3/4 inch in diameter, noticeably larger than the negative post at 5/8 inch. This size difference prevents accidental reverse connections with properly designed equipment. Always verify both the symbol and physical size before attaching any clamps.
Hidden Terminal Locations in Modern Vehicles
Many newer cars hide batteries in trunks or under seats for better weight distribution. Look for remote jump posts under the hood marked with “+” and “-” symbols—these connect directly to your battery through hidden cables. Luxury vehicles like BMWs require ignition position 2 before attempting any jump start, while hybrids only allow jumping the 12V system, never the high-voltage battery.
Correct Connection Sequence That Prevents Damage

Step-by-Step Hookup Process for Safety
Follow this exact order every time you use your car jump starter positive and negative connections:
- Red clamp to dead battery positive (+) terminal first
- Black clamp to metal ground—engine block or chassis, NOT battery negative
- Double-check clamp bite—solid metal contact with no paint interference
- Power on jump starter and wait for green indicator
- Crank engine for 5-6 seconds maximum
- Remove black clamp first, then red clamp
Why This Order Saves Your Vehicle’s Electronics
Connecting positive first prevents dangerous sparking directly at the battery, where hydrogen gas might accumulate. The final negative connection to a ground point away from the battery eliminates explosion risk while ensuring proper current flow through your vehicle’s electrical system. This sequence isn’t arbitrary—it follows the fundamental electrical principles of current flow from positive to negative.
Avoid Reverse Polarity Disasters That Cost Thousands
Warning Signs of Wrong Connection
Modern jump starters include safety systems that beep loudly and flash red LEDs if you reverse the clamps. Never ignore these warnings—attempting to start with reversed polarity causes immediate electrical arcing, potential clamp welding to terminals, and catastrophic damage to your vehicle’s computer systems.
Damage Prevention Systems in Quality Jump Starters
Top-tier jump starters feature multiple protection layers:
– Automatic shut-off that blocks power delivery when polarity is reversed
– Surge protection safeguarding delicate electronics from voltage spikes
– LED confirmation requiring green light before allowing current flow
– Audible alarms alerting you before damage occurs
Clean Terminal Connections for Maximum Power Transfer
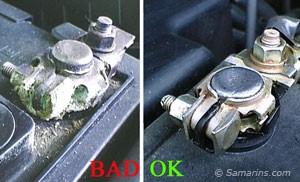
Corrosion Removal Techniques That Work
White or blue crusty buildup on terminals prevents proper electrical contact. Clean both battery posts and clamp contact surfaces using a wire brush or terminal cleaner. After cleaning, apply a thin coat of dielectric grease to prevent future corrosion while maintaining conductivity.
Clamp Positioning Tricks for Better Grip
Rotate clamps slightly after attachment to ensure metal-to-metal contact through any remaining surface contamination. If clamps won’t grip tightly, reposition for better angle—proper spring tension should prevent hand-removal. Check that your clamps have at least 400-amp capacity for passenger vehicles to handle the current demand.
Specialized Battery Configurations Demanding Extra Care
Side-Post Batteries Common in GM Vehicles
Some GM vehicles use recessed side terminals requiring adapter cables or extended-reach clamps. These connections follow the same positive-first sequence but may need careful cable routing to avoid interference with moving engine parts. Ensure your jump starter’s clamps can open at least 2 inches to fit these specialized terminals.
Dual Battery Systems in Trucks and Heavy-Duty Vehicles
Trucks and heavy-duty vehicles often feature parallel battery setups. Always connect to the designated primary battery—look for markings or consult your manual. Both positive terminals connect together, as do both negatives, creating a single larger power source. Attempting to jump from the secondary battery could damage isolation systems.
Troubleshooting Poor Connections That Prevent Starting
Symptoms of Inadequate Contact
Your jump starter shows full charge, but the engine won’t crank? Watch for these signs:
– Rapid clicking from starter solenoid indicates insufficient current flow
– Headlights stay dim during connection attempt shows poor grounding
– No response at all suggests complete circuit failure
Connection Improvement Steps That Deliver Results
Clean ground points with sandpaper if painted surfaces prevent contact. Choose unpainted metal within 18 inches of the battery for optimal current path. Tighten any loose battery terminal connections before attempting another start. Remember that cable gauge matters—4 AWG minimum ensures sufficient current flow.
Safety Equipment Checklist That Could Save Your Life
Essential Protective Gear Before Starting
Before touching any terminals:
– Safety glasses or face shield protect against battery acid spray
– Insulated gloves rated for electrical work prevent shock
– Remove all jewelry—metal rings create dangerous short circuits
– Ensure ventilation—never jump start in enclosed spaces
Post-Jump Procedures for System Stability
After successful engine start:
– Let engine idle 15-30 minutes to partially recharge the battery
– Test all electrical systems—windows, radio, lights for proper function
– Drive to service center for complete battery and charging system test
– Recharge jump starter immediately following use
Equipment Specifications That Ensure Reliable Performance

Quality Clamp Requirements You Should Demand
Premium jump starter clamps feature:
– Copper-alloy jaws for maximum conductivity
– 400-amp minimum rating for passenger vehicles
– 2-inch jaw opening to fit various terminal sizes
– Heavy-duty insulation rated for extreme temperatures
Cable Specifications That Make the Difference
Inferior cables reduce available starting power. Look for:
– 4 AWG wire minimum for standard vehicles
– 12-24 inch length optimal for portable units
– Oil-resistant insulation preventing deterioration
– Temperature rating from -40°F to 221°F
Maintenance for Reliable Performance When You Need It Most
Monthly Equipment Inspection Routine
Test your jump starter monthly to ensure readiness:
– Check cable continuity using multimeter for breaks
– Verify clamp spring tension maintains strong grip
– Inspect insulation for cracks or exposed wire
– Test indicator lights and audible alarms function
Terminal Maintenance Schedule to Prevent Future Failures
Clean battery terminals every 3-6 months using wire brush and terminal cleaner. Apply protective coating after cleaning, and replace any damaged cables or terminals immediately. Remember that proper maintenance of your car jump starter positive and negative connections ensures they’ll work when you need them most.
Emergency Alternatives When Standard Methods Fail
When Jump Starters Won’t Work
If your jump starter won’t work:
– Battery charger connection follows same polarity rules but can be connected with power off
– Jumper cables from another vehicle require identical positive-first sequence
– Professional roadside assistance recommended for hybrid or luxury vehicles with complex systems
Memory Preservation Tips for Modern Vehicles
Modern vehicles lose radio presets and seat memory during battery disconnection. Use an OBD-II memory saver device that plugs into your diagnostic port, maintaining 12V power to computer systems while you perform the jump start. Luxury vehicles often require special procedures to prevent ECU damage.
Key Takeaway: Correct car jump starter positive and negative connections follow a simple rule—red to positive first, black to ground last. This sequence prevents sparks at the battery, eliminates explosion risks, and protects your vehicle’s expensive electronics. Master this fundamental skill once, and you’ll confidently handle dead battery situations anywhere, anytime. Remember that proper connection isn’t just about getting your car started—it’s about protecting your vehicle’s sophisticated electrical systems from potentially catastrophic damage.


