You’re late for work, your car won’t start, and the only person around is your frustrated boss pacing near your stalled vehicle. With a Craftsman jump starter in your trunk, you can restore power in minutes—no waiting for roadside assistance or begging strangers for jumper cables. These compact powerhouses deliver enough amperage to restart most vehicles solo, turning a panic-inducing dead battery into a minor inconvenience. Whether you just bought your first jump pack or rediscovered last year’s model gathering dust, this guide reveals exactly how to use your Craftsman jump starter safely and effectively when every second counts.
Unlike traditional jumper cables requiring a second vehicle, Craftsman’s lithium-ion jump starters provide instant independence. But improper use risks damaging your vehicle’s electronics or causing dangerous sparks. Master these steps once, and you’ll never dread a dead battery again. You’ll learn precise connection sequences, model-specific power limits, and the critical maintenance habits that ensure your jump starter works when -4°F winter mornings leave your battery lifeless.
Charge Your Craftsman Jump Starter Before First Emergency
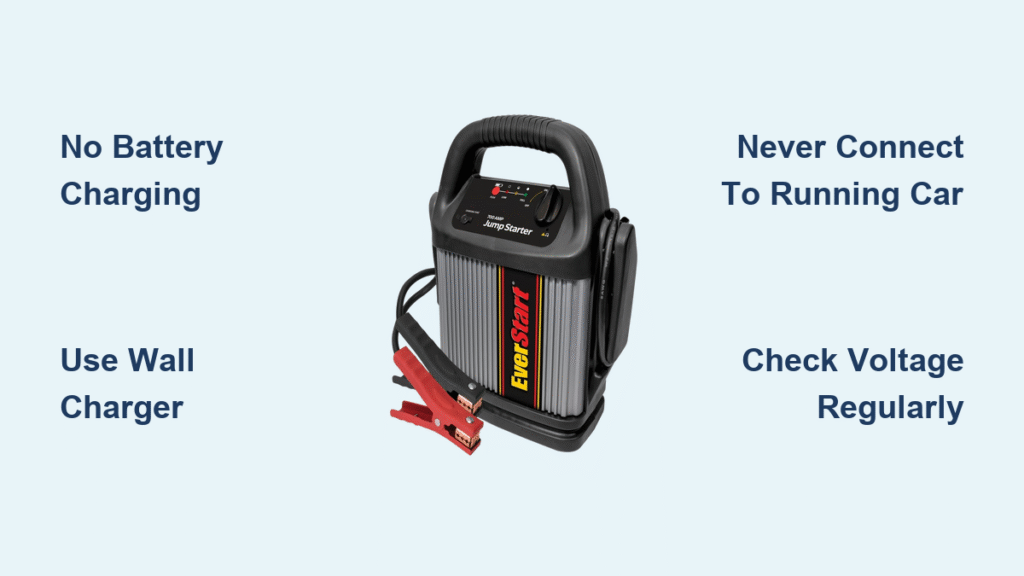
Skip this step and you’ll get stranded with dead electronics—the #1 mistake new owners make. Your Craftsman arrives partially charged, but always complete a full initial charge using the included AC adapter. Plug into any standard household outlet and let it run until indicators confirm 100% capacity. Charging times vary significantly by model:
- CMXCESM256 (1000A): 4-5 hours
- CMXCESM259 (1500A): 5-6 hours
- CMXCESM260 (2000A): 6-7 hours
Pro tip: Set a recurring monthly phone alert to check charge levels. Lithium-ion models self-discharge slowly (5-10% monthly), but storing below 25% charge permanently damages battery capacity.
Decode Your Charge Status Accurately
Misreading indicators causes failed jump attempts. Match your model’s display to these patterns:
LCD Screen Models (CMXCESM260)
– 100%: Ready for immediate use
– 75%: Sufficient for 2-3 starts
– 50%: Recharge after next use
– 25% or lower: Charge immediately
LED Indicator Models (CMXCESM256/259)
– Solid green: Fully charged and ready
– Flashing red: Currently charging
– Solid red: Critical low charge (recharge now)
– No lights: Completely dead—requires extended charging
Warning: Never attempt a jump if indicators show below 25% charge. You risk draining the jump starter completely, leaving no power for subsequent attempts.
Execute the 30-Second Pre-Jump Safety Checklist
Complete this before touching any cables—skipping steps risks electrical shock or battery explosion. In under half a minute, verify these critical conditions:
- Park securely: Engage parking brake on level ground
- Power down: Turn off headlights, radio, and all accessories
- Remove conductors: Take off watches, rings, or metal bracelets
- Ventilate area: Never jump in enclosed garages (hydrogen gas buildup risk)
- Inspect battery: Look for cracks, leaks, or heavy corrosion
Identify Dangerous Battery Conditions
Stop immediately if you spot these red flags:
– White crystalline corrosion around terminals (clean with wire brush first)
– Swollen or cracked case (requires professional replacement)
– Exposed lead terminals (cover with insulating tape before connecting)
– Low electrolyte levels (visible below plates in serviceable batteries)
Critical note: Heavy corrosion blocks electrical flow. Use the included wire brush or a baking soda/water solution (1 tbsp per cup) applied with an old toothbrush—never connect clamps over crusty buildup.
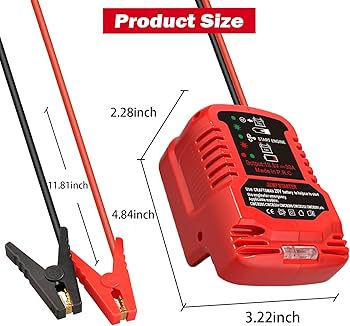
Connect Your Craftsman Jump Starter Without Sparks
Follow this exact sequence to prevent dangerous arcing. Incorrect connections can fry your vehicle’s computer systems or ignite hydrogen gas from the battery.
Position for Safe Operation
- Place your Craftsman unit on stable ground—never on the engine block
- Extend cables fully to avoid tension during connection
- Verify clamps open wide enough to grip terminal posts securely
Connect Red Positive Clamp First
Target the positive (+) battery terminal:
– Locate the red cover or “+” symbol
– Squeeze clamp jaws open and bite firmly onto clean metal
– Wiggle gently to confirm solid metal-to-metal contact
– No spark should occur—if you see sparks, disconnect immediately and clean terminals
Secure Black Negative Clamp Correctly
Choose your safest grounding point:
Option 1: Negative battery terminal
– Only use if terminal is clean and undamaged
– Higher spark risk near battery gases
Option 2: Engine block ground (recommended)
– Clamp to unpainted metal surface 18+ inches from battery
– Engine brackets or bolt heads work perfectly
– Reduces explosion risk by keeping sparks away from battery
Listen for safety alerts: CMXCESM259/260 models emit warning beeps if clamps reverse polarity—disconnect and reconnect correctly.
Start Your Engine in Under 90 Seconds

Timing is critical—delayed starts waste precious power. Modern vehicles require precise sequencing to avoid draining your jump starter.
Activate Power Safely
- Press and hold the power button for 3 full seconds
- Wait for solid green light (3-5 seconds) before starting
- Confirm dashboard lights illuminate normally
Crank with Precision Timing
Follow these engine-start rules:
– First attempt: Crank within 30 seconds of power-on
– Maximum crank: 5 seconds per attempt (longer strains motors)
– Cool-down period: Wait 2-3 minutes between tries
– Hard limit: Stop after 4 attempts to prevent damage
Pro technique: Turn key to “ON” position for 2 seconds to prime fuel pumps before cranking—this cuts required cranking time by 40% for easier starts.
Disconnect and Recharge Within 5 Minutes
Leaving clamps connected risks reverse charging—a common cause of jump starter failure after successful starts.
Remove Cables in Reverse Order
- Turn OFF jump starter power switch immediately after engine runs
- Remove black clamp first from ground point
- Remove red clamp second from positive terminal
- Store cables in molded compartments to prevent damage
- Close hood carefully—never pinch cables against battery
Recharge Within the Critical Window
Lithium-ion batteries degrade rapidly when depleted:
– Plug into charger within 30 minutes of use
– CMXCESM260 requires full 7-hour charge after heavy use
– Never store below 50% charge—this permanently reduces capacity
Winter tip: If temperatures are below freezing, warm the unit indoors for 15 minutes before charging.
Fix Common Craftsman Jump Starter Failures
Diagnose problems in under 60 seconds with this field-tested troubleshooting flow.
Jump Starter Won’t Power On
Quick fixes:
– Recharge for 1 hour minimum (even if indicators show charge)
– Press power button firmly for 5+ seconds (weak presses often fail)
– Warm unit to room temperature if below 32°F—cold cripples lithium-ion performance
Engine Cranks But Won’t Start
Check these often-missed factors:
– Insufficient peak amps: CMXCESM256 (1000A) struggles with V8 engines
– Poor ground connection: Reclamp black lead to bare engine metal
– Battery failure: Jump starter works, but battery can’t hold charge (replace battery)
– Wait period violation: Attempting restarts too soon (wait 3+ minutes)
Cold weather hack: CMXCESM260’s SOS light generates enough heat to warm the jump starter in emergencies—activate for 60 seconds before starting.
Match Your Craftsman Model to Your Vehicle
Using undersized amps risks failed jumps—know your engine’s requirements.
Select Correct Power Level
Peak amp guidelines:
– 1000A (CMXCESM256): 4-cylinder cars up to 2.5L engines
– 1500A (CMXCESM259): V6 trucks and SUVs up to 4.0L
– 2000A (CMXCESM260): Full-size pickups and diesels up to 6.5L
Critical cold-weather adjustment:
– At 0°F, add 500 peak amps to your requirement
– CMXCESM256 becomes marginal below 20°F—upgrade for winter
Pro tip: The CMXCESM260’s 40-start capacity makes it ideal for fleet vehicles—mechanics report 20+ jumps daily during winter months.
Maintain Your Craftsman for 5+ Years Reliability
Monthly care prevents 95% of jump starter failures—this routine takes 8 minutes.
Essential Storage Protocol
Every 30 days:
– Check charge level (recharge if below 50%)
– Clean clamp teeth with wire brush (corrosion blocks conductivity)
– Test work light function (confirms circuit integrity)
– Inspect cables for cuts or fraying
Optimal storage conditions:
– Temperature: 50-70°F (never below -4°F or above 140°F)
– Charge level: 60% for longest battery life
– Position: Upright in climate-controlled space (not trunk)
Warning: Storing fully charged (>90%) or completely drained (<10%) permanently reduces capacity—aim for the 50-70% sweet spot.
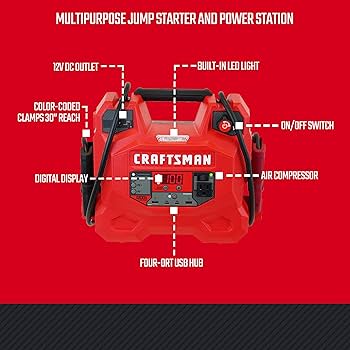
Activate Emergency Features Beyond Jumping
Your Craftsman jump starter is a multi-tool during breakdowns—know these life-saving functions.
Master the LED Work Light
- CMXCESM256: 100-lumen steady beam for 10 hours (sufficient for tire changes)
- CMXCESM259: Strobe mode deters roadside threats (press light button 3x)
- CMXCESM260: SOS mode (automatic distress signal—press 5x)
Pro tip: In blizzards, the CMXCESM260’s 300-lumen light melts snow around your work area—aim downward for instant visibility.
Power Critical Devices When Stranded
Prioritize these essential charges:
– Cell phones: 3 full charges on CMXCESM256 (use included USB-C cable)
– GPS units: Plug into 12V DC outlet (CMXCESM259/260 only)
– Heated vests: Run 12V models for 2+ hours during winter emergencies
Remember: The CMXCESM260’s 200W inverter powers mini-fridges—ideal for keeping insulin cool during roadside waits.
Your Craftsman jump starter transforms dead-battery panic into confident self-reliance. By charging monthly, storing at 60% capacity, and following the precise connection sequence, you’ll ensure this compact device delivers life-saving power for years. Remember the golden rule: red clamp to positive first, black to ground second—then wait for the green light before cranking. Keep your model matched to your vehicle’s engine size, and you’ll never need to wave down strangers for help again. That $150 investment isn’t just a gadget; it’s your guarantee of getting home safely when the unexpected strikes.