
That familiar frustration hits when your Gooloo jump starter refuses to accept a charge just when you need it most. You plug it in, but the indicator lights stay dark or behave erratically—no reassuring glow signaling it’s powering up for your next roadside emergency. When your gooloo battery charger not charging, it leaves you vulnerable to being stranded with a dead car battery.
Before you consider replacing your entire unit, understand that most charging failures stem from simple, fixable issues you can address in minutes with basic tools. This guide delivers proven troubleshooting steps specifically for Gooloo models, walking you through systematic checks from power source verification to battery health assessment. You’ll learn to diagnose whether the problem lies with your charger, cables, or the jump starter itself—and most importantly, how to get your Gooloo back in action before your next emergency.
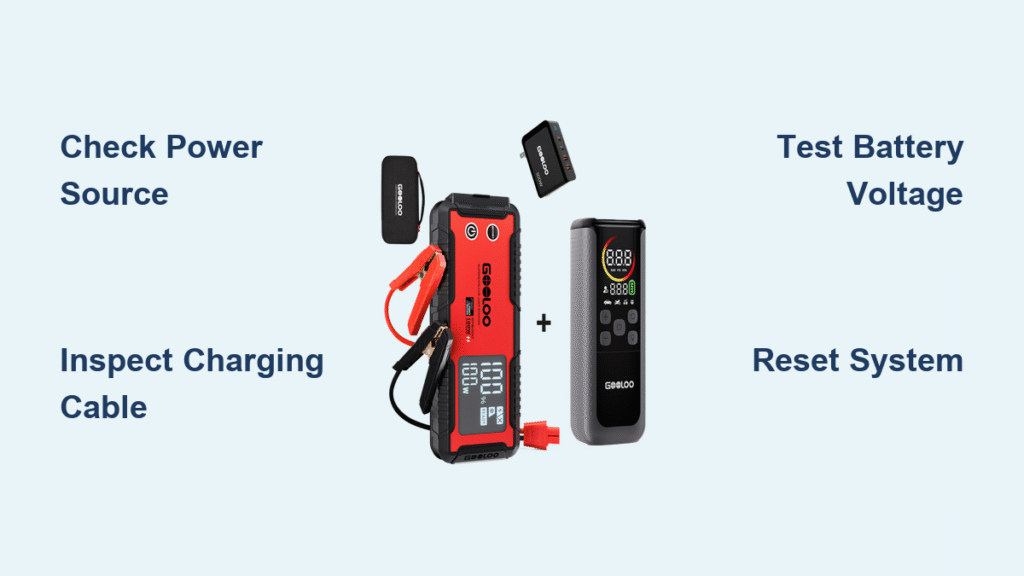
Power Source and Cable Verification
Begin with these critical 60-second checks before moving to more complex diagnostics—most gooloo battery charger not charging issues originate here.
Test Your Electrical Foundation
Don’t assume your wall outlet works properly. Plug in another device like a phone charger to confirm power delivery. Try different outlets throughout your home, as some circuits may have tripped breakers. If using an extension cord, eliminate it completely and plug the Gooloo charger directly into the wall socket. Remember that standard US outlets should provide 110-120V AC power—anything outside this range can prevent proper charging.
Inspect Charging Components Visually
Examine both ends of your Gooloo charging cable for telltale damage signs:
– Frayed insulation exposing copper wires
– Bent, corroded, or misaligned charging pins
– Loose connections where the cable meets the plug
– Burn marks or melting on either the charger body or jump starter port
Pro tip: Gently wiggle the cable while connected to the Gooloo unit. If charging indicators flicker or activate intermittently during movement, you’ve identified a faulty cable connection that needs replacement.
Battery Health Assessment Procedures
Your Gooloo’s lithium-ion battery naturally degrades over time, eventually losing its ability to accept and hold a charge—this is the second most common reason for gooloo battery charger not charging scenarios.
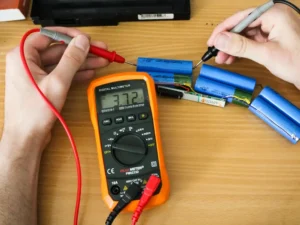
Voltage Testing Protocol
- Disconnect the charger and wait five minutes to stabilize the system
- Set multimeter to DC voltage at a 20V range
- Touch probes to the battery terminals inside the charging port
- Interpret readings:
– 12.6V or higher = Healthy battery
– 11.8-12.5V = Weak but potentially recoverable
– Below 11.8V = Battery likely needs replacement
According to jump starter fundamentals, a significantly lower voltage than the rated specification indicates battery degradation that prevents proper charging cycles.
Recognize Capacity Failure Signs
Watch for these telltale symptoms of battery deterioration:
– Completes charging cycle unusually fast but drains immediately
– Shows “fully charged” status after just 10-15 minutes of charging
– Struggles to start vehicles it previously handled with ease
– Requires increasingly frequent charging between uses
These behaviors signal that your battery can no longer maintain sufficient charge capacity, explaining why your gooloo battery charger not charging properly.
Charger Component Troubleshooting
When power sources and cables check out but your Gooloo still won’t charge, shift focus to the charging system itself.
Adapter Functionality Test
Use your multimeter to verify charger output:
1. Plug adapter into a confirmed-working outlet
2. Set multimeter to DC voltage
3. Connect probes to the inner and outer barrel of the charging plug
4. Compare reading to the voltage specified on the adapter label
Readings more than 10% below the labeled voltage indicate a failing adapter that won’t properly charge your Gooloo unit. Remember that damaged electrical components within the charger can prevent adequate power delivery to the jump starter.
Connection Point Maintenance
Dirty or corroded contacts frequently cause gooloo battery charger not charging issues. Clean both the jump starter’s charging port and the charger plug using:
– Isopropyl alcohol and cotton swabs for gentle cleaning
– Compressed air to remove stubborn debris
– A small wire brush for persistent corrosion
Ensure both surfaces are completely dry before reconnecting—moisture creates conductivity issues that prevent proper charging.
System Reset and Temperature Management
Many charging failures stem from temporary system lockups or environmental factors rather than hardware damage.
Battery Management System Reset
Gooloo units incorporate safety circuits that sometimes trigger false fault conditions:
1. Disconnect all cables from the jump starter
2. Hold power button for 30 seconds to drain residual charge
3. Wait 5 minutes to allow complete system reset
4. Reconnect charger and observe indicator lights
This process clears temporary faults in the protection circuitry that may have incorrectly prevented charging.
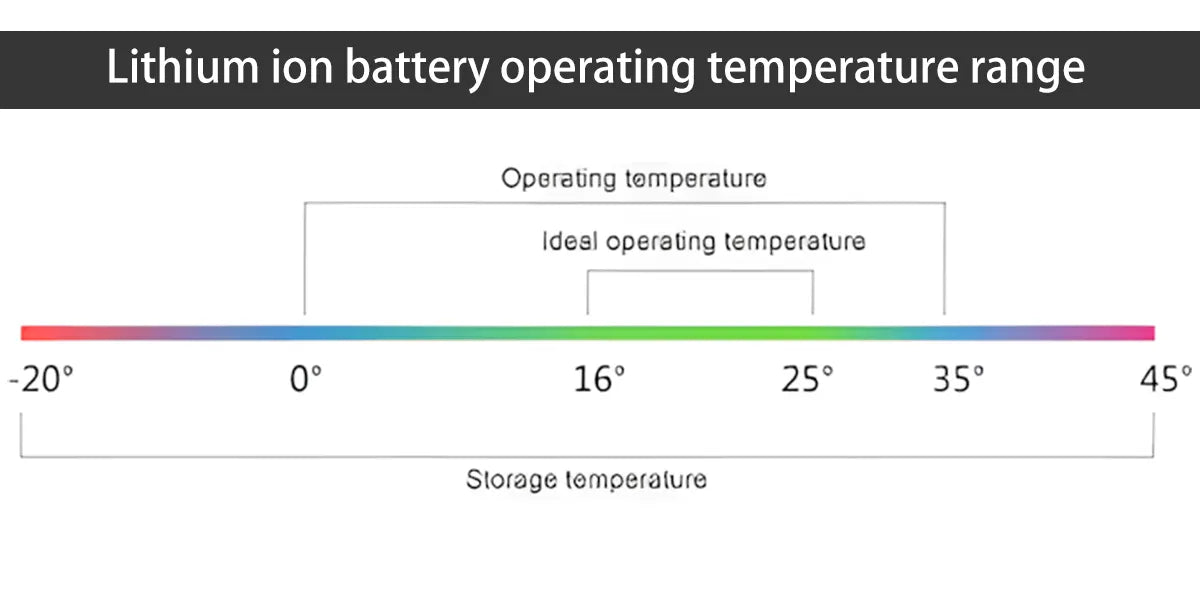
Temperature Normalization Steps
Lithium-ion batteries refuse to charge outside their safe operating range:
– Ideal charging temperature: 32°F to 113°F (0°C to 45°C)
– If overheated: Allow unit to cool for 30 minutes in a shaded area
– If too cold: Warm in your pocket or room temperature space for 15 minutes
Attempting to charge outside these parameters triggers safety mechanisms that halt the charging process—a common reason your gooloo battery charger not charging appears faulty when it’s actually protecting the battery.
Model-Specific Charging Behavior

Understanding your specific Gooloo model’s indicator patterns prevents misdiagnosis of normal operation as a charging failure.
GP2000 Charging Indicators
- Flashing red light: Deeply discharged battery requiring extended recovery time
- Solid red light: Normal charging in progress (check again after 30 minutes)
- No lights: Likely external issue with charger or power source
GP4000 Status Signals
- Alternating red/green: Temperature outside safe charging range
- Rapid blinking red: Insufficient voltage from charger
- Solid green but not charging: Battery protection circuit activated
These patterns help distinguish between actual charging failures and normal operational states that might be mistaken for gooloo battery charger not charging issues.
When Replacement Is the Smart Choice
Sometimes repair isn’t practical—know when to replace components versus the entire unit.
Battery Replacement Thresholds
Consider battery replacement when:
– Voltage remains below 11V after extended charging
– Physical swelling or leakage appears on the battery casing
– Charger works correctly with another Gooloo unit
– Unit has exceeded typical 2-3 year battery lifespan
Cost-Benefit Analysis
Weigh these factors before investing in repairs:
– New Gooloo unit: $80-$150 with full warranty
– OEM battery replacement: $40-$60 with 1-year coverage
– Aftermarket battery: $25-$40 with limited warranty
For units under warranty or with multiple failing components, replacement often proves more economical than piecemeal repairs.
Preventative Maintenance Protocol
Extend your Gooloo’s service life with these simple habits that prevent gooloo battery charger not charging issues.
Monthly Care Routine
- Charge to 80% before storage exceeding 30 days
- Perform full charge/discharge cycles every three months
- Store in climate-controlled environment away from direct sunlight
- Inspect cables for damage during each use
Long-Term Storage Guidelines
- Charge to 50-60% capacity before extended storage
- Disconnect all cables to prevent parasitic drain
- Place in protective case to avoid physical damage
- Check charge level every six months and recharge as needed
Proper storage prevents the battery from entering deep discharge states that trigger permanent charging failures.
Safety-First Troubleshooting Approach
Never compromise safety when diagnosing charging issues with your Gooloo jump starter.
Essential Safety Practices
- Always disconnect power before handling battery components
- Work in well-ventilated areas to avoid fume accumulation
- Use insulated tools only when inspecting electrical connections
- Never force connections—bent pins require component replacement
If you detect burning smells, visible sparks, or excessive heat during troubleshooting, immediately disconnect power and seek professional assistance. These indicate serious electrical hazards that shouldn’t be ignored.
Professional Repair Considerations
When DIY fixes fail, professional options may save money compared to full replacement.
Warranty Coverage Verification
- Standard Gooloo warranty: Typically 12 months from purchase date
- Battery warranty: Often separate, ranging from 6-12 months
- Required documentation: Keep original receipts for warranty claims
- Support contact: Gooloo customer service for RMA process initiation
Qualified Repair Resources
- Automotive retailers: Many offer free battery testing services
- Electronics repair shops: Can address soldering issues and component failures
- Battery specialists: Provide cell-level replacement for advanced restoration
Before paying for repairs, compare costs against new unit pricing—sometimes replacement proves more economical than professional servicing.
Final Takeaway: Most gooloo battery charger not charging problems stem from easily fixable issues like faulty power sources, damaged cables, or temporary system lockups. By methodically working through these troubleshooting steps—from simple power source verification to battery health assessment—you’ll solve most charging failures without professional help. Implement the preventative maintenance habits outlined here to extend your Gooloo’s service life and avoid future charging issues. Remember that lithium-ion batteries naturally degrade over time, so recognize when replacement becomes the smartest solution rather than continuing to troubleshoot a worn-out component. With proper care and timely intervention, your Gooloo jump starter will remain a reliable roadside companion for years to come.


