
Your JNC660 jump starter sits in your trunk, ready to save the day when your car battery dies. But months have passed since you last used it, and now you’re wondering—does it still have enough juice? Even the most reliable jump starter becomes useless without proper charging, and the JNC660 is no exception. This guide walks you through every step to keep your unit charged and ready for emergencies.
You’ll learn the exact charging process, how to read those indicator lights that seem confusing at first, and the maintenance habits that separate prepared drivers from those stranded in parking lots. Whether you’re charging it for the first time or troubleshooting why it won’t hold power, this guide covers everything you need to know about how to charge JNC660 jump starter effectively.
Required Charging Equipment for Your JNC660

Standard wall charger is your go-to solution for routine maintenance. The included 12-volt DC adapter plugs directly into any standard wall outlet and typically takes 2-4 hours to deliver a complete charge from empty. This method provides the most consistent power delivery and should be your primary charging approach when preparing for seasonal use or after emergency deployment.
Vehicle charging cable offers valuable flexibility when wall outlets aren’t accessible. Using the included 12-volt DC car adapter, you can recharge your jump starter while driving—perfect for topping up after using the unit to jump-start your vehicle. This method works slower, requiring 4-6 hours for a complete charge, and requires your engine to be running throughout the process.
Extension cord considerations become critical when charging in locations with limited outlet access. When using extension cords longer than 25 feet, always choose heavy-duty 14-gauge or thicker cords. Thinner cords create significant voltage drops that not only extend charging time but can prevent your JNC660 from reaching full capacity. Never daisy-chain multiple extension cords, as this dramatically increases resistance and charging inefficiency.
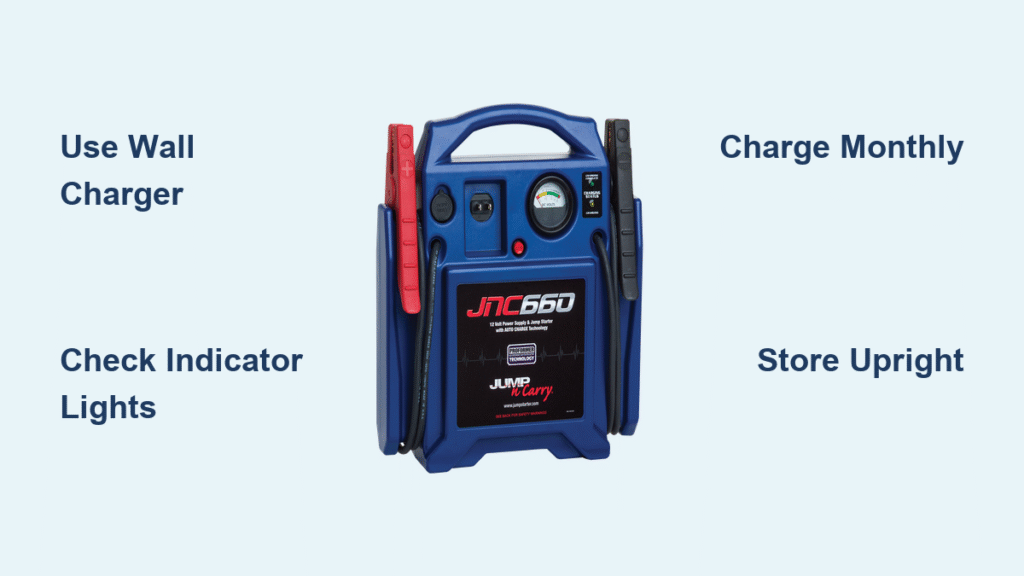
Locate Your JNC660 Charging Ports Correctly

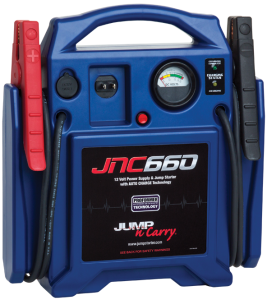
Main charging port identification prevents connection mistakes. On the JNC660, this port sits on the back panel with clear “CHARGE” labeling. It accepts both the wall adapter and vehicle charging cable, but the connection must be firm—you should hear a definite click when properly seated. Many charging issues stem from users confusing this port with the USB ports or jumper cable terminals.
Voltage selector switch verification protects your investment. Some JNC660 models include this switch near the charging port—set it to 110V for North American use or 220V for international operation. Using the wrong setting prevents charging and risks permanent damage to the internal battery system. Always double-check this setting before connecting power for the first time in a new location.
Port protection cover maintenance preserves weather resistance. This rubber flap snaps securely over the charging port when not in use. Before charging, ensure the cover is clean and undamaged—cracked or missing covers allow moisture ingress that causes corrosion. After charging, press the cover firmly into place until it seals completely, especially if storing the unit in humid environments.
Wall Outlet Charging Steps Made Simple
Check current charge level by pressing the battery status button before connecting power. The LED indicators provide instant feedback: four lights means fully charged, three indicates good reserve, two signals it’s time to recharge soon, and one light means immediate charging needed. Skipping this step might lead to unnecessary charging cycles that wear down battery lifespan.
Connect wall adapter securely to prevent frustrating intermittent charging. Insert the connector until you feel and hear a firm click—loose connections cause the unit to cycle on and off during charging. If the connection feels loose, inspect both the adapter tip and charging port for debris or damage before proceeding.
Verify proper charging initiation by watching for the indicator light. When correctly connected to a working outlet, the charging light should immediately glow solid red. No light indicates either a dead outlet, faulty cable, or connection problem. Test the outlet with another device first before assuming your JNC660 has issues.
Monitor charging progress every 30 minutes during the first hour. The LED indicators should progressively light up as charge increases—typically one light every 30-45 minutes. A completely depleted unit usually takes 3-4 hours, while one with partial charge completes faster. Never leave charging unattended for more than 4 hours to prevent potential overheating risks.
Vehicle Charging Method Done Right
Start your engine before connecting to ensure stable power delivery. The alternator provides consistent 12-volt power only when your engine runs—attempting to charge from a parked car drains your vehicle’s battery faster than it recharges the jump starter. This critical step prevents leaving yourself stranded after helping others.
Route the car adapter cable safely to avoid dangerous interference. The coiled cable stretches to 8-10 feet, allowing flexible positioning, but never let it dangle near pedals or underfoot. Secure excess cable with zip ties or tuck it safely out of the way before driving. A loose cable could become entangled with steering components during operation.
Confirm secure 12V socket connection by gently tugging the adapter after insertion. The connection should remain firmly in place even during bumpy roads. Many charging interruptions occur because drivers fail to fully seat the adapter in the vehicle’s power socket—push until you feel definite resistance.
Drive strategically for efficient charging by understanding power generation dynamics. Highway driving provides the most consistent charging due to steady engine RPMs, while city driving with frequent stops extends charging time significantly. For best results, drive continuously for 2-4 hours at speeds above 35 mph to maximize alternator output.
Reading Charge Indicator Lights Like a Pro
Solid red light interpretation tells you charging proceeds normally. This steady illumination should continue throughout the charging cycle. If the light blinks irregularly or turns off unexpectedly, immediately check your connections and power source before resuming charging.
Green light appearance signals charging completion—unplug immediately to preserve battery health. While the JNC660 has overcharge protection, leaving it connected creates unnecessary wear on internal components. Set a timer when you begin charging to avoid forgetting and leaving it plugged in for days.
Blinking red patterns communicate specific issues requiring attention:
– Rapid blinking: Overheating protection activated—remove from charger and let cool 30 minutes
– Slow blinking: Low voltage from power source—check outlet voltage or car battery condition
– Alternating red/green: Internal battery problem—contact manufacturer for service options
No lights during charging attempts indicates three possible failure points:
1. Check power source with another device to rule out dead outlets or blown fuses
2. Test the charging cable on another 12V device if available
3. Inspect the JNC660’s charging port for visible damage or debris
Optimal Charging Schedule for Emergency Readiness
Monthly charging maintenance keeps your JNC660 ready when needed most. Even unused batteries lose 5-10% charge monthly due to natural self-discharge. Mark your calendar for the first of each month—just 15 minutes of charging prevents emergency unpreparedness.
Recharge immediately after each use regardless of remaining power. Partial discharges followed by incomplete charging create memory effects that reduce overall capacity over time. Treat your jump starter like a cellphone—top it off after every use for maximum reliability.
Storage preparation requires full charge before long-term storage. Disconnect all cables and store in a cool, dry location between 40-70°F. Check charge level every 90 days during storage—recharge if indicators show less than three lights to prevent sulfation damage.
Temperature considerations affect charging efficiency significantly. Charge between 50-80°F for optimal results—extreme cold slows chemical reactions in the battery, while heat accelerates degradation. Never charge in direct sunlight or immediately after using the unit in freezing conditions.
Battery Maintenance Between Charges
Clean terminal connections monthly using a wire brush or dedicated battery cleaner. Corrosion buildup increases resistance and reduces effective power delivery when you need it most. A quick 2-minute cleaning session ensures maximum cranking amps during jump-start emergencies.
Inspect cables and clamps regularly for cuts, frays, or corrosion. Damaged cables create dangerous voltage drops that reduce jump-starting effectiveness. Replace worn components before they fail during emergencies—most manufacturers offer replacement cable kits.
Test jump starter function quarterly by powering accessories. Plug in a 12V device like a tire inflator to verify the unit delivers power consistently. This simple test confirms the battery accepts and holds charge properly while exercising the electrical system.
Store in upright position to prevent electrolyte stratification in the internal battery. Avoid concrete floors which can accelerate discharge—use a wooden shelf or plastic container instead. Proper storage orientation extends battery life by 20-30% compared to horizontal positioning.
Safety During Charging Procedures
Ensure proper ventilation to prevent potential gas buildup during charging. Charge in open areas or well-ventilated garages—never in enclosed spaces like car trunks or sealed storage containers. Even modern sealed batteries can vent small amounts of hydrogen under certain conditions.
Route cables safely to eliminate trip hazards and damage risks. Run cables along walls or secure with cable ties during indoor charging. Avoid creating loops where pets or people might trip, especially in household environments with children.
Unplug promptly after charging completes as an extra safety measure. While automatic shutoff prevents damage, unplugging eliminates any fire risk from faulty outlets or power surges. Make this part of your standard charging routine—set a reminder if needed.
Place on non-combustible surfaces during charging sessions. Position your JNC660 on concrete, metal, or ceramic surfaces—not on carpets, wood tables, or near flammable materials. Maintain at least 12 inches of clearance from walls and other objects for proper airflow.
Your JNC660 jump starter serves as critical insurance against dead batteries, but only when properly maintained. Charge it monthly, store it correctly, and test it quarterly. These simple habits ensure your jump starter delivers maximum performance when you need it most. Remember—five minutes of charging attention today prevents hours of roadside frustration tomorrow. By following these precise charging procedures, you’ll keep your JNC660 ready to save the day whenever battery emergencies strike.


