
Your engine won’t turn over. The dashboard lights flicker weakly as you twist the key, met only by a rapid clicking sound. This dead battery scenario strikes 1 in 4 drivers annually—and leaves you stranded without roadside assistance. But your portable jump starter (also called a battery booster or jump box) can rescue you in minutes if you know how to use battery booster and jump starter correctly. Unlike traditional jumper cables requiring another vehicle, these compact 12V powerhouses work solo. Master these steps to transform panic into confidence during any battery emergency.
Match Jump Starter to Your Vehicle’s Power Needs

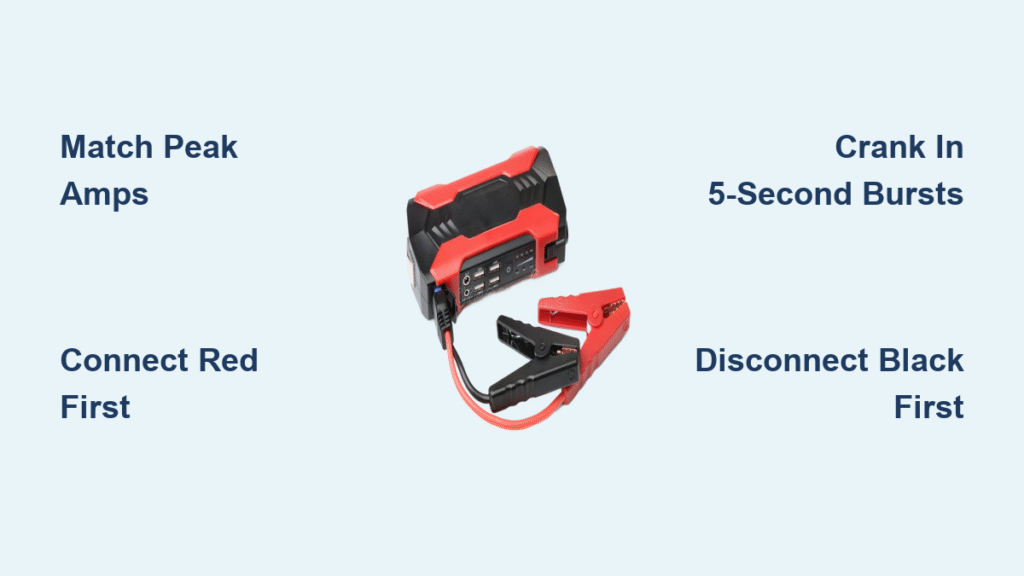
Calculate Required Peak Amps by Engine Type
Selecting the right jump starter prevents dangerous underpowered attempts. Four-cylinder gasoline engines demand 400-600 peak amps, while V8 trucks require 1,000+ amps. Diesel engines need 1.5-2x the power of comparable gasoline engines—ignoring this risks damaging your starter motor. Check your jump starter’s label for “peak amps” (brief high-current bursts for starting) versus “cranking amps” (sustained power). Always choose based on peak amp requirements.
Confirm 12V System Compatibility First
95% of modern vehicles use 12V systems, but motorcycles, classic cars, and heavy equipment may use 6V or 24V. Verify your battery voltage by checking the label (usually “12V” stamped near terminals) or owner’s manual. Using a 12V jump starter on a 6V battery won’t work, while applying 24V to a 12V system fries electronics. Never assume—mismatched voltage causes catastrophic damage.
Prioritize Core Features Over Gimmicks
While USB ports and tire inflators seem appealing, focus first on meeting your vehicle’s power needs. A $50 basic lithium-ion unit handles most sedans, but towing a boat requires $200+ models with 1,500+ peak amps. Avoid “all-in-one” units where extra features compromise jump-starting capacity. Your priority is reliable engine turnover—not charging your phone mid-crisis.
Execute Pre-Jump Safety Protocol
Diagnose Battery vs. Electrical Failure
Don’t connect cables blindly. Test if it’s truly a dead battery: Turn headlights on. If they’re bright but the engine won’t crank (only clicking), the battery is depleted. If lights are dim and accessories fail, you likely have a battery issue. If lights work normally but nothing happens when turning the key, suspect a faulty starter or ignition switch—not the battery.
Identify Critical Battery Hazards
Immediately abort if you see these danger signs:
– Cracked or swollen battery case
– Leaking acid (clear, oily fluid under battery)
– Sulfur smell (rotten eggs) indicating hydrogen gas buildup
– Heavy white corrosion on terminals
Forcing a jump start on damaged batteries risks explosion. Call roadside assistance instead.
Create a Spark-Safe Zone
Park on level ground, engage parking brake, and turn off ALL accessories. Remove rings/watches that could short-circuit. Position the jump starter as far from the battery as cables allow—minimum 18 inches—to avoid sparks near explosive hydrogen gas. Work in open areas, never near fuel pumps or gas cans.
Connect Cables in Correct Sequence
Locate Terminals Without Guessing
Positive terminals always have red covers or “+” symbols; negative have black covers or “-“. If terminals are corroded, scrape them clean with a pocket knife before connecting. Some European cars hide batteries in trunks—check your manual. Never connect to painted or oily metal surfaces—you need bare, unpainted metal for grounding.
Attach Red Clamp to Positive Terminal
Secure the red clamp firmly to the battery’s positive terminal until it grips solidly. Wiggle it—if it moves, reposition for metal-to-metal contact. Poor positive connections cause 70% of failed jump starts. For corroded terminals, use the jump starter’s included wire brush first.
Connect Black Clamp to Chassis Ground
Place the black clamp on unpainted engine metal—like a bolt on the intake manifold—not the negative battery terminal. This avoids sparks near the battery where hydrogen gas accumulates. Ideal spots include alternator brackets or suspension components. Never attach to fuel lines, hoses, or moving parts.
Start Engine Without Damaging Systems

Activate Jump Starter Before Cranking
Turn the jump starter ON and wait for green confirmation lights (usually 2-5 seconds). If red lights flash, immediately disconnect—this signals reversed polarity. Never attempt to start with the jump starter off; you’ll drain its battery without delivering sufficient cranking power.
Crank Engine in Strict 5-Second Bursts
Turn your key to “START” for no longer than 5 seconds. If the engine doesn’t fire, wait 2-3 minutes before retrying—this cools the starter motor and jump starter. Most quality units auto-shut down after 3 failed attempts to prevent overheating. Exceeding these limits melts wiring.
Disconnect Cables in Reverse Order
First, turn OFF the jump starter. Then remove the black clamp from the chassis ground, followed by the red clamp from the positive terminal. Reversing this sequence risks short-circuiting. Let the engine idle 2-3 minutes before driving to stabilize the electrical system.
Troubleshoot Failed Jump Attempts

Fix Loose or Corroded Connections
90% of “failed” jump starts stem from bad connections. Re-clean terminals with a wire brush, then reconnect clamps with firm pressure. Ensure clamps don’t touch each other during attachment—sparks here can ignite battery gases. For stubborn corrosion, pour baking soda/water mix over terminals to neutralize acid.
Test Battery Health Post-Jump
If the car starts but dies immediately when cables disconnect, your battery is beyond recovery. Drive continuously for 20+ minutes so the alternator recharges it. If you need repeated jumps within days, replace the battery—it’s holding less than 30% capacity.
Verify Jump Starter Capacity Limits
A jump starter that works on your sedan may fail on a diesel truck. If cranking is slow or the unit shuts down instantly, you need higher peak amps. Cold weather reduces jump starter output by 30%—always choose a model rated for 20% more power than your engine requires.
Maintain Jump Starter Reliability
Recharge Within 24 Hours of Use
Lithium-ion jump starters lose 5-10% capacity per day when depleted. Plug yours in immediately after any jump attempt—even if it started the car on the first try. Most recharge fully in 1-4 hours via USB-C or wall adapter. Never store it below 50% charge.
Store at Room Temperature Always
Extreme heat or cold permanently damages internal batteries. Keep your jump starter between 32°F-80°F—never leave it in your car trunk through summer or winter. Ideal storage is a climate-controlled closet. Check charge monthly; recharge if below 80%.
Inspect Before Every Road Trip
Before long drives, verify:
– No cracked housing or frayed cables
– Clamps grip firmly without wobble
– Indicator lights confirm full charge
A 30-second check prevents being stranded with a dead device when you need it most.
Jump Start Hybrids and Motorcycles Safely
Locate Hybrid 12V Battery Correctly
Hybrids hide the 12V auxiliary battery in trunks or under seats—not under the hood. Look for labeled jump terminals under the hood (often red plastic covers). Never touch orange high-voltage cables—these carry 200-400V and can kill. Only jump the 12V system.
Use Motorcycle-Specific Clamps
Standard car jump starter clamps often short-circuit on tight motorcycle frames. Buy $10 micro-clamps that fit battery terminals without touching surrounding metal. Follow the same connection sequence: red to positive, black to engine ground. Avoid jump starters over 500 peak amps—they can fry sensitive bike electronics.
Final Jump Starter Checklist
Master how to use battery booster and jump starter by memorizing this sequence:
1. Confirm dead battery (dim lights + rapid clicking)
2. Match jump starter to engine size (400-600A for 4-cyl, 1000A+ for V8)
3. Connect RED to positive terminal, BLACK to chassis ground
4. Crank ≤5 seconds, wait 2-3 minutes between attempts
5. Disconnect BLACK first, then RED after engine runs
Keep your unit charged, store it indoors, and practice connections in your driveway. With these steps, you’ll conquer battery emergencies confidently—no roadside assistance needed. Remember: a well-maintained jump starter delivers 15-30 starts per charge, but only if you follow these safety-critical procedures. Your next dead battery won’t ruin your day—it’ll be just a minor pit stop.


