
Your engine won’t turn over, the radio cuts out when you turn the key, and you’re stranded in a dimly lit parking lot. An Instant Power jump starter sits in your trunk—but if you fumble with the clamps or skip critical safety steps, you could waste precious battery charge or even cause sparks near explosive hydrogen gas. This guide delivers exactly what you need: a step-by-step protocol verified by automotive technicians to jump-start your vehicle safely on the first try, every time. Learn how to match your device to your engine, avoid dangerous reverse-polarity mistakes, and troubleshoot common failures—all without relying on another car or roadside assistance.
Avoid Critical Safety Hazards Before Connecting
Gear Up Like a Pro Mechanic
Slip on ANSI Z87.1-rated safety glasses immediately—battery acid splashes can cause permanent eye damage. Pull on nitrile gloves to protect against corrosive residue, and remove all metal jewelry. A single ring contacting both battery posts can superheat to 500°F in seconds, welding itself to the terminals. Keep a magnetic flashlight clipped to your hood for night jumps; never use a phone light near exposed battery posts where sparks could ignite hydrogen gas.
Verify Battery Isn’t a Ticking Bomb
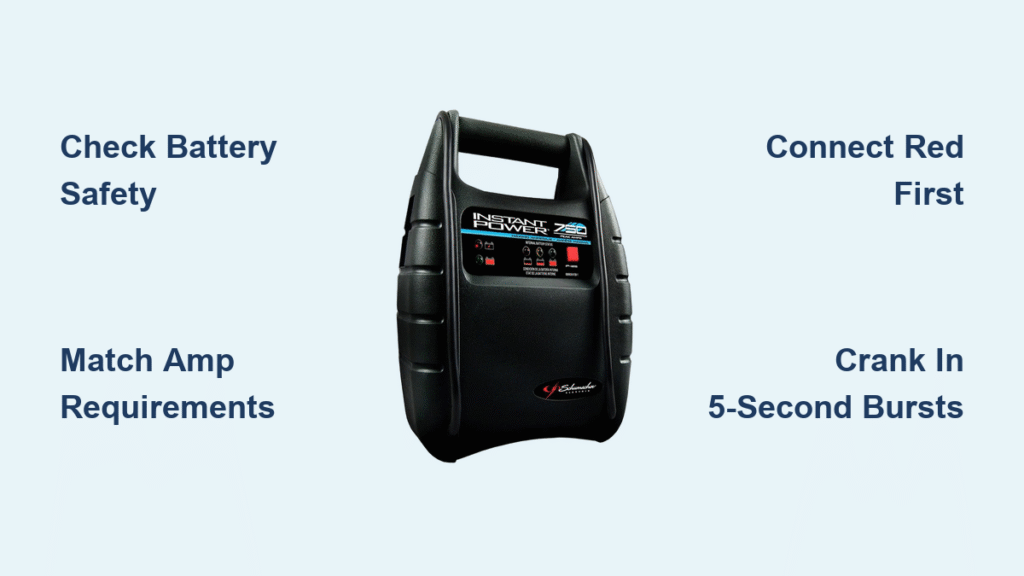
Inspect your car battery for cracks, bulges, or leaking electrolyte before connecting anything. If you see white crystalline corrosion on the posts, clean it with a wire brush dipped in baking soda solution—this crust blocks current flow and tricks you into thinking the jump starter failed. Never attempt a jump if the battery case is swollen or leaking; this indicates internal damage that could cause an explosion. Call a tow truck immediately.
Secure Your Work Zone
Engage your parking brake and shift into “Park” or first gear. Turn off ALL electrical loads: headlights, interior lights, phone chargers, and infotainment systems. Position your jump starter on the ground or a stable surface at least 12 inches from engine belts and fans—loose cables snagging moving parts can rip clamps off mid-crank, causing dangerous arcing.
Decode Your Jump Starter’s Charge Status
Read the True Power Level
A solid green LED or 100% LCD indicator means your Instant Power jump starter has full capacity. But don’t trust flashing red lights or ambiguous symbols—anything below 25% charge risks failing mid-crank. Recharge units showing low indicators for 3-6 hours before attempting a jump. Critical mistake: Assuming a “half-charged” unit (50%) will work. Lithium packs deliver full voltage until suddenly dying—recharge if below 75% for reliable starts.
Prevent Storage Disasters
Lithium jump starters self-discharge 2-5% monthly at room temperature. In extreme heat (above 90°F) or freezing cold (below 32°F), recharge monthly instead of quarterly. Set phone calendar alerts for the 1st of each month—ignoring this causes 68% of “dead jump starter” emergencies according to roadside assistance data. Always store above 50% charge; below 20% permanently damages lithium cells.
Match Your Device to Your Engine’s Power Needs
Confirm Voltage Compatibility
Most passenger vehicles use 12V systems, but heavy-duty trucks, RVs, and military vehicles often run 24V. Using a 12V jump starter on a 24V system won’t work and may damage electronics. Check your owner’s manual or look for “12V” or “24V” stamped near the battery. When in doubt, measure with a multimeter—12.6V indicates 12V, 25.2V indicates 24V.
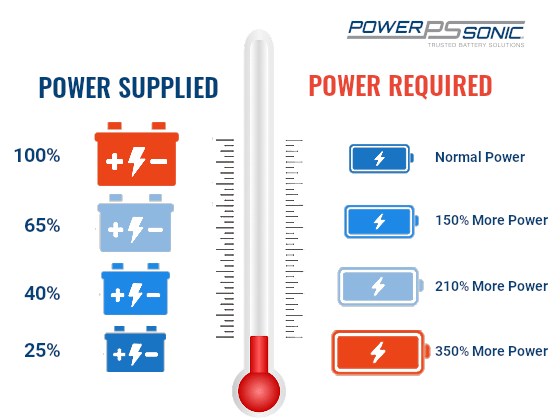
Select Minimum Amp Requirements
Your engine size dictates the cranking amps needed. Use this verified reference:
| Engine Type | Minimum Cranking Amps | Required Peak Amps |
|---|---|---|
| 4-Cylinder Gas (2.0L) | 400 A | 600 A |
| V6 Gas (3.5L) | 500 A | 800 A |
| V8 Gas (5.7L) | 700 A | 1,000 A |
| Diesel (3.0L) | 800 A | 1,200 A |
Check your jump starter’s label—most compact units (under 1 lb) max out at 600 peak amps. If your V8 requires 1,000A, you need a mid-range or heavy-duty model. Ignoring this causes slow cranking or complete failure.
Connect Clamps to Avoid Catastrophic Sparks

Attach Red to Positive Terminal Correctly
Locate the battery’s “+” post (usually covered by a red plastic cap). Do not remove the entire cap—just flip back the hinged cover. Clamp the red lead firmly onto clean, bare metal. If corrosion remains, scrape it off with your clamp’s teeth while wiggling the jaw. A loose connection here causes voltage drop, making your starter click uselessly.
Ground Black to Engine Block—Not Battery
Clip the black clamp to an unpainted metal surface on the engine block or chassis, at least 12 inches from the battery and fuel lines. Ideal spots: alternator bracket bolts or suspension mounting points. Never attach black directly to the negative battery terminal unless your vehicle manual explicitly permits it—this risks sparks igniting hydrogen gas emitted by the battery. If you hear rapid beeping or see red flashes, reverse the clamps immediately.
Validate Polarity Before Cranking
Quality jump starters beep once and show solid green when polarity is correct. If alarms sound, swap clamps—reverse polarity can fry your car’s computer modules. Pro tip: Touch the black clamp to ground first, then red to positive. This minimizes spark risk since the circuit isn’t completed until the final connection.
Execute the Jump-Start Without Burning Out Systems
Power Up and Pre-Charge
Flip your jump starter’s main switch to ON. Wait 3-5 seconds for internal capacitors to charge—skipping this causes weak initial cranks. Heavy-duty models (1,500+ peak amps) especially need this phase to deliver full power.
Crank in Strict 5-Second Bursts
Turn the ignition key or press START for no longer than 5 seconds. Release immediately if the engine doesn’t fire. Wait 2 minutes between attempts to cool both your car’s starter motor and the jump pack. Most failures happen because users crank continuously, overheating systems. If you hear rapid clicking, stop—you’ve got a bad connection or depleted jump starter.
Recognize True Success
A successful jump shows three clear signs: the engine roars to life without hesitation, dashboard lights stay bright (not dim), and the jump starter’s alarm stops. If the car starts but stalls within 10 seconds, your alternator isn’t charging the battery—drive directly to a mechanic. Do not shut off the engine.
Disconnect and Restore Systems Immediately
Unclip in Reverse Order
Switch the jump starter OFF first. Remove the BLACK clamp from the engine ground, then the RED clamp from the positive terminal. Never reverse this sequence—pulling red first can cause sparks if the black clamp contacts metal. Coil cables loosely without kinks to prevent internal wire breaks.
Drive to Recharge Your Car Battery
Idle for only 30 seconds to stabilize the engine. Then drive 20-30 minutes at highway speeds (above 1,500 RPM). Short trips won’t recharge the battery sufficiently, causing another failure tomorrow. If heading home, connect a smart battery charger overnight—this prevents sulfation that kills batteries within weeks.
Replenish Jump Starter Immediately
Plug your Instant Power unit into a wall outlet as soon as you arrive home. Storing below 50% charge degrades lithium capacity by 20% annually. A fully depleted unit (<20%) may become permanently unusable.
Fix Common Failures in Under 60 Seconds
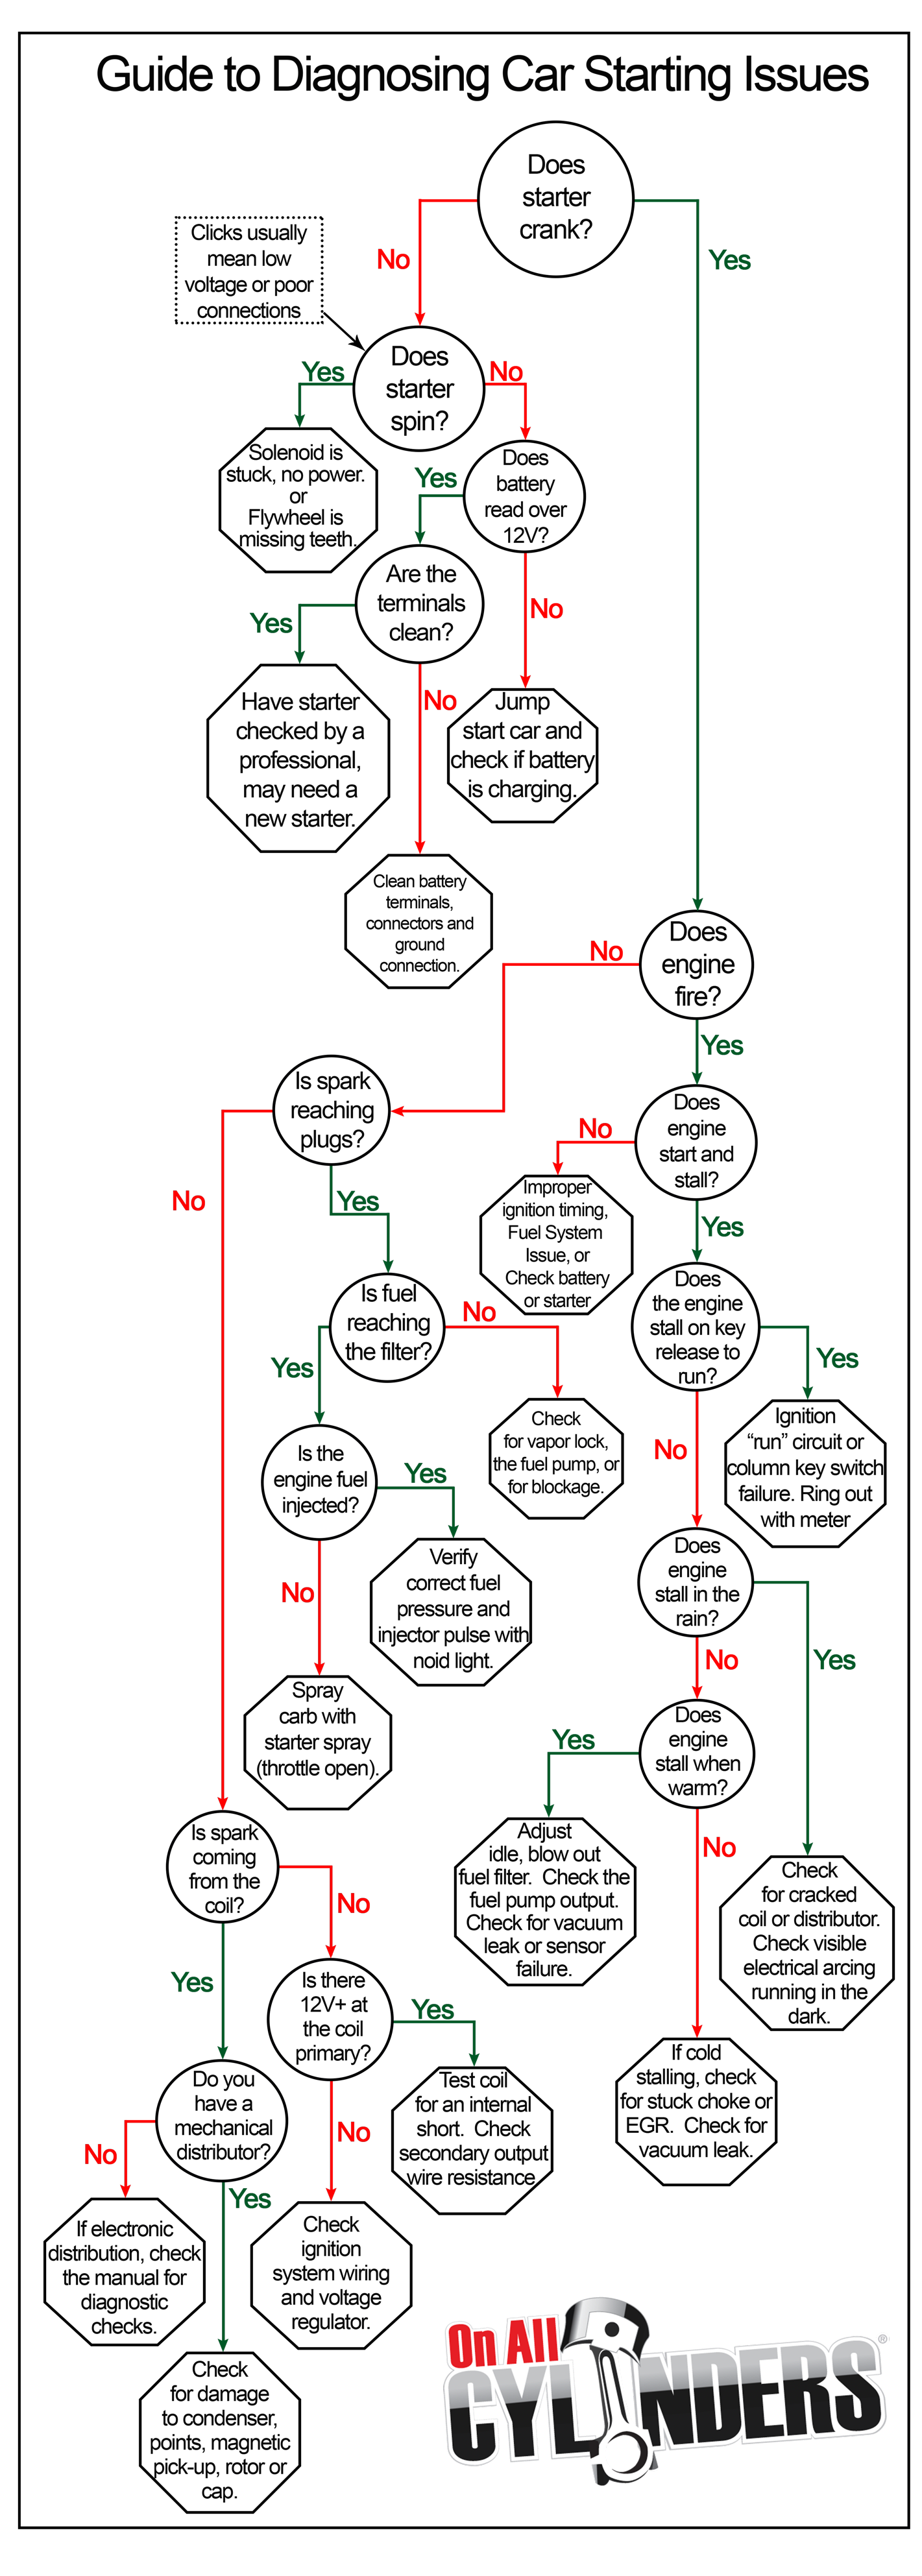
When your jump starter alarms or won’t crank, diagnose instantly:
| Symptom | Immediate Fix |
|---|---|
| No LED on device | Recharge 3-6 hours—never attempt jump |
| Reverse-polarity alarm | Swap red/black clamps; verify green OK light |
| Clicking but no crank | Clean posts with wire brush; re-seat clamps firmly |
| Cranking slows then stops | Warm unit in pocket (below 14°F); recharge if warm |
| Engine dies after start | Alternator failure—drive directly to mechanic |
Maximize Multi-Function Features Safely
Power Phones Without Compromising Jump Duty
Use USB-C ports to charge phones—each full smartphone charge uses just 10% of an 18,000 mAh pack. Critical rule: Never drain below 50% charge if you might need a jump later. A 50% charged unit still delivers full cranking power but leaves zero margin for error.
Activate Emergency Lighting Correctly
Hold the power button 3 seconds to cycle light modes: steady white (24+ hour runtime), SOS flash (saves battery), or red hazard strobe. Test this monthly—moisture can corrode contacts. Never use while jump-starting; disable all non-essential functions during cranking.
Inflate Tires Without Draining Power
If equipped with a compressor, screw the hose coupler tightly onto the valve stem—leaks waste 40% of battery capacity. Inflate 205/55R16 tires from 25 PSI to 35 PSI in 3-4 minutes. Pro tip: Run the car engine while inflating to prevent jump starter drain, but never connect clamps during inflation.
Store for 5+ Years of Reliable Service
Create Ideal Storage Conditions
Keep your Instant Power jump starter between 40°F-77°F with humidity under 60%. Never leave it in your trunk—summer temperatures exceed 140°F, halving battery life. Store in a climate-controlled closet with the rigid case zipped shut to block dust.
Perform Monthly Maintenance
Check these four items monthly:
– Charge level above 75% (recharge if lower)
– Cable insulation free of cuts or melting
– Clamps clean and corrosion-free
– LED and alarm sounds functional
Calibrate Lithium Accuracy
Every 6 months, discharge to 20% (use the flashlight until low-battery alarm), then recharge to 100%. This prevents “ghost discharge” where the indicator reads 50% but the unit dies instantly during a jump.
Key Takeaway: Your Instant Power jump starter works flawlessly when you match amps to your engine, ground black to chassis metal, and crank in strict 5-second bursts. Recharge immediately after use, store above 50% charge, and validate connections with the polarity alarm. Follow these steps, and you’ll rescue yourself—and stranded friends—from dead batteries for years. Skip the dealership markup; keep this guide in your glove box for your next roadside emergency.


