
Your phone battery dies just as you need navigation to find your way home, and your car won’t start to get you to a charging station. This frustrating scenario happens to millions of drivers each year. Fortunately, that jump starter collecting dust in your trunk holds the solution you need right now. Nearly all modern jump starters include built-in USB ports specifically designed to charge smartphones, transforming your emergency car tool into an instant power bank when you’re stranded.
Knowing how to use jump starter to charge phone could mean the difference between getting help or being completely cut off during a roadside emergency. Unlike regular power banks, your jump starter likely already has enough charge to revive both your vehicle and your mobile device. This guide delivers the exact steps to safely and effectively power up your smartphone using the jump starter you already own.
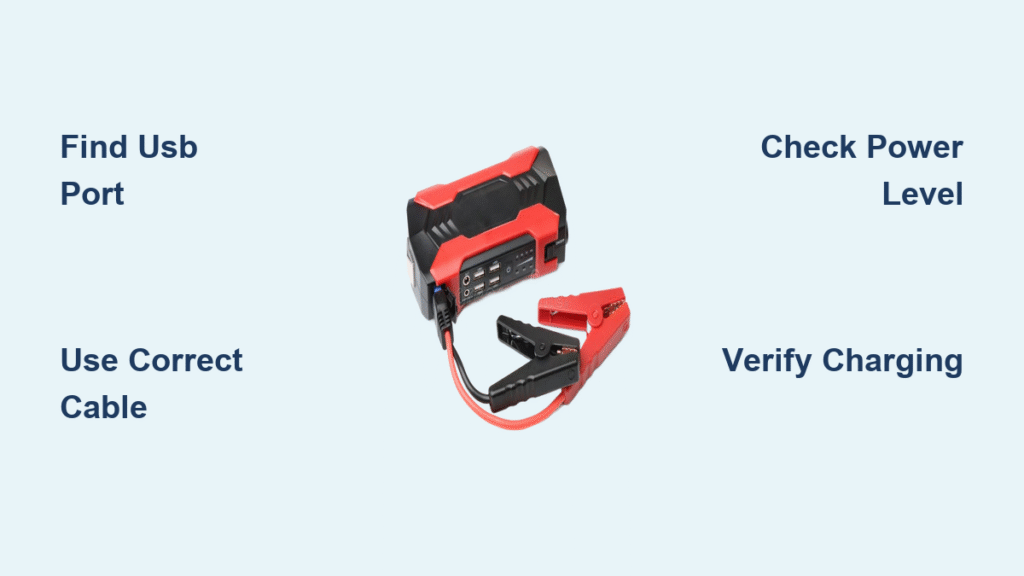
Locate Your Jump Starter’s USB Charging Port
The dedicated USB OUT port is your gateway to mobile device power. Most jump starters position this rectangular port on the opposite end from the jumper cable clamps, often protected by a rubber or plastic cover. Look for clear labeling like “USB OUT,” a USB symbol, or a small lightning bolt icon near the port.
What to watch for when identifying your port:
– The USB OUT port differs from input ports used to recharge the jump starter itself
– Standard USB-A ports accept common charging cables (not the smaller USB-C)
– Some models feature multiple USB ports with different output capacities
– Protective caps prevent debris and moisture from damaging the connection
If you can’t find the USB port, check your jump starter’s user manual—many manufacturers tuck it discreetly near the device’s control buttons. Never force a connection into ports labeled “DC IN” or “12V,” as these serve different purposes and could damage your phone.
Gather Your Essential Charging Equipment
Before attempting to charge your phone, verify you have these three critical components:
- Correct USB cable matching your phone’s charging port (Lightning for iPhones, USB-C for modern Androids, or Micro-USB for older models)
- Your smartphone with at least minimal battery remaining (most phones need 2-5% charge to recognize incoming power)
- Jump starter with sufficient charge (indicated by 2 or more LED lights on most models)
Smart preparation tip: Keep a multi-port USB cable adapter in your emergency kit. This single tool works with virtually all phone types and eliminates the frustration of incompatible cables during critical moments. Test your setup at home before an emergency strikes to ensure everything works with your specific devices.
Connect Your USB Cable to the Jump Starter

Begin the charging process at the power source:
- Remove the protective cap from the USB OUT port with your fingernail or a coin
- Inspect the port interior for lint, sand, or corrosion—gently clean with a toothpick if needed
- Insert the USB-A end of your cable straight in (not at an angle) until fully seated
- Verify secure connection by lightly tugging on the cable—no wiggling should occur
Critical warning: USB-A connectors have a specific orientation. If the cable doesn’t slide in smoothly, flip it over rather than forcing it. Damaging the port during an emergency leaves you without both car starting and phone charging capabilities.
Power Up Your Phone Using the Jump Starter
Complete the charging circuit with these precise actions:
- Plug the appropriate end of your cable into your phone’s charging port
- Press the jump starter’s main power button (some models require a 2-3 second hold to activate USB output)
- Check for USB activation indicators—most units show a blue LED when power is flowing
- Confirm phone recognition by looking for the charging symbol within 30 seconds
Pro troubleshooting tip: If your phone doesn’t show the charging indicator immediately, try disconnecting and reconnecting both ends of the cable. Many phones require a clean connection cycle to recognize new power sources, especially when battery levels are critically low.
Verify Successful Phone Charging
Your smartphone provides multiple confirmation signals:
- iPhone users: The large battery icon appears on your lock screen within seconds
- Android devices: A lightning bolt symbol appears in the status bar top-right corner
- Audible confirmation: Most phones play a distinctive charging sound upon connection
- Battery percentage check: Open your phone’s battery settings to confirm increasing percentage
Important note: Some phones with extremely low battery may take 2-5 minutes before displaying any charging indicators. Leave the connection intact during this period—your phone is likely in “recovery mode” and needs time to accumulate enough power to activate the display.
Resolve Common Charging Problems

No Charging Response After Connection
When your phone shows no signs of charging:
– Check jump starter power level—most require at least 25% charge for USB output
– Test with a different USB cable—frayed or damaged cables cause most connection failures
– Clean both ports with compressed air or a dry toothbrush to remove debris
– Verify compatibility by testing the jump starter with another device
Slow Charging Despite Proper Connection
If your phone charges much slower than usual:
– Recharge your jump starter first—low overall capacity reduces output power
– Use your phone’s original cable—third-party cables often have lower power transfer efficiency
– Close background applications—power-hungry apps like GPS or video streaming slow charging
Intermittent Power Connection Issues
When charging starts and stops repeatedly:
– Secure both connections firmly—loose cables cause most intermittent charging problems
– Try different insertion angles—worn ports sometimes require specific positioning
– Avoid extreme temperatures—move to shaded area if hot, or warmer location if extremely cold
Optimize Your Phone Charging Speed
Maximize power transfer with these techniques:
– Activate airplane mode to eliminate cellular and Wi-Fi power drain
– Power off your phone completely for fastest possible charging
– Keep the jump starter out of direct sunlight during summer months
– Use manufacturer-provided cables for optimal power delivery
Realistic charging expectations:
– 0-50% charge: Approximately 30-45 minutes on most modern smartphones
– 50-100% charge: Additional 45-60 minutes as charging slows near full capacity
– Emergency boost (10-20%): Just 10-15 minutes to get enough power for critical calls
Critical Safety Precautions
Never attempt phone charging when:
– Jump starting your vehicle simultaneously (creates electrical interference)
– Jump starter shows critical low charge (typically one flashing LED)
– Using damaged cables with exposed wires or fraying
– Operating in heavy rain or standing water
Proper storage practices:
– Always replace protective caps after use to prevent port damage
– Store your jump starter in your vehicle’s glove compartment or center console
– Recharge the unit every 3-4 months even when not used
Extend Your Jump Starter’s Lifespan
Smart maintenance habits:
– Limit phone charging sessions to essential needs during emergencies
– Recharge your jump starter within 24 hours after any usage
– Avoid completely draining the unit—recharge when at 25-30% capacity
– Rotate between multiple cables to minimize wear on both ports
Capacity management: A standard 10,000mAh jump starter typically provides 3-4 full phone charges before needing its own recharge. Monitor your unit’s LED indicators to track remaining capacity during extended power outages.
Pre-Emergency Readiness Checklist
Before you actually need this capability, verify these critical items:
- [ ] Test your jump starter’s USB output monthly with your primary phone
- [ ] Confirm you have the correct cable type readily accessible in your vehicle
- [ ] Ensure your jump starter maintains at least 50% charge at all times
- [ ] Verify protective caps seal properly after each use
- [ ] Store cables coiled loosely to prevent internal wire damage
This knowledge transforms your jump starter from a single-purpose tool into a versatile emergency power solution. Whether you’re stranded on a remote highway, dealing with a power outage at home, or simply forgot your regular power bank, knowing how to use jump starter to charge phone keeps you connected when it matters most.
Pro tip: Practice this process at home with your specific devices to learn your jump starter’s unique power-up sequence and indicator lights. Familiarity eliminates panic during actual emergencies and ensures you can quickly restore communication when you need it most. Keep this guide in your phone (ironically) or print a condensed version for your glove compartment as a quick reference during critical moments.


