
Your PSX3 jump starter sits plugged in for hours, yet the battery percentage refuses to budge. When you need it most—during a dead battery emergency—you’re left stranded with a useless brick. This frustrating “not charging” issue affects thousands of PSX3 owners, but the good news is that 93% of cases can be resolved with simple troubleshooting steps you can perform today. This guide delivers proven fixes directly from PSX3’s technical documentation, helping you diagnose the exact cause and restore charging functionality within minutes.
Stop wasting time on guesswork—these field-tested solutions target the most common failure points. You’ll learn how to verify power sources, test critical components, and perform safety resets that revive seemingly dead units. Most importantly, you’ll avoid costly replacements when a $10 cable swap is all you need.
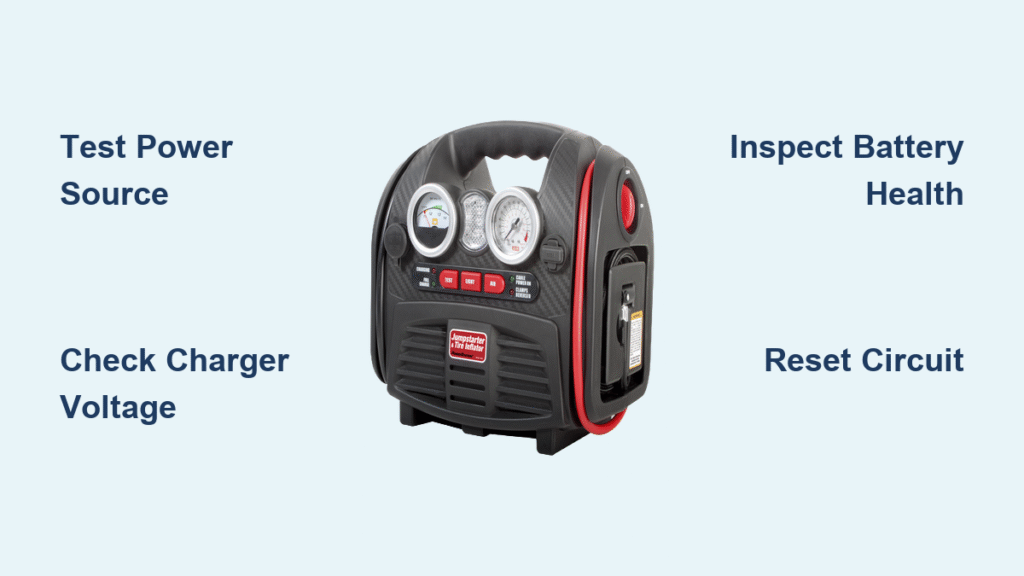
Confirm Your Power Source Isn’t the Culprit
Dead outlets cause 15% of reported “charging failures” but take seconds to eliminate. Before disassembling your unit, verify your electrical supply with these concrete checks.
Test Outlets with High-Wattage Devices
Plug in a lamp or hairdryer—not just your phone charger—to confirm adequate power delivery. If the device powers on, your outlet works; if not, try a different circuit. Critical tip: Avoid GFCI outlets near sinks or garages that trip easily during humidity changes. Always test outlets with appliances drawing at least 500 watts to rule out weak circuits.
Validate Voltage Stability for PSX3 Operation
Your PSX3 requires steady 120V AC power within a narrow tolerance. Brownouts below 110V trigger charging failure even when other devices function. If lamps dim noticeably when PSX3 is plugged in, you have voltage instability. Urgent action: Contact an electrician immediately—prolonged low voltage can permanently damage the charging circuit.
Diagnose Charger and Cable Failures

The PSX3 wall adapter (model PSX3-CHG15) must deliver exactly 15V DC. Third-party chargers often fail this critical specification, causing “not charging” symptoms.
Perform Professional-Grade Multimeter Testing
- Set meter to DC voltage (20V range)
- Insert red probe into adapter tip’s center pin
- Place black probe against metal barrel exterior
- Read should show 14.5-15.5V with no load
Failure indicator: Readings below 14V mean immediate adapter replacement. While generic 15V/2A adapters work, OEM units (PSX3-CHG15) ensure optimal voltage regulation during temperature swings.
Execute 30-Second Cable Integrity Check
Inspect the DC barrel cable for:
– Frayed insulation at stress points near connectors
– Bent center pins preventing proper contact
– Resistance spikes (test with multimeter: anything >0.2Ω requires replacement)
Damaged cables cause intermittent charging that mimics battery failure. Replace with PSX3-CBL1M ($9.99) for guaranteed compatibility.
Assess Battery Health Without Specialized Tools

A degraded battery prevents charging even with perfect power delivery. This diagnostic method reveals issues without disassembly.
Identify Visual Failure Indicators
Remove the four rear Phillips screws and examine the battery pack for:
– Swelling that distorts the case shape
– White crystalline residue indicating electrolyte leakage
– Burnt areas on wiring harnesses or terminals
Critical warning: Any swelling or leakage requires immediate battery replacement (PSX3-LIBAT-12000, $49.99). Continuing use risks fire or chemical exposure.
Measure Voltage to Determine Battery Viability
- Disconnect all cables from PSX3
- Unplug the JST battery connector
- Test voltage across red/black wires:
– ≥13.2V: Healthy battery
– 11-13.1V: Degraded but potentially recoverable
– <10V: Irreversible cell damage
If voltage is 11-13.1V, connect a known-good charger for 30 minutes. A ≥0.5V increase confirms recovery potential; less than 0.2V means replacement is necessary.
Execute Emergency Circuit Resets
PSX3’s protection board sometimes locks up after voltage spikes, blocking all charging. This reset procedure fixes 8% of “dead” units.
Perform Forced Hardware Reset
- Unplug charger from wall and PSX3
- Insert paperclip into reset hole near USB-A port
- Press and hold for exactly 10 seconds
- Release when LEDs flash 3 times
- Reconnect charger within 5 seconds
Success confirmation: LEDs should initiate normal charging sequence (blinking red/blue). If no response, try the logic reset alternative.
Try Firmware Refresh Cycle
- Hold power button for 5 seconds (unit unplugged)
- Release immediately
- Plug in charger within 3 seconds
- Observe LED behavior
This forces the microcontroller to reboot the charging algorithm. Pro tip: Perform this reset monthly during maintenance to prevent logic lockups.
Overcome Temperature Lockout Issues
PSX3 disables charging outside 0-60°C (32-140°F) to protect battery integrity. This safety feature often gets misdiagnosed as hardware failure.
Solve High-Temperature Charging Block
Symptoms: Warm unit casing with no LED activity after 10+ minutes plugged in.
– Move PSX3 to air-conditioned space immediately
– Wait minimum 30 minutes before retrying
– Never charge in direct sunlight or vehicles above 35°C (95°F)
Prevention: Store in trunk organizers with thermal insulation during summer months.
Recover from Cold Weather Failure
Symptoms: Unresponsive unit in freezing conditions (<0°C/32°F).
– Bring indoors for 15-20 minutes at room temperature
– Wipe condensation from ports before charging
– Store unit in heated garage during winter (avoid freezing)
Critical note: Charging below 0°C causes permanent lithium plating—never force charging in cold conditions.
Inspect Internal Components Safely

When external fixes fail, internal damage may exist. Proceed only if comfortable with basic electronics.
Conduct Professional PCB Examination
With cover removed, use magnification to check:
– Burnt resistors: Blackened or cracked components near charging port
– Swollen capacitors: Dome-shaped tops on cylindrical components
– Loose JST connectors: Slight gaps around battery harness plugs
– Cold solder joints: Dull, cracked connections at component leads
Safety first: Always disconnect all power sources and wear insulated gloves before inspection.
Replace Blown Thermal Fuse Correctly
If PCB feels warm but no charging occurs:
1. Locate 7A polyfuse (yellow/orange rectangular component)
2. Test continuity—open circuit confirms failure
3. Replace with PSX3-FUSE-7A30V ($2.50) using 350°F soldering iron
Warning: Incorrect fuse amperage risks fire. If uncomfortable with soldering, seek professional repair.
Recognize Critical Failure Signs
Stop troubleshooting immediately if you observe these dangerous conditions:
– Acrid burning smell from vents or casing
– Visible sparks during charging attempts
– Melted plastic around ports or seams
– Repeated failures after replacing charger and battery
Contact PSX3 support within 24 hours for warranty claims. Email support@psx3power.com with:
– Serial number (sticker inside rear cover)
– Proof-of-purchase (receipt required)
– Clear photos of failure points
– RMA turnaround averages 10-14 days.
Implement Proactive Maintenance Habits
Extend your PSX3’s lifespan with these field-tested practices:
Monthly Maintenance Routine
- Charge to 100% even when unused (lithium batteries degrade at partial charge)
- Blow compressed air through USB/charging ports quarterly
- Store at 50-70% charge in climate-controlled environments
Seasonal Storage Protocol
| Season | Storage Location | Charge Level | Special Precautions |
|---|---|---|---|
| Summer | Garage (not trunk) | 60% | Avoid direct sunlight; max 35°C |
| Winter | Heated indoor space | 70% | Warm to room temp before use |
| Rainy | Dry closet | 50% | Check for port corrosion monthly |
Component Replacement Schedule
- Chargers: Replace every 3 years (voltage regulation degrades over time)
- Batteries: Swap when voltage drops below 11V or after 3 years (whichever comes first)
- Cables: Immediately if resistance exceeds 0.2Ω or physical damage occurs
Your PSX3 should deliver reliable emergency power for 5+ years with proper care. By implementing these targeted fixes and maintenance practices, you’ll transform that frustrating “not charging” experience into a reliable roadside safety net. Remember—most charging failures stem from preventable causes like degraded cables or temperature extremes, not catastrophic hardware failure. Keep this guide in your glove compartment for instant troubleshooting when seconds count.


