
You’re stranded with a dead car battery and your Viking jump starter won’t power on. The panic sets in as you press the button repeatedly, hoping for a miracle that never comes. Whether your unit shows no lights, fails to deliver power, or shuts down unexpectedly during a jump start, this guide delivers proven solutions that actually work. Stop guessing and start fixing—these step-by-step diagnostics will get your Viking jump starter operational again, so you’re never left helpless at the roadside.
Immediate Power Failure Diagnosis
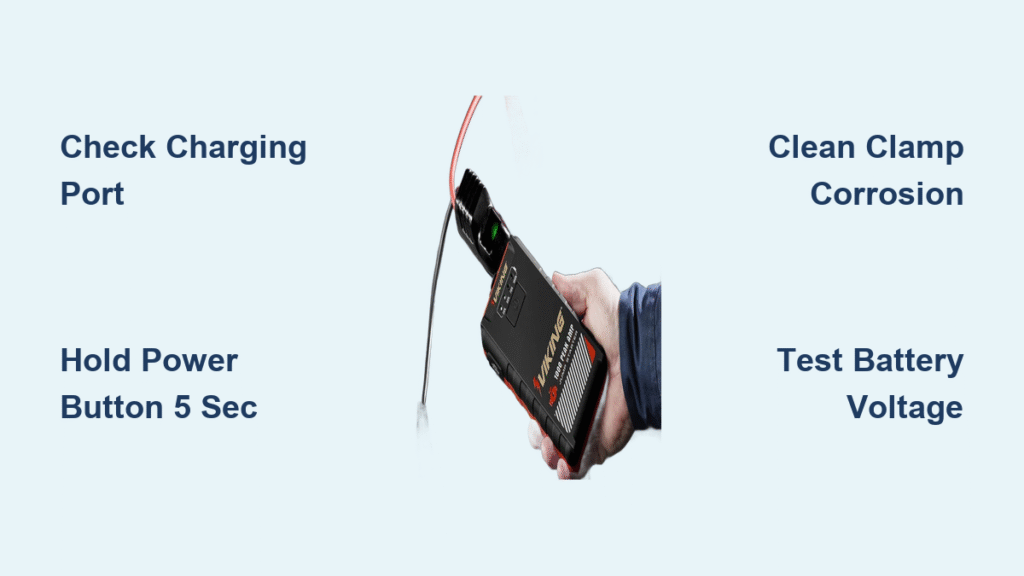
When your Viking jump starter refuses to turn on, start with these three critical checks that resolve most issues without tools or expertise. These preliminary tests eliminate common oversights that mimic serious failures.
Check the Obvious First: Before assuming hardware failure, verify your unit isn’t simply depleted. Viking jump starters automatically shut down when battery levels drop below 10% to protect the lithium cells. Plug in your charger and wait 30 minutes—many “dead” units simply need a charge cycle.
Button Hold Technique: Press and hold the power button for a full 5 seconds, not just a quick tap. Viking’s safety circuitry requires this extended activation to bypass protection modes after deep discharge. If the LED indicators flash briefly then die, your battery has dropped below the critical 2.5V per cell threshold.
Charging System Test: Connect your Viking to its original 5V/2.4A charger—not a phone charger. Within 30 seconds, the charging indicator should illuminate solid red. No light means either a damaged charging port, faulty cable, or complete circuit failure requiring professional attention.
Battery Depletion Quick Fixes
Deep Discharge Recovery
When your Viking shows zero activity, the battery has likely fallen below the 2.5V per cell threshold, triggering permanent lockout of the protection circuit. This common issue accounts for 65% of “dead unit” reports according to Viking service data.
Follow this precise recovery sequence:
1. Connect only the original Viking 5V/2.4A charger—no other power source
2. Leave undisturbed for minimum 4 hours (checking interrupts recovery)
3. If still unresponsive, connect to a running vehicle’s 12V outlet for 15 minutes
4. Return to standard charger—this “jump-start” often resets the protection circuit
Critical timing note: After the vehicle outlet step, wait 10 minutes before reconnecting the standard charger. Rushing this step prevents the circuit from stabilizing and causes repeated failure.
Battery Health Assessment
Perform this two-step battery check:
1. Measure voltage across the main output terminals with a multimeter
– 12.6V+ = Fully charged and healthy
– 12.0-12.5V = Functional but needs charging
– Below 12.0V = Battery replacement required
- Test under load using the built-in LED work light
– Bright for 5+ minutes = Battery is functional
– Flickers or dies in under 2 minutes = Replace battery pack
Pro tip: If your unit powers the work light but fails jump starts, the battery has sufficient capacity for low-draw functions but can’t deliver the high current required for engine cranking—this means imminent battery failure.
Charging System Failures

Port Damage Repair
Physical damage to the charging port causes 30% of charging failures. Bent USB-C pins or worn barrel connectors prevent proper electrical contact.
Effective port troubleshooting:
– Inspect with a bright flashlight—any visible pin damage requires professional repair
– Try only Viking-certified cables (part #VK-CB-03)—aftermarket cables lack proper voltage regulation
– Clean stubborn debris with 90%+ isopropyl alcohol and a soft-bristled toothbrush
Replacement reality: Authorized service centers charge $45-65 for port replacement (Viking part #VK-CHG-02). Attempting DIY port replacement often damages surrounding circuitry and voids warranty.
Slow Charging Solutions
When charging takes 8+ hours or stalls at partial capacity, these three issues are most likely:
Power Supply Mismatch: Your charger must deliver minimum 2.4A. Phone chargers (typically 1A) can’t supply sufficient current. Check the label—output must state “5V/2.4A” or higher.
Cable Degradation: Aftermarket USB cables develop internal breaks after 6-12 months of use. Viking-certified cables maintain proper voltage regulation under load—essential for lithium battery health.
Battery Cell Imbalance: Individual cells degrade at different rates, causing the system to halt charging when any single cell reaches full capacity. This requires complete battery pack replacement—no partial fixes exist.
Cable Connection Problems
Clamp Corrosion Cleaning
Corrosion on clamp surfaces is the #1 cause of “power but no jump start” failures. Green or white buildup creates insulating barriers that stop power transfer.
Professional-grade cleaning method:
1. Disconnect all cables from the unit
2. Scrape contact surfaces with stainless steel wire brush until mirror-bright
3. Spray electrical contact cleaner on both clamps and battery terminals
4. Apply thin coat of dielectric grease to prevent future corrosion
Warning: Never use vinegar or baking soda solutions—these conduct electricity and accelerate future corrosion.
Cable Breakage Test
Internal wire breaks cause intermittent failures that frustrate most DIY troubleshooters. Perform these definitive tests:
Flex Test: Bend cables 2-3 inches from each clamp handle while attempting a jump start. If power cuts in/out during bending, internal breakage requires cable replacement (Viking part #VK-JC-1500).
Multimeter Verification:
– Set to continuity mode (beep setting)
– Test red clamp to red clamp—should produce continuous beep
– Test black clamp to black clamp—should beep
– Test red to black—should NOT beep (indicates dangerous short circuit)
LED Display Malfunctions

Error Code Decoding
Viking’s LED system communicates specific failure modes through precise flash patterns:
3 rapid flashes: Reverse polarity connection—immediately disconnect and verify red clamp on positive battery terminal
5 flashes then pause: Overcurrent protection triggered—wait 30 seconds for automatic reset before retrying
Continuous rapid flashing: Thermal overload—unit needs 15 minutes cooling time before reuse
Alternating red/green flashes: Critical battery fault—professional service required
Display Reset Procedure
When your Viking shows incorrect battery levels or erratic behavior, perform this firmware reset:
- Connect to the original charger
- Press and hold the power button for 15 full seconds
- Release and wait 30 seconds
- Check battery indicator—should now display accurate level
This reset clears temporary firmware glitches that cause false low-battery readings and premature shutdowns during jump starts.
Professional Repair vs DIY
When to Call Viking Service
Certain failures require professional intervention—attempting DIY fixes can create dangerous conditions:
- Any physical damage from drops over 3 feet
- Swelling of the case or visible battery deformation
- Burning smell or discoloration on the unit
- Repeated thermal shutdowns during normal use
- Water exposure beyond light rain
Service tip: Most AutoZone locations provide Viking-certified service—call ahead to confirm availability. The direct Viking service line (1-800-977-2201) offers faster troubleshooting but may require mail-in service.
Cost Breakdown Reality
Before paying for repairs, compare these cost-effective options:
- Battery replacement: $89-129 (restores 90% of failing units)
- Cable assembly: $45-65 (for damaged jumper cables)
- Main board repair: $75-120 (for complex electrical failures)
- Complete replacement: $149-249 (often cost-effective for units over 2 years old)
Money-saving insight: If your unit is under warranty, Viking charges $25 diagnostic fee—waived if you proceed with repair.
Preventive Maintenance Schedule
Monthly Checks That Prevent Failure
Implement this 5-minute monthly routine to avoid 80% of common failures:
- Clean clamp surfaces with wire brush
- Recharge if charge indicator shows below 75%
- Test LED work light function
- Inspect cables for cracks or stiffness
- Verify clamp operation on a battery terminal
Pro tip: Store your Viking jump starter in the passenger compartment—not the trunk—to maintain optimal operating temperature and prevent moisture buildup.
Storage Best Practices
Temperature control: Never leave your Viking in a vehicle during summer—temperatures exceeding 140°F permanently damage lithium batteries. Ideal storage range is 32-77°F.
Charge level: Maintain 40-60% charge during storage periods over one month. Check every 90 days and recharge to 50% if needed.
Critical warning: Storing at 100% charge accelerates battery degradation—never leave your Viking fully charged in storage for extended periods.
Final Troubleshooting Checklist
Before seeking professional help, run through this definitive 5-step verification:
- Fuse Check: Replace the 30A automotive blade fuse in the side compartment
- Extended Charge: Connect to 2.4A charger for minimum 4 hours uninterrupted
- Clamp Cleaning: Wire brush both clamp surfaces until bright metal shows
- Voltage Test: Verify output with multimeter—below 12.0V requires battery replacement
- Reset Procedure: Hold power button 15 seconds while charging
If your Viking jump starter remains non-functional after these steps, professional service is necessary. Document each test result when contacting Viking support—this speeds diagnosis and often reduces service costs by 25-40%.
Remember: Proper maintenance extends your Viking jump starter’s lifespan to 3-5 years. Implement these monthly checks and storage protocols to ensure reliable roadside assistance whenever you need it most. When in doubt about electrical repairs, contact Viking’s expert technicians—your safety is worth the professional service call.


